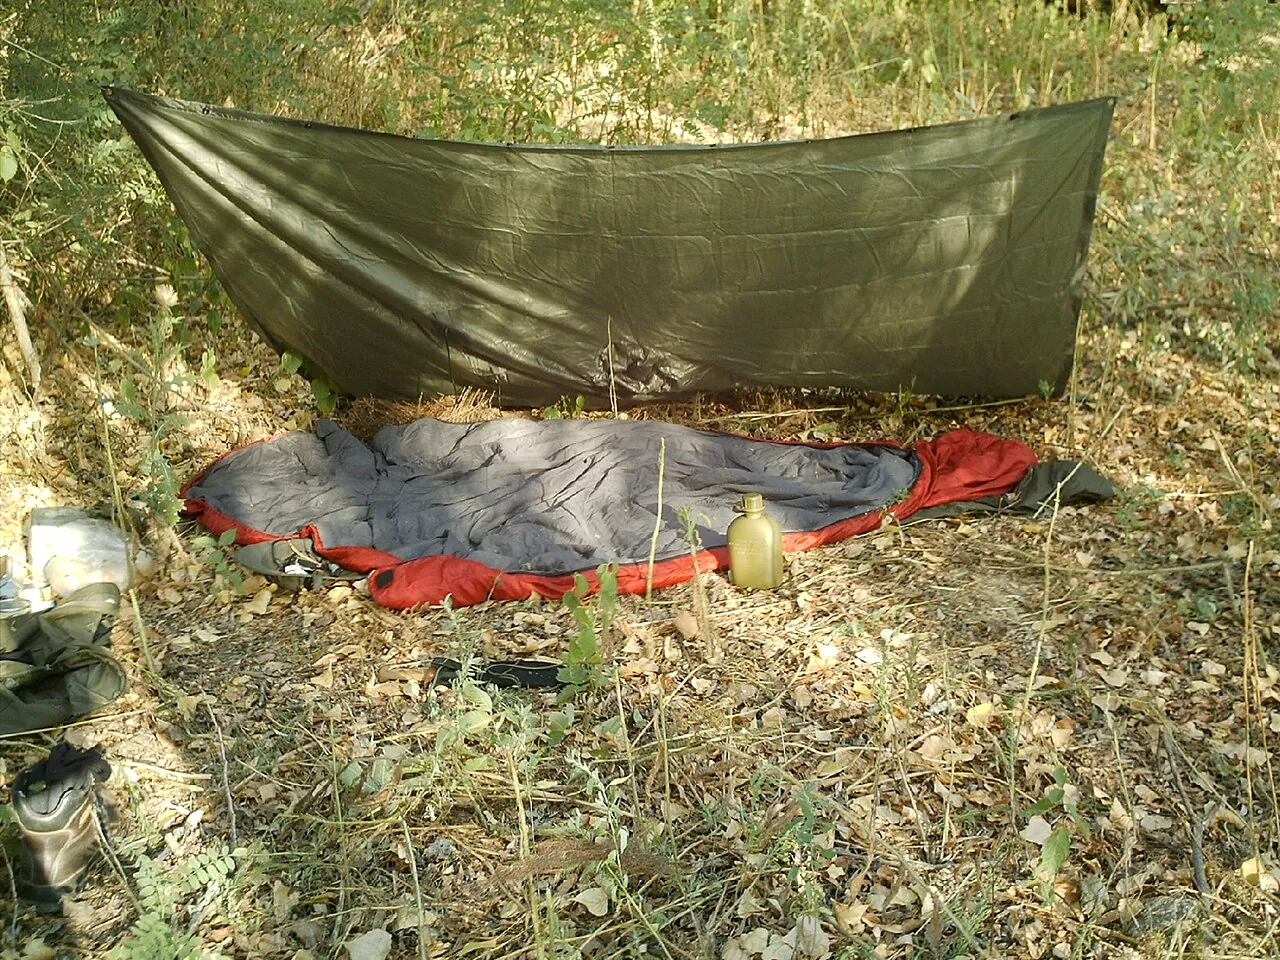
Tarps and Shelters
Shelters that keep you warm and dry: choosing a safe site, why small beats big, insulating from the ground, pitching a tarp lean-to with its back to the wind, drip sticks and the round turn and two half hitches, a reflector wall for a fire, and building a debris hut.
- 5 min
- 7 steps
- 3 questions
- Lesson 41 of 49
In this lesson
- Pick a safe site
- Small and insulated
- A tarp lean-to
- A fire reflector
- The debris hut
- Try it
- What to take from this
Picking up where you left off.
Pick a safe site
A shelter site needs material to build with and a spot big and level enough to lie down 1. Then look for what can hurt you 1:
- Overhead: dead trees and hanging dead limbs (widowmakers). Look up before you unpack.
- Below: ground under the high-water mark of a lake or river, and dry washes that flood.
- Around: rockfall slopes, insect nests, and poison ivy.
In winter, pick a spot out of the wind with fuel and water close; in summer, a breezier spot with fewer bugs 1.
Small and insulated
“The most common error in making a shelter is to make it too large,” according to the Army manual. A shelter has to be big enough to protect you and small enough to hold your body heat, especially in the cold 1.
The ground is the other heat thief. The manual warns that at rest you can lose as much as 80 percent of your body heat to the ground 1, so insulate underneath before anything else: a thick bed of leaves, pine needles, grass, or spruce boughs, or a closed-cell foam pad. A tarp over your head and nothing under you is a cold night.
Quick check
It has to be big enough to protect you and small enough to stay warm.
A tarp lean-to
The fastest shelter, from a poncho or tarp, 2 to 3 meters of cord, a few stakes, and two trees 2 to 3 meters apart 1:

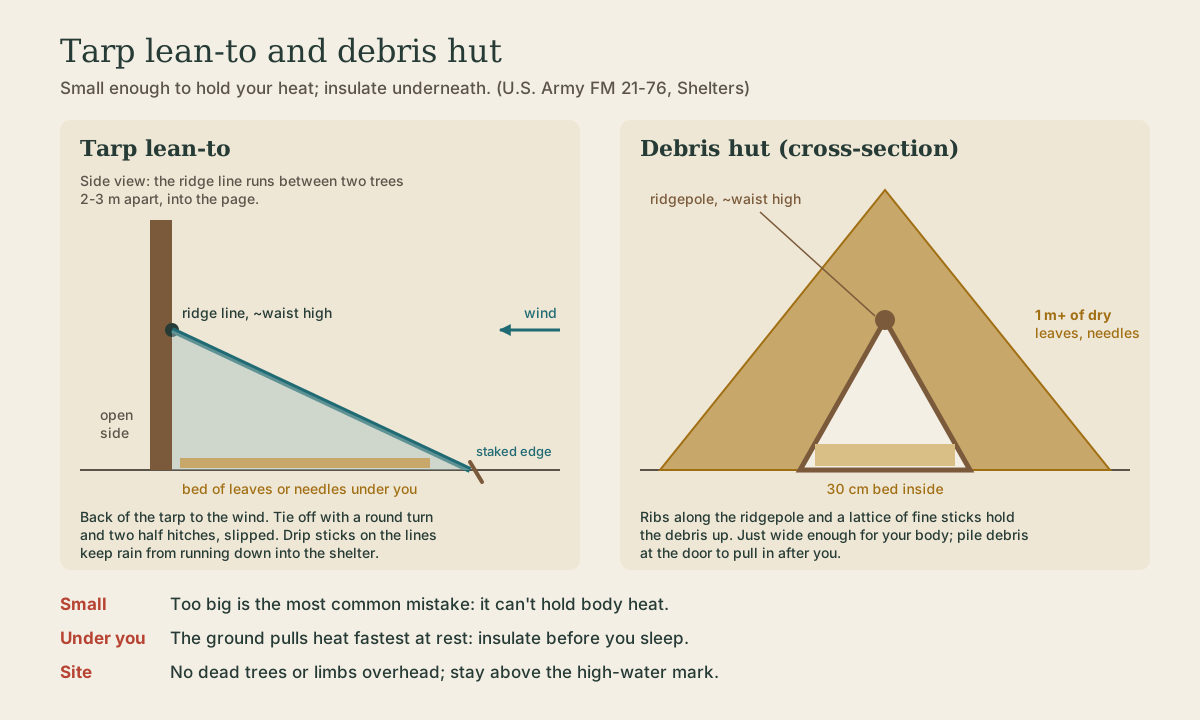
- Check the wind. The back of the lean-to goes into the wind 1.
- Tie cord to the two corner grommets on one long edge and tie them off to the trees about waist high, using a round turn and two half hitches with a quick-release (slipped) finish 1.
- Tie a short drip stick to each cord a couple of centimeters from the grommet. Rainwater running down the cord drips off the stick instead of running into the shelter 1.
- Stake the other edge to the ground 1.
- Put insulation inside, and pile brush or your pack at the open sides against the wind 1.
For more than one night or expected rain, add a center support: a line from the middle of the tarp up to an overhanging branch 1. A ridgeline strung tight between the trees, with the tarp hung from it, is the common modern version.
Playback is optional. If the player is unavailable, open the video at its source.
Quick check
The sloped back sheds wind and rain; the open side faces away.
A fire reflector
In cold weather, a reflector wall throws a fire’s heat back into an open lean-to. The Army manual’s version: drive four 1.5-meter stakes in two pairs, stack green logs between each pair, and fill the gap between the two rows with dirt; bind the stake tops so it stays together 1. Poles laid from the lean-to’s ridge to the top of the wall make a drying rack for clothes 1.
The debris hut
When you have no tarp, the debris hut is “one of the best” for warmth and ease, says the manual 1:
- Prop a long ridgepole on a stump or a tripod of two short stakes, or against a tree, at about waist height 1.
- Lean sticks along both sides to make ribs: just wide enough for your body, steep enough to shed rain 1.
- Lay finer sticks and brush crosswise as a lattice so the leaves don’t fall through 1.
- Pile dry leaves, grass, or needles on top at least 1 meter thick; thicker is warmer 1.
- Put a 30-centimeter layer of debris inside to lie on 1.
- Leave a pile of debris at the entrance to pull in behind you, and lay branches on top so the wind doesn’t blow the debris away 1.
A Wisconsin oak or maple woods in October has all the leaves you need. It takes an hour or more and a lot more leaves than you’d guess.
Playback is optional. If the player is unavailable, open the video at its source.
Quick check
Leaves trap air; thicker is warmer. Add branches on top so wind doesn’t strip it.
Try it
Pitch a tarp lean-to in your yard or woods using only a round turn and two half hitches and two stakes, with drip sticks on both lines, and sleep under it one night with a foam pad and one without (or a leaf bed). In fall, build a debris hut to the 1-meter standard and spend an hour inside on a cool evening with a thermometer.
What to take from this
Check overhead for dead limbs and stay above the high-water mark. Keep shelters small enough to hold your heat, and insulate underneath first: the ground drains heat fastest. A tarp lean-to goes back to the wind, tied waist high with a round turn and two half hitches, with drip sticks on the lines. A reflector wall turns a fire’s heat into the shelter. A debris hut needs a waist-high ridgepole, ribs, a lattice, at least 1 meter of leaves, and a 30-centimeter bed.
Lesson complete
Nice work.
Sources for this lesson
- 1Department of the Army. FM 21-76 Survival. U.S. Department of the Army. 1992. verifiedFirecraft: fire triangle of air, heat, and fuel; clear a circle at least 1 m across; no wet or porous rocks (they can explode); green-log platform on snow; tinder, kindling, fuel; char cloth; tepee, lean-to (green stick at 30 degrees pointed into the wind), cross-ditch (about 30 cm across, 7.5 cm deep), and pyramid lays; light from the upwind side; metal match, flint and steel with carbon steel; bow drill dimensions; bank the fire overnight. Shelters: most common error is building too big; avoid dead trees and sites below the high-water mark; poncho lean-to with drip sticks, back to the wind, round turn and two half hitches; up to 80 percent of body heat lost to the ground at rest; field-expedient lean-to with a fire reflector wall; debris hut with at least 1 m of debris and a 30 cm bed.