Compass, Declination, and Terrain Navigation
Using a baseplate compass with a map: taking a bearing from the map, Wisconsin's west declination from NOAA's current model and how to correct for it, following a bearing on the ground, pace counting, bypassing obstacles, handrails, catching features, attack points, and aiming off.
- 5 min
- 8 steps
- 3 questions
- Lesson 38 of 49
In this lesson
- The baseplate compass
- Taking a bearing from the map
- Declination in Wisconsin
- Following the bearing
- Distance: pace counting
- Let the terrain help
- Try it
- What to take from this
Picking up where you left off.
The baseplate compass
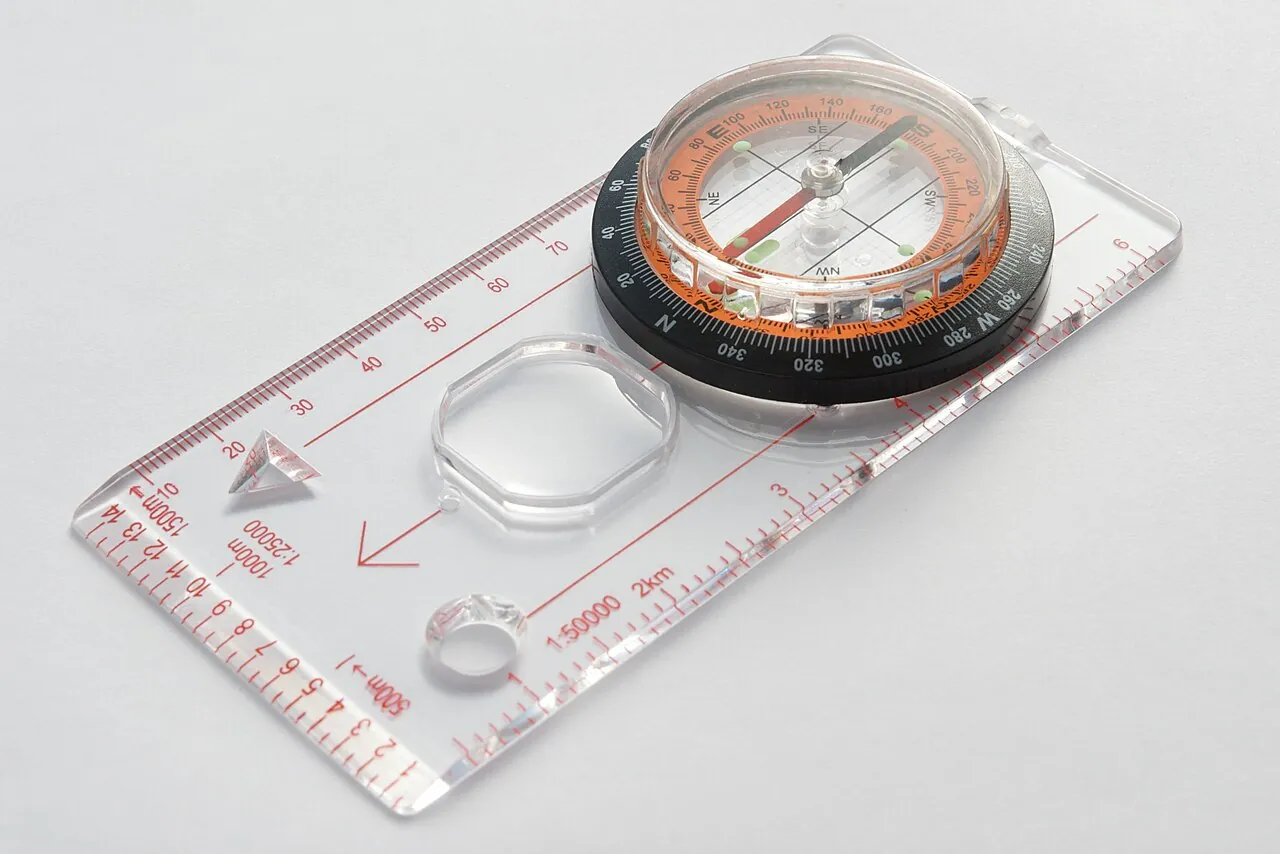
A baseplate (orienteering) compass has a clear rectangular base with a direction-of-travel arrow and straight edges, a rotating housing marked 0-360° with parallel orienting lines and an orienting arrow inside, and a magnetic needle, red end north. Many have a declination adjustment that offsets the orienting arrow.

Taking a bearing from the map
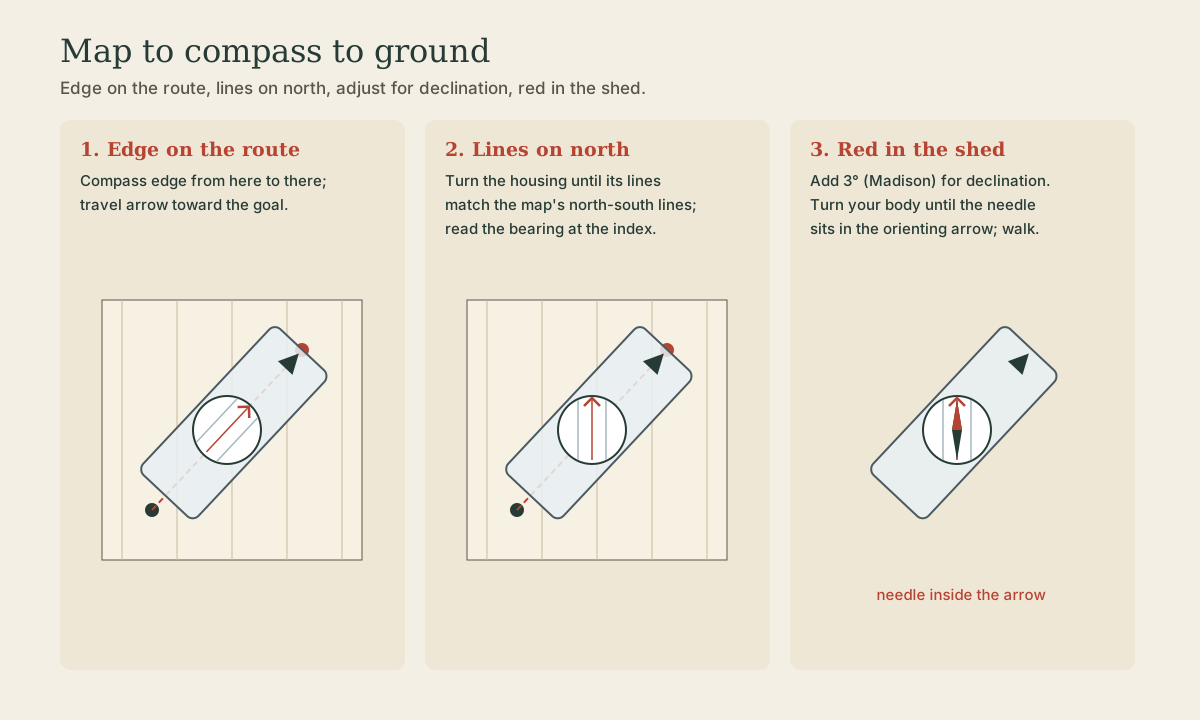
- Edge on the route: lay one long edge of the baseplate along the line from where you are to where you’re going, with the travel arrow pointing toward the destination.
- Lines on north: turn the housing until its orienting lines are parallel to the map’s north-south lines (the map edges or grid lines) and the orienting arrow points to map north. Ignore the needle for this step.
- Read the bearing at the index line where the travel arrow meets the housing. That’s a true bearing, measured from the map’s true north.
Declination in Wisconsin
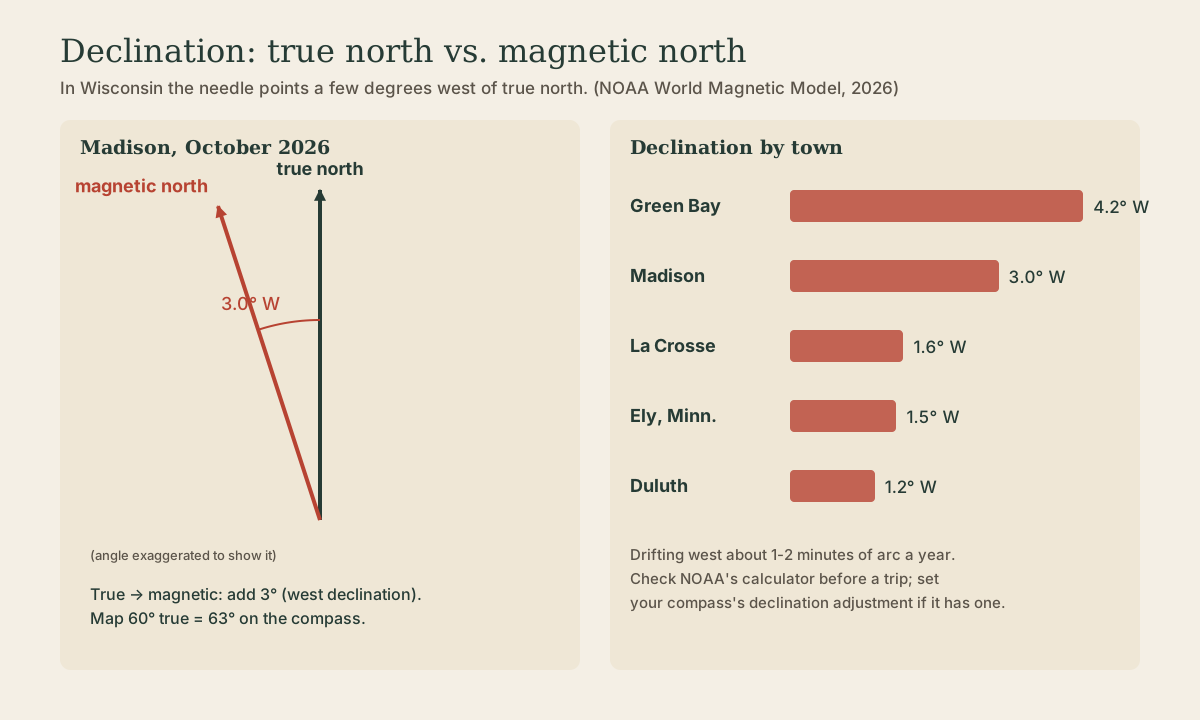
A compass needle points to magnetic north, not true north. The angle between them is declination, and it changes with place and time. NOAA’s World Magnetic Model gives these values for October 2026 1:
| Place | Declination |
|---|---|
| Green Bay | 4.2° west |
| Madison | 3.0° west |
| La Crosse | 1.6° west |
| Ely, Minn. (Boundary Waters) | 1.5° west |
| Duluth | 1.2° west |
It’s drifting west by roughly a minute or two of arc a year 1, so the declination printed on an old quad can be several degrees out of date.
The correction: with west declination, magnetic bearings are larger than true ones. Going from map (true) to compass (magnetic), add the declination; going from a compass bearing back to the map, subtract it. At Madison, 60° true is 63° magnetic. Better: set the compass’s declination adjustment once for the area, and it reads true directly.
A few degrees matters: every degree off puts you about 18 meters to the side for every kilometer walked 2, so 3° over 2 km is over 100 m.
Quick check
With west declination, magnetic bearings are larger than true: add going from map to compass, subtract going back.
Following the bearing
Hold the compass level at your waist, travel arrow pointing away from you. Turn your whole body until the red end of the needle sits inside the orienting arrow (“red in the shed”). Look up along the travel arrow, pick a landmark on that line (a distinctive tree, a rock), walk to it, and repeat. Sighting on landmarks beats walking with your eyes on the needle.
Bypassing an obstacle without losing the line: turn 90°, pace a set distance, turn back to the original bearing and pass the obstacle, then turn 90° the other way and pace the same distance back before resuming 2.
Playback is optional. If the player is unavailable, open the video at its source.
Distance: pace counting
A pace is one natural step, about 30 inches. Learn how many you take per 100 meters by walking a measured course on terrain like what you’ll travel, and track each hundred with a pebble moved between pockets, knots in a cord, or notebook marks rather than memory 2. Your pace shortens uphill, into a headwind, in snow, sand, or mud, in rain, and in heavy clothing, and lengthens downhill; a 120-pace count can become 130 or more on a climb 2.
Quick check
Count on terrain like what you’ll travel, and track hundreds with pebbles or knots.
Let the terrain help
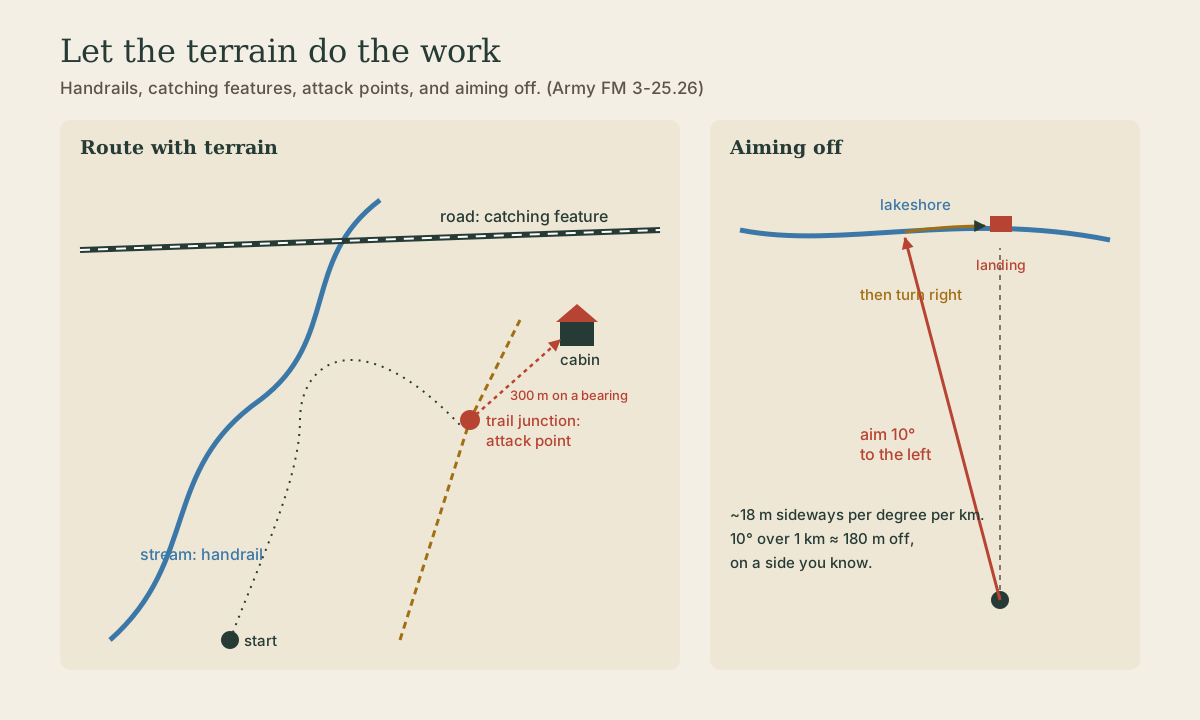
Precise compass work over long distances piles up error. The Army manual’s techniques for using terrain instead 2:
- Handrail: a linear feature running roughly parallel to your route (a stream, ridge, road, power line, or lakeshore) that you can follow loosely without exact compass work.
- Catching feature: something prominent that tells you to turn, or that you’ve gone too far (a road crossing, a lake, a power line).
- Attack point: an easily found landmark close to your goal, ideally within 500 meters, from which you walk a careful bearing and pace count to the exact spot.
- Aiming off: when your goal sits on a linear feature (a canoe landing on a shore, a bridge on a river), aim about 10° to one side. When you hit the feature, you know which way to turn 2.
Quick check
Each degree moves you about 18 m sideways per km, so 10° over 1 km puts you about 180 m off, on a known side.
Try it
Lay out a 100-meter pace course on a trail and walk it three times; average your count. Then, on the map of a park you know, pick a target 500 m off-trail, take a bearing, correct it for declination, and walk it using landmarks and your pace count. Check where you end up against where you meant to be.
What to take from this
Take a bearing by laying the compass edge on the route, turning the housing lines to map north, and reading the index. Wisconsin’s declination is west, about 1 to 4 degrees (Madison 3.0° in 2026), so add it going from map to compass, or set it on the compass. Follow bearings by boxing the red needle and walking landmark to landmark. Count paces per 100 m and adjust for slopes and snow. Use handrails, catching features, and attack points within 500 m, and aim off about 10° when the target is on a line.
Lesson complete
Nice work.
Sources for this lesson
- 1Magnetic Field Calculators (World Magnetic Model). NOAA National Centers for Environmental Information. verifiedDeclination for October 1, 2026 from the WMM: Green Bay 4.19° W, Madison 2.98° W, La Crosse 1.62° W, Ely, Minn. 1.52° W, Duluth 1.21° W; secular change about 0.02-0.04° per year toward the west.
- 2FM 3-25.26 Map Reading and Land Navigation. Headquarters, Department of the Army. 2005. verifiedTerrain features in contours: hill, saddle (hourglass), valley (closed end of U or V points upstream), ridge (points away from high ground), depression (tick marks to low ground), draw, spur, cliff; pace count: about 30-in. pace, count per 100 m on similar terrain, longer downhill and shorter uphill or in snow; deliberate offset about 10°, 18 m per degree per 1,000 m; bypassing obstacles at right angles; handrails, catching features, attack points within 500 m; shadow-tip method (first mark west, wait 10-15 minutes); watch method; Polaris less than 1° from true north, found by the Big Dipper's pointers at five times their spacing.