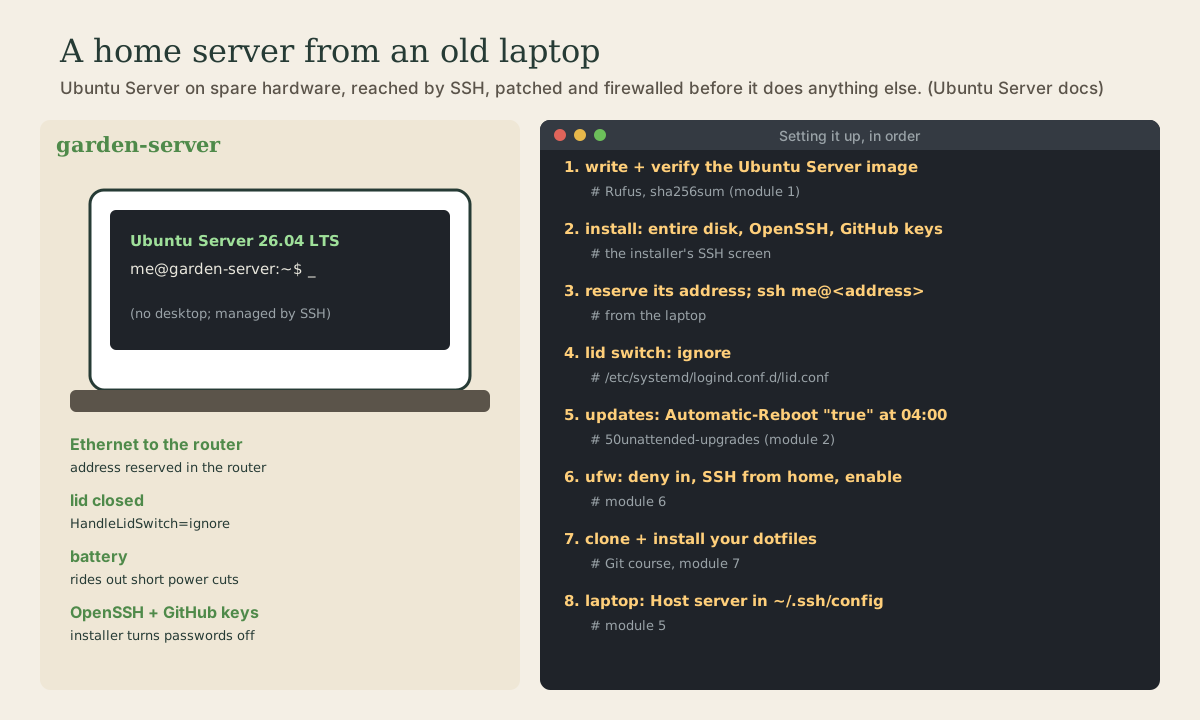
Setting Up the Server
An old laptop becomes an always-on home server. Ubuntu Server 26.04 LTS: requirements, the live-server image and its checksum, and the installer's screens, including installing OpenSSH and importing your keys from GitHub, which turns password logins off. Then the first hour: a reserved address and an SSH Host entry, keeping it running with the lid closed, the time zone, automatic security updates with a 4 a.m. reboot when needed, the ufw firewall, and your dotfiles.
- 6 min
- 10 steps
- 2 questions
- Lesson 61 of 80
In this lesson
- Why a home server
- The image
- Installing
- Reaching it
- Keeping it awake
- Time and updates
- The firewall
- Your dotfiles
- Your turn
- So
Picking up where you left off.
Why a home server
An always-on Linux machine at home is useful immediately, as a backup target for your laptop, and it’s the best practice ground for everything in this course, since you’ll run it entirely by SSH. An old laptop is ideal: it uses little power, it’s quiet, and its battery rides out short power cuts.
Ubuntu Server needs little: the installation tutorial asks for 2 GB of memory and 5 GB of disk or more 1. Plan on wiring it to the router with Ethernet, and on an external drive for backups (next lesson).
The image
Ubuntu Server is the same Ubuntu without a desktop, installed through a text installer 1. The 26.04 image is ubuntu-26.04.1-live-server-amd64.iso, and its line in Ubuntu’s SHA256SUMS reads 2:
cc8a95cde20f6ced61a322420de00f10cc3c90ced545daa46cb9c1a117f1d927 *ubuntu-26.04.1-live-server-amd64.iso
Download, verify, and write it to a USB stick exactly as in module 1, then start the old laptop from the stick with its boot menu key (often Escape, F2, F10, or F12) 1.
Installing
The installer has sensible defaults; for a first server, mostly accept them 1. Screen by screen:
- Language and keyboard; take an installer update if offered 1.
- Network: with the Ethernet cable in, it sets itself up by DHCP 1.
- Proxy and mirror: leave as they are 1.
- Storage: “use an entire disk,” and choose the laptop’s internal disk. This erases it; make sure there’s nothing on it you want 1.
- Identity: your name, the server’s name (
garden-server), a user name, and a password. You’ll need the password forsudoeven when you log in by key 3. - SSH: a default install has no open ports, so tick Install OpenSSH server, and import your SSH keys from GitHub with your GitHub user name. When you import keys, password logins over SSH are turned off by default 3, which is exactly what module 5 had you do by hand.
- Snaps: a list of server snaps; skip them for now 3.
- Wait for it to install and apply security updates, choose Reboot, remove the stick, and log in at the console 1 3.
Quick check
You can turn passwords back on later, but there’s rarely a reason to.
Reaching it
At the server’s own keyboard, find its address:
me@garden-server:~$ ip -br addr
In your router’s settings, reserve that address for the server’s MAC address (module 5), so it never changes. Then, from the laptop:
me@garden-laptop:~$ ssh me@192.168.1.10
Check the fingerprint against ssh-keygen -l -f /etc/ssh/ssh_host_ed25519_key.pub on the server the first time (module 5); your GitHub key logs you in. Add a short name to the laptop’s ~/.ssh/config:
Host server
    HostName 192.168.1.10
    User me
From now on, ssh server. (To use garden-server.local instead of the address, install Avahi on the server with sudo apt install avahi-daemon 4.) Everything below is done over SSH, from the laptop.
Keeping it awake
By default, closing a laptop’s lid makes systemd-logind suspend it 5. A server has to stay on. Create /etc/systemd/logind.conf.d/lid.conf with:
[Login]
HandleLidSwitch=ignore
HandleLidSwitchExternalPower=ignore
Files in logind.conf.d add to the main configuration without editing it 5; ignore tells logind to do nothing when the lid closes 5. Reboot (sudo systemctl reboot), close the lid, and check you can still ssh server.
Quick check
systemd-logind handles the lid; by default it suspends.
Time and updates
Check the clock and time zone, so logs and timers line up with your day 6:
me@garden-server:~$ timedatectl
me@garden-server:~$ sudo timedatectl set-timezone America/Chicago
Security updates install themselves every day through unattended-upgrades (module 2) 7. A desktop can wait for you to restart; a server nobody logs in to needs to restart on its own when an update requires it. Create /etc/apt/apt.conf.d/52unattended-upgrades-local:
Unattended-Upgrade::Automatic-Reboot "true";
Unattended-Upgrade::Automatic-Reboot-Time "04:00";
Automatic-Reboot restarts when an update asks for it, and Automatic-Reboot-Time waits until the given time, rather than restarting at once 7. The 52 in the name makes apt read it after the package’s own 50unattended-upgrades, so your settings take effect and survive package updates.
The firewall
As in module 6, allow SSH from your home network before enabling ufw 8:
me@garden-server:~$ sudo ufw default deny incoming
me@garden-server:~$ sudo ufw default allow outgoing
me@garden-server:~$ sudo ufw allow from 192.168.1.0/24 to any port 22 proto tcp
me@garden-server:~$ sudo ufw enable
me@garden-server:~$ sudo ufw status verbose
Then, from the laptop, open a new connection with ssh server to prove you can still get in.
Your dotfiles
Your prompt, aliases, update-all, nano and tmux settings, and git settings, in two minutes (Git course, module 7). The server needs its own SSH key for GitHub:
me@garden-server:~$ ssh-keygen -t ed25519 -C "garden-server"
me@garden-server:~$ cat ~/.ssh/id_ed25519.pub
Add that public key to GitHub, then clone and install:
me@garden-server:~$ git clone git@github.com:you/dotfiles.git ~/dotfiles
me@garden-server:~$ ~/dotfiles/install.sh
me@garden-server:~$ git config --global user.name "Your Name"
me@garden-server:~$ git config --global user.email "you@example.com"
Log out and back in, and the server feels like home.
Your turn
Project, part 1
- Find a spare computer, ideally a laptop, and an Ethernet cable. Back up anything on it.
- Download, verify, and write the Ubuntu Server 26.04 image. Install it, with OpenSSH and your GitHub keys.
- Reserve its address in your router, and add a
Host serverblock on your laptop. - Set the lid switch to ignore, reboot, and check SSH still works with the lid closed.
- Set the time zone, and turn on automatic reboots at 04:00.
- Turn on ufw with SSH allowed from your network. Test with a new connection.
- Give the server its own GitHub key, then clone and install your dotfiles.
Answers
- After the reboot, the console shows a login prompt with the server’s name; log in with the user name and password you chose.
ssh serverlogs you in by key, with no password asked.- If it suspends anyway, check the file’s name and the
[Login]heading, and that it’s in/etc/systemd/logind.conf.d/. timedatectlshowsTime zone: America/Chicago.sudo ufw status verboseshowsStatus: active,Default: deny (incoming), allow (outgoing), and the port 22 rule from192.168.1.0/24.
So
Ubuntu Server 26.04 LTS runs happily on an old laptop: verify and write the live-server image, install on the whole disk with OpenSSH and your GitHub keys (which turns password logins off), reserve its address, and give it a Host server entry on the laptop. Set HandleLidSwitch=ignore in logind.conf.d, set the time zone with timedatectl, let unattended-upgrades reboot it at 04:00 when needed, turn on ufw with SSH allowed from home, and install your dotfiles. Next, give it a job.
Lesson complete
Nice work.
Sources for this lesson
- 1Basic installation (Ubuntu Server documentation). Canonical. verifiedRecommended minimum for the tutorial: 2 GB RAM, 5 GB disk; back up first; download the server install image from releases.ubuntu.com and write a bootable USB; boot menu keys Escape, F2, F10, or F12; mostly accept the defaults: language, installer update, keyboard, network by DHCP, no proxy or mirror changes, use an entire disk, username/hostname/password, Done on the SSH and snap screens, then restart and log in.
- 2How to verify your Ubuntu download. Canonical. verifiedMirrors publish SHA256SUMS and the signature SHA256SUMS.gpg next to the images; verify the checksum file with gpg --keyid-format long --verify SHA256SUMS.gpg SHA256SUMS, then check the image with sha256sum. sha256sum and gpg come with Ubuntu and with bash on Windows.
- 3Screen-by-screen installer walk-through (Ubuntu installer documentation). Canonical. verifiedIdentity: a password is needed even if SSH public-key access is enabled. SSH: a default Ubuntu installation has no open ports; the installer can install OpenSSH and import keys for the default user from GitHub or Launchpad, and if a key is imported, password authentication is disabled by default. Snaps: optional server snaps. The installer applies security updates before asking to restart.
- 4Avahi. ArchWiki. verifiedZero-configuration networking; Avahi provides local hostname resolution using a hostname.local naming scheme (with nss-mdns and avahi-daemon).
- 5logind.conf(5) manual page. man7.org (Linux man-pages). verifiedConfiguration in /etc/systemd/logind.conf and drop-ins in /etc/systemd/logind.conf.d/*.conf, [Login] section; HandleLidSwitch= defaults to suspend, HandleLidSwitchExternalPower= is ignored unless set explicitly, HandleLidSwitchDocked= defaults to ignore; ignore means logind never handles the event.
- 6timedatectl(1) manual page. man7.org (Linux man-pages). verifiedShows the current time settings (status); set-timezone sets the system time zone, list-timezones lists the available ones.
- 7Automatic updates (Ubuntu Server documentation). Canonical. verifiedunattended-upgrades, installed by default, applies security updates automatically, once a day by default. /etc/apt/apt.conf.d/20auto-upgrades (Update-Package-Lists and Unattended-Upgrade, in days; 0 disables), /etc/apt/apt.conf.d/50unattended-upgrades (Allowed-Origins: release and -security plus ESM; -updates commented out; added repositories aren't included automatically; Automatic-Reboot default false), logs in /var/log/unattended-upgrades; triggered by apt-daily.timer and apt-daily-upgrade.timer, catching up after boot if missed; /var/run/reboot-required; needrestart restarts affected services automatically since 24.04, except a list such as the display manager.
- 8Firewall (Ubuntu Server documentation). Canonical. verifiedufw is Ubuntu's default firewall configuration tool, a front end to netfilter, initially disabled; sudo ufw enable/disable; ufw allow 22 and deny 22; allow from a host or subnet to a port (ufw allow proto tcp from 192.168.0.2 to any port 22); status and status verbose; status numbered and delete; --dry-run; application profiles in /etc/ufw/applications.d with ufw app list and app info.