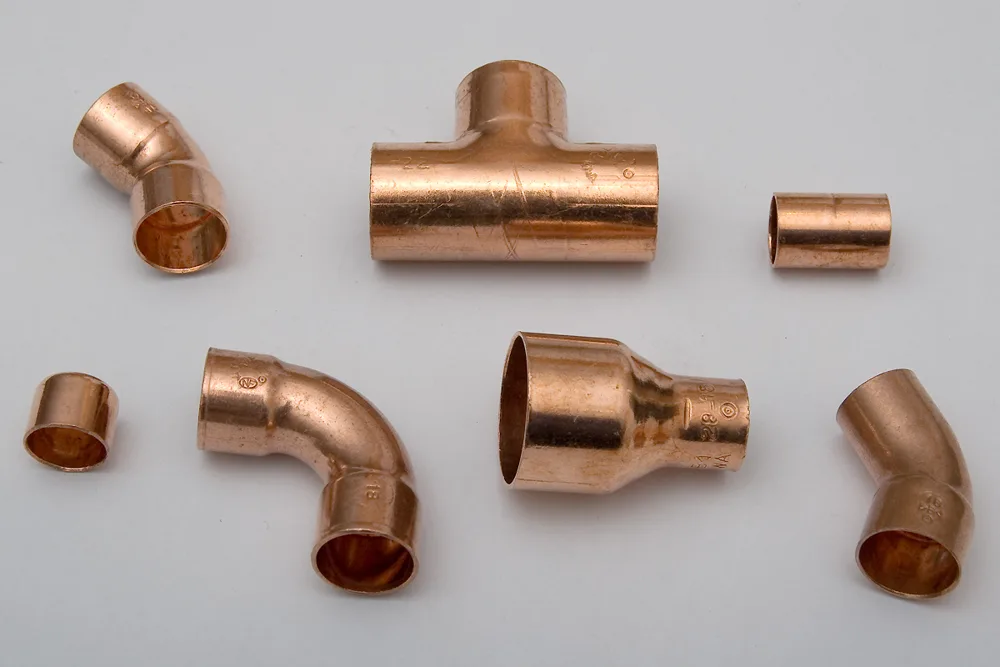
Copper and Soldering
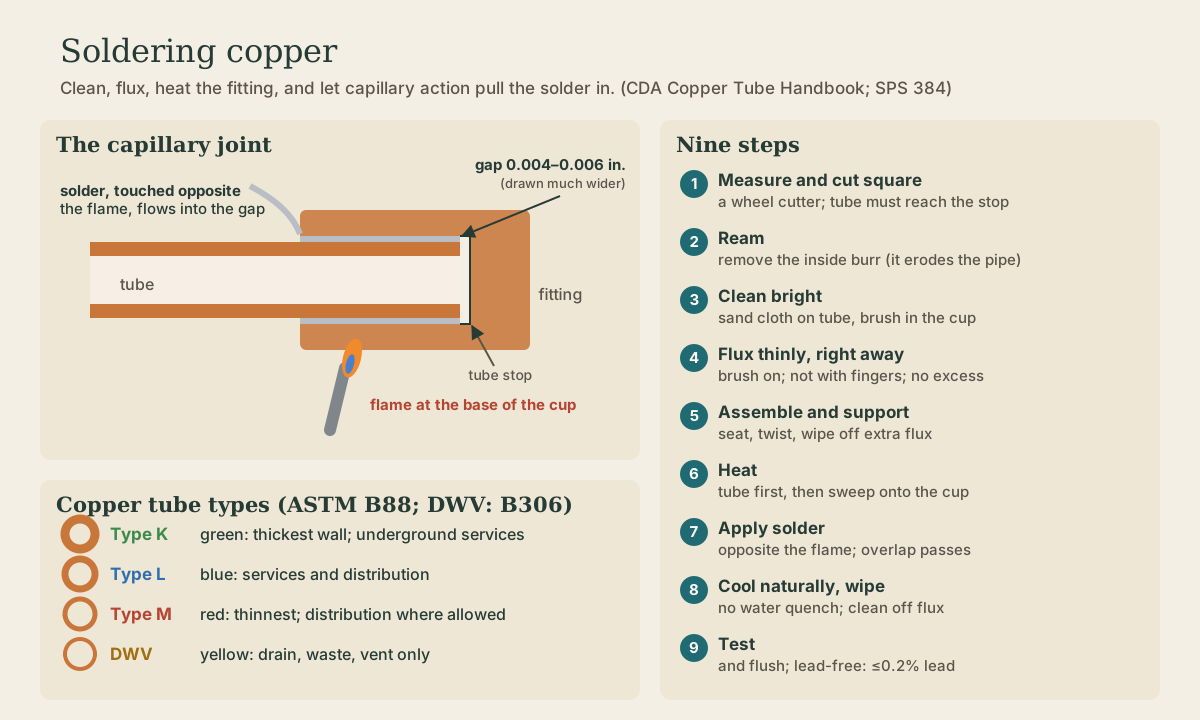
Copper water tube comes in Types K, L, and M (thickest to thinnest wall, printed green, blue, and red) plus yellow DWV. A soldered joint works by capillary action: solder is drawn into a 0.004 to 0.006 inch gap between tube and fitting. The nine-step sequence (cut, ream, clean bright, flux thinly, assemble, heat the tube then the cup, solder opposite the flame, cool naturally, test), lead-free solder and flux for water lines, and when to use press or push fittings instead.
- 5 min
- 5 steps
- 3 questions
- Lesson 31 of 111
In this lesson
- The tube
- Why a joint holds
- Making the joint
- When not to solder
- What to take from this
Picking up where you left off.
The tube
Copper water tube is at least 99.9 percent copper, made to ASTM B88 in three wall thicknesses for any given size 1:
| Type | Print color | Wall | Typical use |
|---|---|---|---|
| K | green | thickest | underground water services |
| L | blue | medium | services and distribution |
| M | red | thinnest | distribution, where code allows |
| DWV | yellow | thin | drain, waste, and vent only (ASTM B306) |
Sizes are nominal: the actual outside diameter is always 1/8 inch larger than the size name, so “1/2-inch” tube measures 5/8 inch outside 1. Hard (drawn) tube comes in straight lengths; soft (annealed) tube comes in coils, bends by hand or with a bender, and can take flare and compression fittings.
Why a joint holds
A solder fitting’s cup is sized so the gap around the tube is about 0.004 to 0.006 inch. When the joint is clean, fluxed, and hot, molten solder is drawn into that gap by capillary action, the same way a paper towel wicks water, in any direction, uphill included 1. Flux keeps the cleaned copper from re-oxidizing while it heats and helps the solder wet the surfaces. Too loose a fit and the gap won’t fill or the solder may crack under stress.
For water lines, solder and flux must be lead-free: solders with more than 0.2 percent lead have been banned for drinking water since the 1986 Safe Drinking Water Act amendments 1, and Wisconsin requires lead-free materials, NSF-approved flux, and joints made per ASTM B828 2. Old 50-50 tin-lead solder belongs only on non-potable work where allowed.
Quick check
Solder flows into the 0.004 to 0.006 inch gap upward, downward, or sideways, as long as the joint is clean, fluxed, and hot.
Making the joint
The Copper Tube Handbook’s sequence, from ASTM B828 1:
- Measure and cut square. A wheel cutter gives a square cut without crushing the tube. Too short and the tube won’t reach the bottom of the cup.
- Ream the burr off the inside edge; left in, it causes turbulence that erodes the pipe from inside. Knock off the outside burr too.
- Clean bright. Sand cloth or an abrasive pad on the tube, slightly past the cup depth; a fitting brush inside the cup. Don’t overdo it: copper is soft, and removing too much loosens the fit. Don’t touch the cleaned surfaces.
- Flux right away, a thin even coat with a brush on both tube and cup, never with fingers. Excess flux residue can corrode the tube wall, in extreme cases right through it.
- Assemble and support. Push the tube to the stop, twist to spread flux, wipe off the excess, and support the assembly so the gap stays even. Finish fluxed joints the same day.
- Heat. Start with the flame on the tube next to the fitting, then move onto the cup, sweeping between them. On horizontal joints, don’t play the flame on the top; heat rises.
- Apply solder. Touch the solder to the joint opposite the flame. If it doesn’t melt, pull it away and keep heating. When it flows, feed it across the bottom, up one side, then back to the start and up the other, overlapping. A small drop forming behind the solder means that part of the joint is full.
- Cool naturally, then wipe off flux residue with a wet rag. Quenching with water stresses the joint.
- Test the system as code requires and flush it to clear flux and debris.
Most soldering happens between about 350 and 600 °F 1. A valve with a soldered cup gets heated with the valve partly open and the heat aimed mostly at the tube, following the valve maker’s instructions.

Quick check
Oxide re-forms quickly; skin oil spoils the joint; excess flux can corrode the tube.
Quick check
If it doesn’t melt on contact, take it away and keep heating; the hot fitting, not the flame, should melt it.
When not to solder
Water in the line is the classic failure: it turns heat into steam and the joint won’t come up to temperature. The handbook prefers flared, press-connect, or push-connect joints when a line can’t be drained dry 1.
- Press-connect fittings have an EPDM seal inside; a powered tool crimps them. They’re fast and flameless but need the tool and fully inserted, clean tube 1.
- Push-connect fittings use an EPDM seal and a stainless grab ring; no tools at all, and some types are removable 1.
- Flare joints on soft tube are made with a flaring tool and can be taken apart; Wisconsin allows them on annealed water tube 2.
All of these are legal in Wisconsin when installed per the manufacturer’s instructions and suitable for potable water 2.
Playback is optional. If the player is unavailable, open the video at its source.
What to take from this
Copper tube types K, L, and M differ in wall thickness (green, blue, red), and DWV is yellow. A soldered joint is a capillary joint: clean the tube and cup bright, flux thinly, heat the tube then the cup, and touch lead-free solder opposite the flame so the hot fitting draws it in; let it cool on its own and test. When a line won’t drain dry, use press, push, or flare fittings instead of fighting steam.
Lesson complete
Nice work.
Sources for this lesson
- 1Copper Tube Handbook (CDA Publication A4015-14/19). Copper Development Association. 2019. verifiedCopper water tube is at least 99.9 percent copper; Types K, L, and M (ASTM B88) differ in wall thickness, K thickest, and hard tube is printed green, blue, or red; DWV tube (ASTM B306) is yellow; soldered joint sequence after ASTM B828: measure and cut square, ream, clean, flux, assemble and support, heat, apply solder, cool and clean, test; capillary gap 0.004-0.006 inch; flux thinly and not with fingers, since excess flux residue can corrode through tube; heat the tube first, then the cup, and touch solder opposite the flame; let joints cool naturally; most soldering is done at about 350-600 °F; solders with more than 0.2 percent lead are banned for potable water by the 1986 SDWA amendment; wet lines are hard to solder, so press- or push-connect joints are preferred; press-connect and push-connect fittings use EPDM seals and need no flame.
- 2Wis. Admin. Code ch. SPS 384, Plumbing Products. Wisconsin Department of Safety and Professional Services. verifiedSPS 384.40 joints: copper soldered joints per ASTM B828 with NSF-approved flux and ASTM B32 solder, lead-free for water supply (solders and fluxes over 0.2 percent lead not allowed for brass); flared joints only on annealed tube with a flaring tool; PEX joints per the manufacturer's instructions; PVC solvent joints per ASTM D2855 with F656 primer and D2564 cement; ABS solvent joints with D2235 cement; ABS-to-PVC solvent joints only in non-pressurized systems, with F656 primer on the PVC and D3138 transition cement; threaded joints get compound or tape on male threads only, and plastic may be threaded only at schedule 80 or heavier; cast iron by caulked (oakum and poured lead) or mechanical sleeve joints with C564 rubber and CISPI 310 bands; different materials joined by mechanical compression joints, with dielectric fittings to prevent galvanic corrosion.