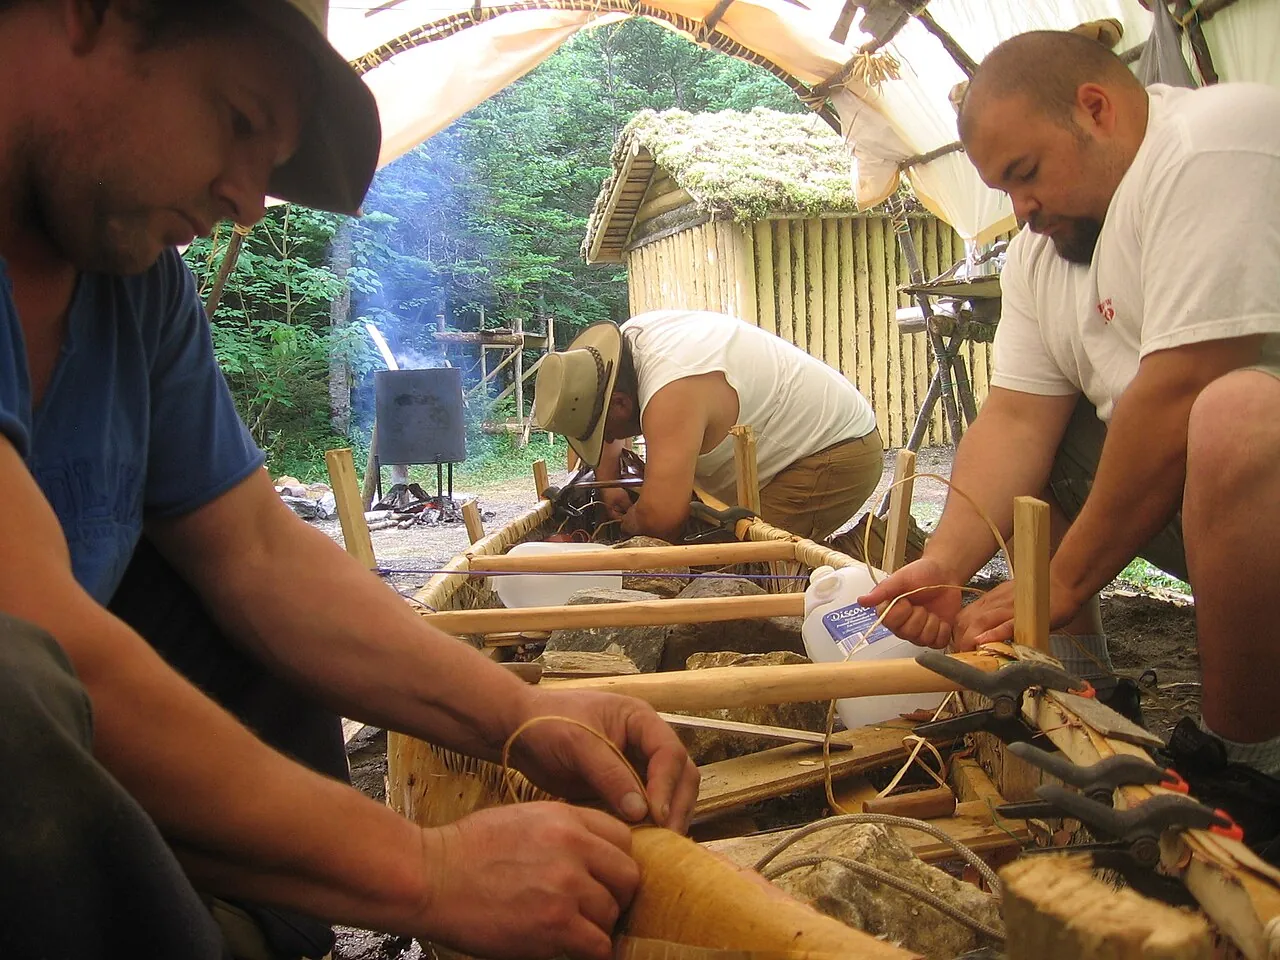
Building a Bark Canoe
How a birchbark canoe takes shape without plans or molds: the level building bed and building frame, staking the bark, sewing panels and goring with spruce root, setting the gunwales to the sheer, shaping the ends off the bed, driving pre-bent cedar ribs over sheathing to tighten the hull, and gumming every seam.
- 5 min
- 6 steps
- 3 questions
- Lesson 89 of 160
In this lesson
- The building bed
- The six stages
- Ribs and sheathing
- Gumming
- Try it
- What to take from this
Picking up where you left off.
The building bed
Bark canoes were built without plans or molds, on a building bed: a level patch of ground, sometimes with a long board set flush into it to keep the bottom line true 1. For the canoe’s bottom shape, many builders, including all Ojibwe builders, used a building frame: two thin cedar strips bent edgewise and spread by short crosspieces into the outline of the bottom 1. In an Algonkin 2- to 2-1/2-fathom canoe Adney measured, the frame strips were 1-1/2 by 3/4 inch and the frame about 22-1/2 to 23 inches wide at the middle 1.

Quick check
The frame fixes the bottom’s shape; the stakes and gunwales shape the sides.
The six stages
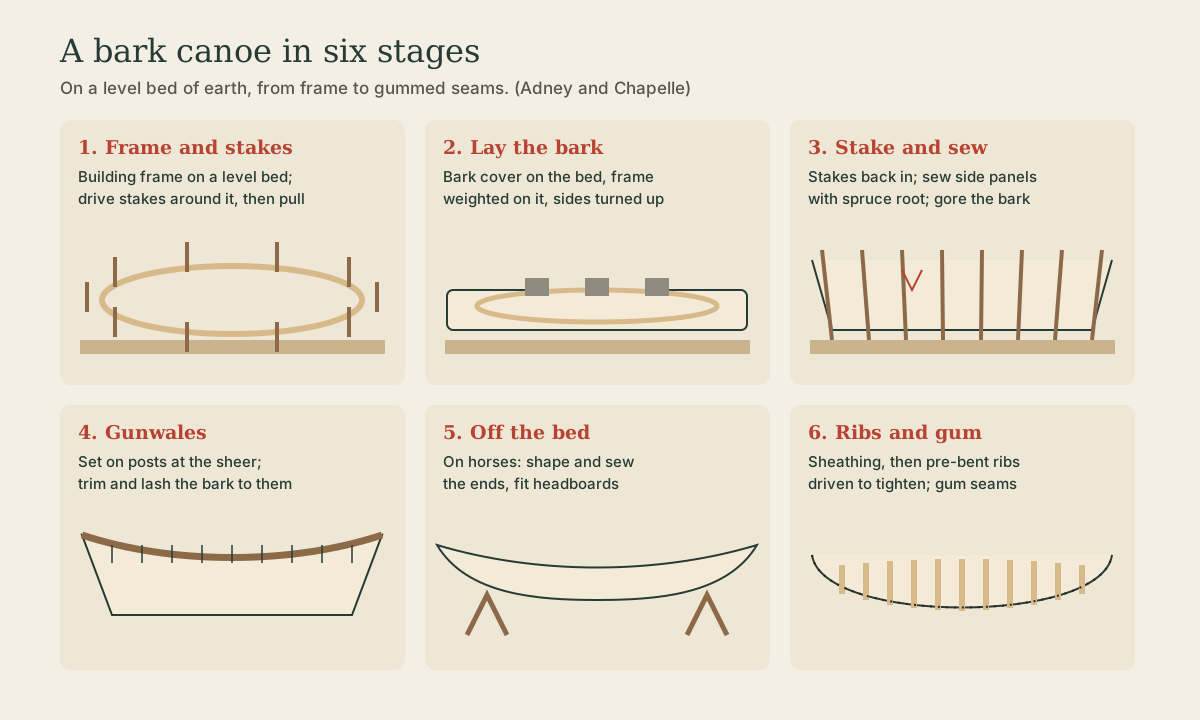
Adney’s sequence, from his drawings of the work 1:
- Frame and stakes: lay the frame (or the gunwale frame) on the bed and drive stakes around it to mark the outline; then pull them.
- Lay the bark: lay the bark cover on the bed, outside up as the builder chooses, set the frame on it, weight it down, and turn the bark up along the sides.
- Stake and sew: drive the stakes back into their holes to hold the bark upright. Sew on side panels where the main sheet is too narrow, using split spruce root through awl holes, and gore (slit and overlap) the bark where it bunches toward the ends.
- Gunwales: set the gunwales on posts cut to the right heights to give the sheer, trim the bark to them, and lash it on; in many Algonkin and Ojibwe canoes the thwarts are fitted afterward, spreading the gunwales to add sheer and rocker.
- Off the bed: lift the canoe onto horses to shape and sew the ends, fit the stem-pieces and headboards.
- Ribs and gum: lay thin cedar sheathing splints inside, held by temporary ribs; drive the permanent ribs; then gum every seam.
Ribs and sheathing
Ribs are split from cedar, then bent in pairs while hot (or, in black spruce, while green) and dried to shape; Ojibwe builders pre-bent ribs in pairs and used spreaders in the end ribs while they dried 1. Sheathing splints go in first, held by temporary ribs under the gunwales. The permanent ribs, a little long, are then driven into place under the gunwales, which pushes the sheathing and bark outward, stretches the cover tight, and sets the canoe’s final shape 1.
Quick check
Ribs were split and bent in pairs ahead of time, then driven under the gunwales.
Gumming
With the canoe upside down, every seam is gummed smooth on the outside 1. The ends, from the start of the seam to above the waterline, get a heavy coat and a narrow strip of thin bark (in later years, gummed cloth) pressed over them 1.
The gum is spruce gum, melted (traditionally in a bark container of boiling water, skimmed off the top) and tempered with a little animal fat and powdered charcoal. Test it on a strip of bark cooled in water: if it cracks when bent, add gum; if it’s tacky or rubs off, add temper 1. Most groups’ gum was black or nearly so. Valliere uses pitch mixed with oak ash and deer tallow 2.
Decoration, where it was used, was done by moistening the winter bark and scraping away the dark inner rind to leave a design 1.
Playback is optional. If the player is unavailable, open the video at its source.
Quick check
The same test is used today with pine pitch blends.
Try it
Make a small bark container the same way the canoe is built: a sheet of birch bark folded and gored at the corners, sewn with split spruce root through awl holes, rimmed with a split cedar hoop lashed on, and the seams sealed with pine pitch tempered with a little charcoal and fat. (The Green Woodworking course’s birch bark lesson covers containers in detail.)
What to take from this
A bark canoe is built on a level bed of earth: a building frame and stakes shape the bottom and sides, the bark is staked up, sewn with spruce root, and gored, the gunwales are lashed on at the right sheer, and the ends are shaped off the bed. Sheathing goes in, then cedar ribs bent in pairs are driven home to stretch the bark tight. Every seam is gummed with spruce gum tempered with fat and charcoal and tested by bending a gummed bark strip.
Lesson complete
Nice work.
Sources for this lesson
- 1Edwin Tappan Adney, Howard I. Chapelle. The Bark Canoes and Skin Boats of North America (U.S. National Museum Bulletin 230). Smithsonian Institution (Project Gutenberg edition). 1964. verifiedPaper birch bark preferred: range reaching through Wisconsin; bark over 1/8 in. thick from straight trunks; peels easily when sap flows; 'winter bark' keeps its inner rind and was prized, 'summer bark' separates into layers; grain runs around the tree so sheets can be sewn end to end; black spruce root for sewing, up to 20 ft long and pencil-thin; northern white cedar for ribs, sheathing, gunwales, headboards; hard maple for thwarts and paddles; spruce gum tempered with fat and powdered charcoal and tested on a bark strip; building bed, building frame, stakes, six stages of construction; ribs pre-bent in pairs; Ojibway long-nose canoes west of Lake Superior, 3-fathom rice-harvesting canoes, all Ojibway canoes built with a building frame.
- 2Wayne Valliere: Birchbark Canoe Builder (2020 National Heritage Fellow). National Endowment for the Arts. 2020. verifiedWayne Valliere (Mino-Giizhig), Lac du Flambeau Ojibwe, one of a handful of Native birchbark canoe builders in the U.S.; Ojibwe language and culture teacher who has mentored over 100 students through 'These Canoes Carry Culture'; harvests birchbark in spring and June, cedar from swamps in winter, spruce roots in summer, and pitch mixed with oak ash and deer tallow; artist in residence at UW-Madison.