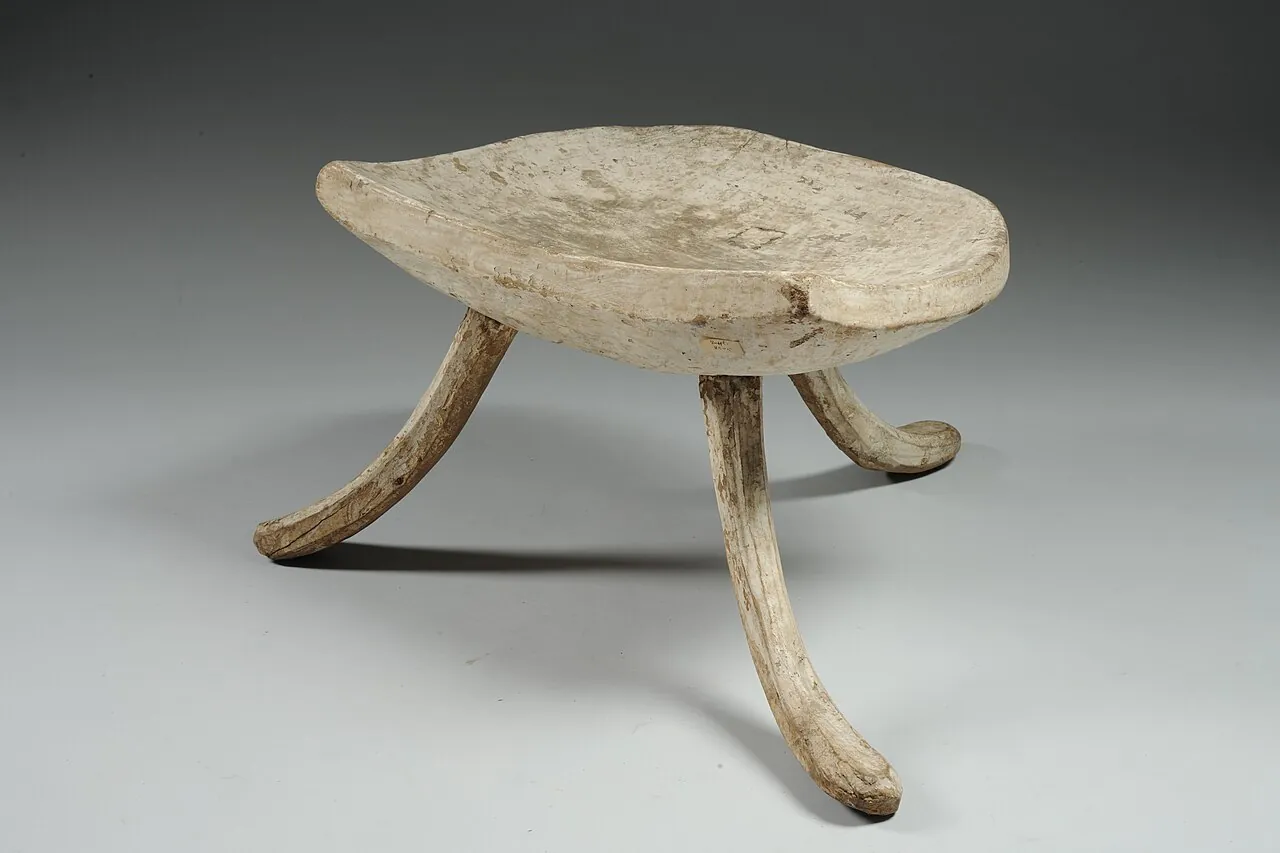
A Three-Legged Stool
A complete milking-stool build from green wood: why three legs never rock, a riven or sawn seat, shaved legs dried before tenoning, laying out at 120 degrees, boring through at a single angle, wedging across the grain, leveling, and finishing - with dimensions.
- 4 min
- 7 steps
- 3 questions
- Lesson 78 of 160
In this lesson
- Why three legs
- Dimensions
- The seat
- Legs
- Assembly
- Leveling and finishing
- What to take from this
Picking up where you left off.
Why three legs
Three points always define a plane, so a three-legged stool never rocks, whatever the floor 1. That’s why milking stools on rough barn floors had three legs. The trade-off: it tips more easily if you lean over the gap between two legs, so splay the legs generously.
_S_8505_p05.jpg)
Quick check
That’s why milking stools on rough barn floors had three legs.
Dimensions
A good low stool for milking, the fireside, or a workshop:
| Part | Size |
|---|---|
| Seat | 11-13 in. (28-33 cm) round or D-shaped, 1 3/4-2 in. (45-50 mm) thick |
| Legs | about 1 1/4 in. (32 mm) thick, tapering to 1 in. at the foot; long enough for a 10-14 in. (25-35 cm) seat height |
| Tenons | 3/4-1 in. (19-25 mm) through the seat |
| Resultant angle | about 15 degrees |
Quick check
Milking and fireside stools are low; a standard chair seat is about 17-18 in.
The seat
Rive a slab from a log section or saw a plank; a half-log section gives a traditional rounded underside. Hew or plane it flat on top, trace the circle, and saw or axe it round. A slight dish carved in the top with a gouge or adze makes it far more comfortable. Let the seat dry for some weeks if you can.
Legs
Rive leg billets from straight ash, oak, or hickory and shave them on the shaving horse - square, octagon, round - leaving them a little fat (see The Shaving Horse and Drawknife). Then dry the legs, especially the tenon ends, near a stove or in a warm room for a week or two. A dry tenon in a seat that’s a little wetter gets gripped tighter as the seat dries; a wet tenon shrinks loose 2. Size the tenons only once they’re dry.
Quick check
Shave legs green, then dry the tenon ends in a warm spot before final sizing.
Assembly
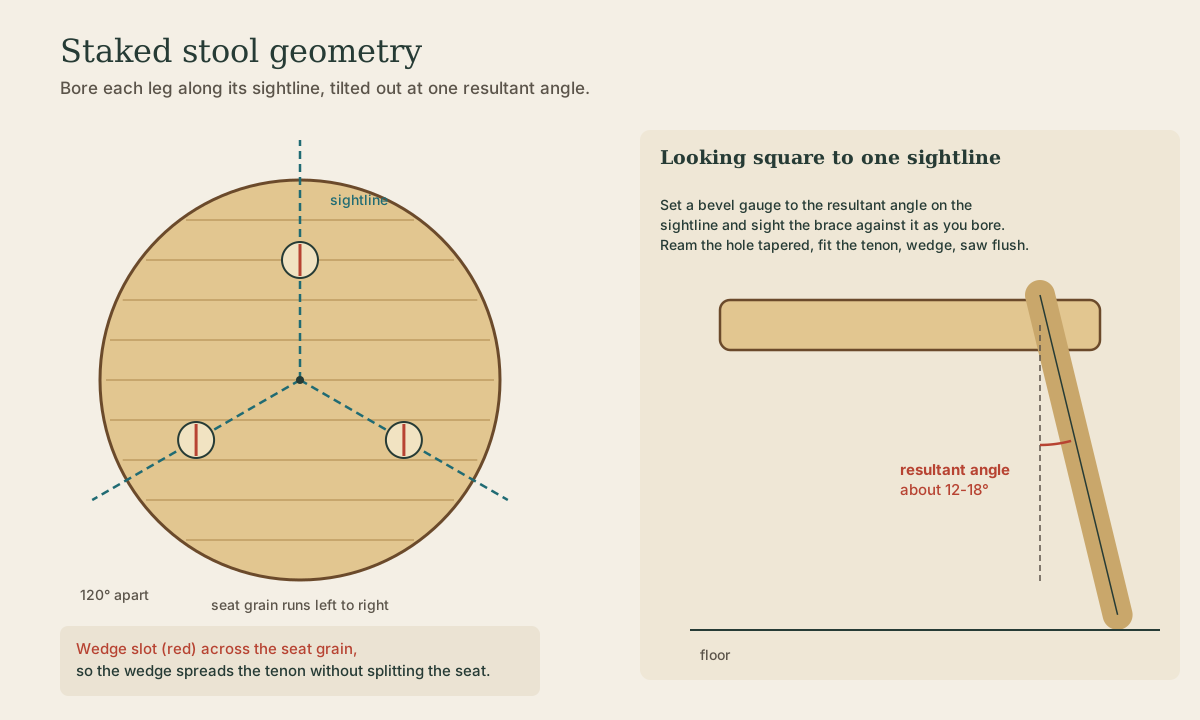
- Lay out three leg positions 120 degrees apart on the underside, about 1 1/2-2 in. in from the edge, and draw sightlines from the center through each.
- Bore each hole through along its sightline at about 15 degrees, sighting against a bevel gauge (see Stick Stools and Benches).
- Ream tapered if using tapered tenons.
- Fit each tenon until it seats firmly with a mallet tap, with about 1/2 in. proud of the top.
- Kerf each tenon across the grain direction of the seat.
- Drive the legs home, with glue if you like, then drive a dry oak wedge into each kerf. Saw and pare flush.
Playback is optional. If the player is unavailable, open the video at its source.
Leveling and finishing
Set the stool on a flat surface, shim to level, scribe all three legs from a block, saw, and chamfer each foot. Finish with linseed oil, or with milk paint or linseed oil paint in Nordic colors (see the Traditional Paints and Finishes course), then add a carved initial or date under the seat - kolrosed or chip-carved.
What to take from this
Three legs always touch, so the stool never rocks. Make a 45-50 mm thick seat about 30 cm across, shave ash or oak legs green and dry their tenons before sizing, lay legs out 120 degrees apart, bore through along sightlines at about 15 degrees, wedge across the seat’s grain, then shim, scribe, saw level, and finish.
Lesson complete
Nice work.
Sources for this lesson
- 1Christopher Schwarz. The Anarchist's Design Book. Lost Art Press. 2016. verifiedVernacular staked and boarded furniture, including the six-board chest (pine recommended because its cross-grain nailing must tolerate movement); free PDF.
- 2Jennie Alexander. Make a Chair from a Tree: Third Edition. Lost Art Press. 2021. verifiedPublisher contents and excerpts for post-and-rung construction, moisture management, bending, assembly, and hickory-bark seating.