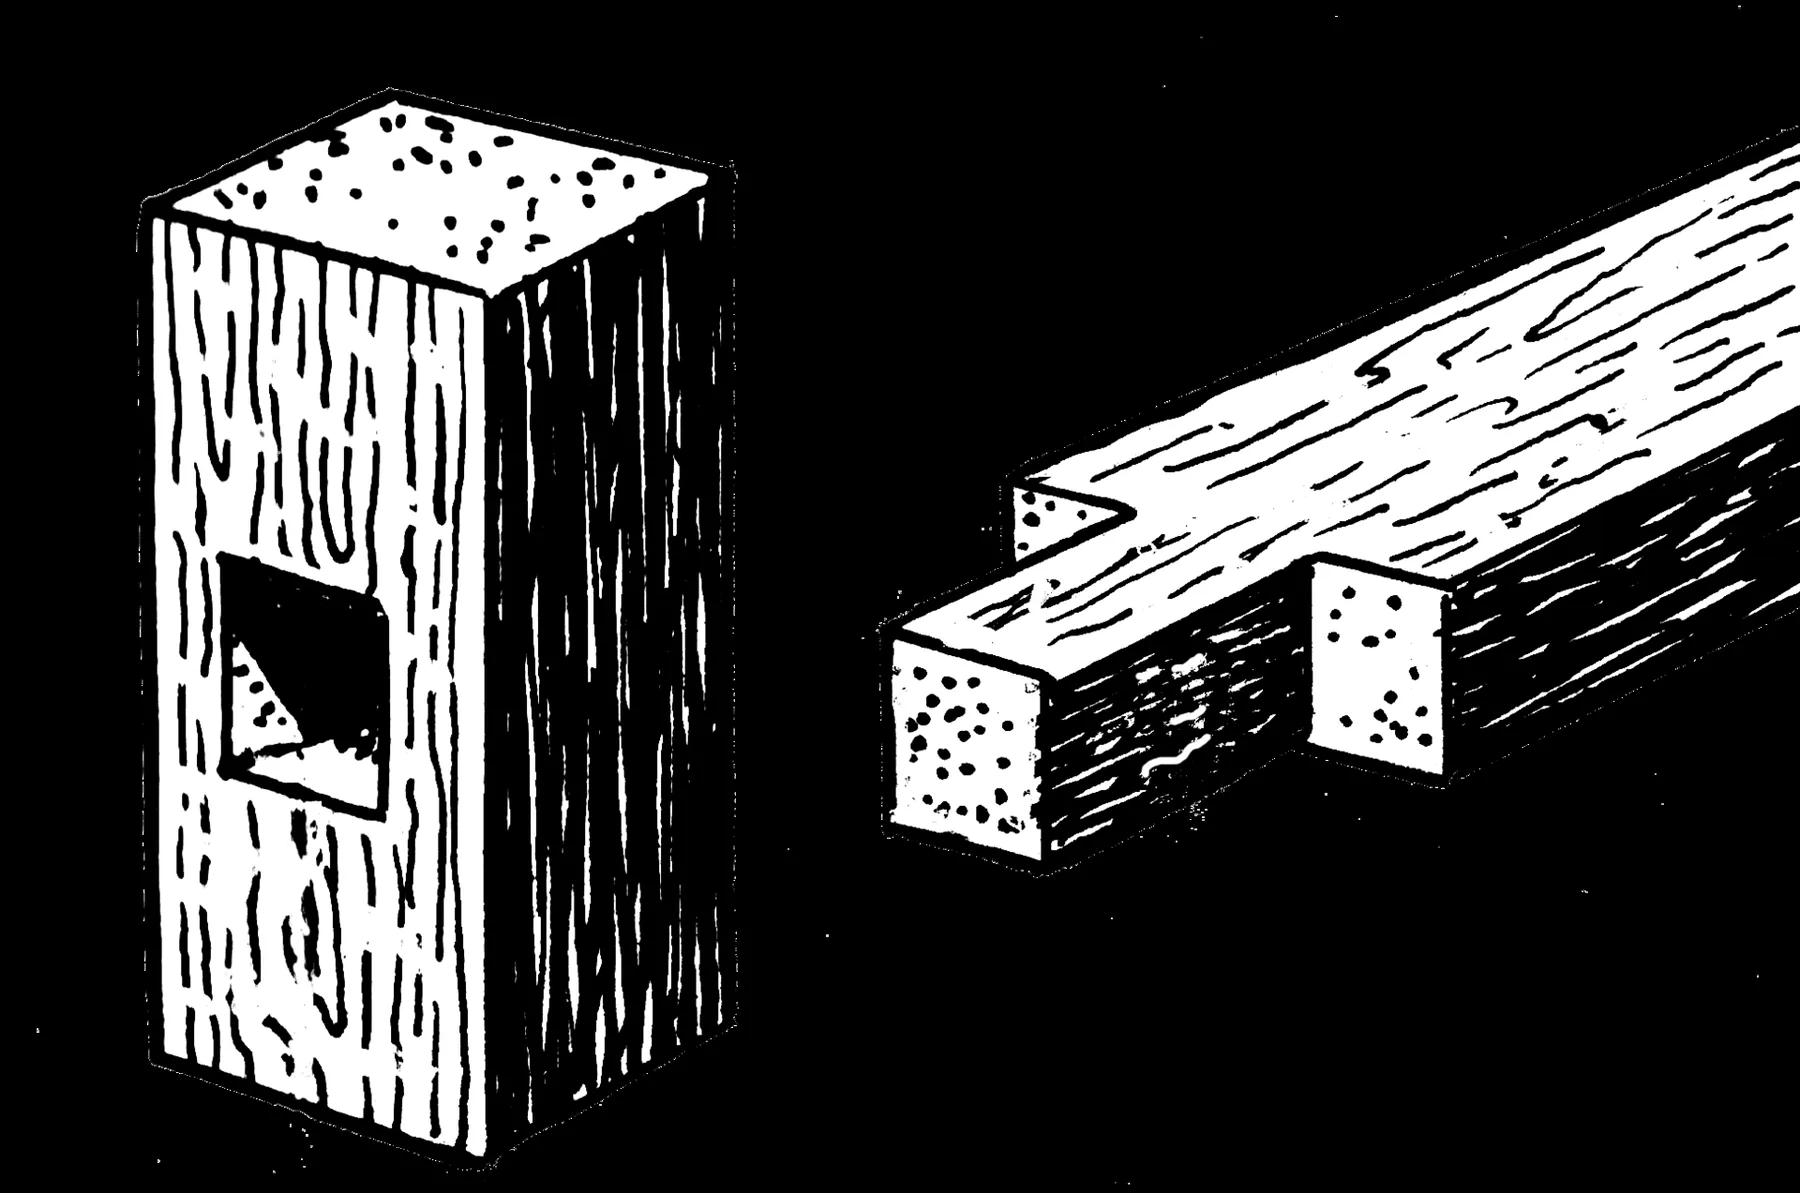
The Mortise-and-Tenon Family
Mortise-and-tenon joints for frame chairs: choosing a joint from its load, how mortises and shoulders vary, angled shoulders, a repeatable fitting sequence that cuts mortises first, drawboring and wedged through-tenons, and diagnosing joints that won't close.
- 7 min
- 6 steps
- 3 questions
- Lesson 125 of 160
In this lesson
- Read the load before choosing the joint
- The family, organized by what changes
- A repeatable fitting sequence
- Mechanical locks
- Failure diagnosis
Picking up where you left off.
Every frame chair is a conversation between sticks, and the mortise-and-tenon is its grammar. The tenon is the projecting tongue; the mortise is the cavity. The tenon’s broad cheeks carry long-grain glue surfaces, while its shoulders register the parts and bear against the mortised member. The first workshop rule is therefore fit inside, meet outside. A tenon can be tight yet leave gapped shoulders because it is twisted, too long, or bottoming in debris. It can also show beautiful shoulders while barely engaging the mortise.
.png)
Read the load before choosing the joint
Do not select a joint because it is traditional in the abstract. Draw the likely load path. A seat rail entering a leg must resist the rail pulling out, the frame racking, and a sitter rocking the rail up and down. A broad apron wants a rectangular tenon because its width resists twist. A round rung wants a round tenon because it can be made quickly, but it needs moisture strategy, pinning, or another mechanical lock when the consequences of loosening are high.
For ordinary rectangular furniture joinery, a tenon around one-third of the stock thickness is a useful starting proportion—not a law. It leaves material in both mortise walls and in the tenon. Depth is often more valuable than extra thickness because a deeper tenon increases long-grain cheek area without thinning the surrounding walls. Before using a proportion, check the actual part: short grain, a nearby second mortise, a curved post, or a narrow outside wall can change the decision.
Use the mnemonic WALL:
- Wood grain: where could a split run?
- Adjacent joints: will two mortises collide?
- Load: what direction tries to open the joint?
- Length: how much sound long-grain engagement remains?
Quick check
A third leaves wood in both mortise walls and the tenon. Extra depth usually helps more than extra thickness.
The family, organized by what changes
What the mortise does
A blind or stopped mortise hides the tenon and preserves the far face. Leave a little clearance beyond the tenon so glue and chips cannot make it bottom out. A through mortise makes fitting visible and permits wedges or keys; it also puts the exit surface at risk of breakout. Back the exit or work from both faces when the plan allows.
A haunched tenon leaves a short upper extension that fills a groove or resists twist without requiring a full-depth mortise across the entire rail. It is useful where a full-width tenon would weaken a post near its end. A loose tenon places a separate spline into matching mortises in both parts. Router-made or Domino-made loose tenons are legitimate when their grain, dimensions, setback, and fit match the structural job. They do not excuse placing a mortise too close to an edge.
What the shoulder does
Square frames have square shoulders. Chairs frequently do not. An angled rail can keep a straight tenon while the shoulder carries the angle, provided the tenon enters the mortise without being bent or pared into a loose wedge. At a leg corner, two rail tenons may meet inside the post. A mitered end lets both gain length, but only if the internal geometry is planned before either mortise is cut.
Mark every face-reference and orientation before separating parts. A cabinetmaker’s triangle across a dry-assembled frame is faster to read than four nearly identical labels. On a compound assembly, also mark front, inside, and up.
A repeatable fitting sequence
- Prepare straight, square reference faces and bring mating parts to final thickness.
- Lay out mortises from one agreed reference face; use the same gauge setting for matching tenons.
- Cut the mortise first. Its real width—not the nominal chisel or router size—controls the tenon.
- Cut the tenon slightly proud in cheek thickness and shoulder position.
- Test only far enough to reveal contact. Pencil or transfer marks on the cheeks show high spots.
- Pare or plane both cheeks deliberately. Do not rock the tenon sideways to force it in; that bruises mortise edges and lies about fit.
- Check the shoulders with the parts held in their intended alignment.
- Number the joint and stop adjusting it once it fits.
The practical fit is firm, seated, and removable without damage. If a dry joint needs pounding that mushrooms the tenon or threatens the mortise wall, glue will not make assembly easier. If it falls together under its own weight, a purely glued joint has little margin. Use a test mortise in same-species scrap when a machine setup will make many joints.
Stop gate: with the joint dry, the part reaches its layout line, shoulders meet, the assembly holds the intended angle, and disassembly leaves no crushed fibers or new split.
Quick check
Cut the tenon slightly proud and pare it to the actual mortise.
Mechanical locks
Drawboring
In drawboring, the peg hole through the tenon is deliberately offset toward the shoulder relative to the hole through the mortised member. A tapered peg bends through the offset and pulls the shoulder closed. Alexander and Follansbee document robust, glue-free drawboring in their joint-stool work; the important lesson is the mechanism, not one universal offset 1. Peg diameter, species, grain, joint scale, and moisture all affect the safe offset.
Practice on a full-size sample. Bore the member, assemble and mark the tenon through the hole, then move the tenon hole toward the shoulder by the tested amount. The easy memory aid is offset toward closure. Point the peg’s long taper so it can find the second hole, and orient the peg’s grain continuously across its bend. Stop if the peg begins splitting or the outside wall bulges.
Wedged through-tenons
A kerfed through-tenon can be spread with one or more wedges. The receiving mortise may be flared when the controlling design calls for a dovetail-like lock. Wedge orientation matters: expansion across a narrow band of short grain can split a seat or rail. Map the surrounding grain before cutting the kerf, and make the wedge from straight, tough stock.
Do not use a wedge to rescue a loose, misdirected joint. It expands the tenon; it does not restore missing shoulder bearing or move the member onto its correct axis. The wedged chair joints in The Stick Chair Book are best studied as complete systems—mortise, tenon, kerf, wedge, surrounding grain, and assembly order—not as isolated tricks 2.
Quick check
The offset makes the peg bend through the joint and draw it tight; the safe amount depends on peg, species, and scale, so test it on a sample.
Failure diagnosis
- Shoulders close on one edge only: the shoulder is out of square, the tenon is twisted, or the rail is being held at the wrong angle.
- Tenon stops early: check depth, end clearance, chips, and swelling before paring cheeks.
- Mortise lip crumbles: the tenon is entering crooked or too tight; chamfer the leading edge lightly and correct the alignment.
- Outside wall shows a hairline split: stop. Do not drive farther. Reassess wall thickness, grain, and mechanical-lock direction.
- Frame racks after glue-up: locate the joint that lacks shoulder bearing or has internal looseness. More surface finish will not cure geometry.
Before glue, rehearse the entire clamp and peg sequence. Put parts, clamps, cauls, mallet, wedges, and cleanup tools in order. Time the dry run. The central judgment is simple: glue assists; geometry remains responsible.
Lesson complete
Nice work.
Sources for this lesson
- 1Christopher Schwarz. Drawboring in ‘Make a Joint Stool from a Tree’. Lost Art Press. 2012. verifiedPublisher discussion of the glue-free, offset drawbored joint documented by Jennie Alexander and Peter Follansbee. Cited at: method and comparison.
- 2Christopher Schwarz. The Stick Chair Book. 2nd revised ed. Lost Art Press. verifiedPublisher page with the complete book available as a free PDF. Cited at: joinery and assembly chapters.
Further reading
- Peter Galbert. Chairmaker's Notebook. Lost Art Press. 2015. verifiedDetailed chairmaking reference for drilling, reaming, sightlines, and compound geometry.