Japanese Joinery and Hand Tools
Japanese hand tools in a chair shop: pull saws that cut in tension, laminated nomi chisels and their hollow backs, fitting and maintaining a kanna plane, one source of truth for marking, why architectural joints don't shrink to chair scale, and a starter kit.
- 7 min
- 7 steps
- 3 questions
- Lesson 127 of 160
In this lesson
- Pull saws: tension instead of compression
- Nomi: laminated chisels and the hollow back
- Kanna: a plane that must be fitted
- Marking culture: create one source of truth
- Joinery: keep the boundary honest
- A modest starter kit and care routine
Picking up where you left off.
Japanese woodworking tools can improve a chair shop immediately, but only when they are treated as a coherent working system rather than exotic collectibles. Toshio Odate’s guide is the anchor: it covers thin pull saws, laminated hollow-backed chisels, planes, marking tools, waterstones, and the care that makes them work 1. The transferable lesson is not that Japanese tools are universally better. It is that blade construction, body mechanics, sharpening, and layout were developed together.
Pull saws: tension instead of compression
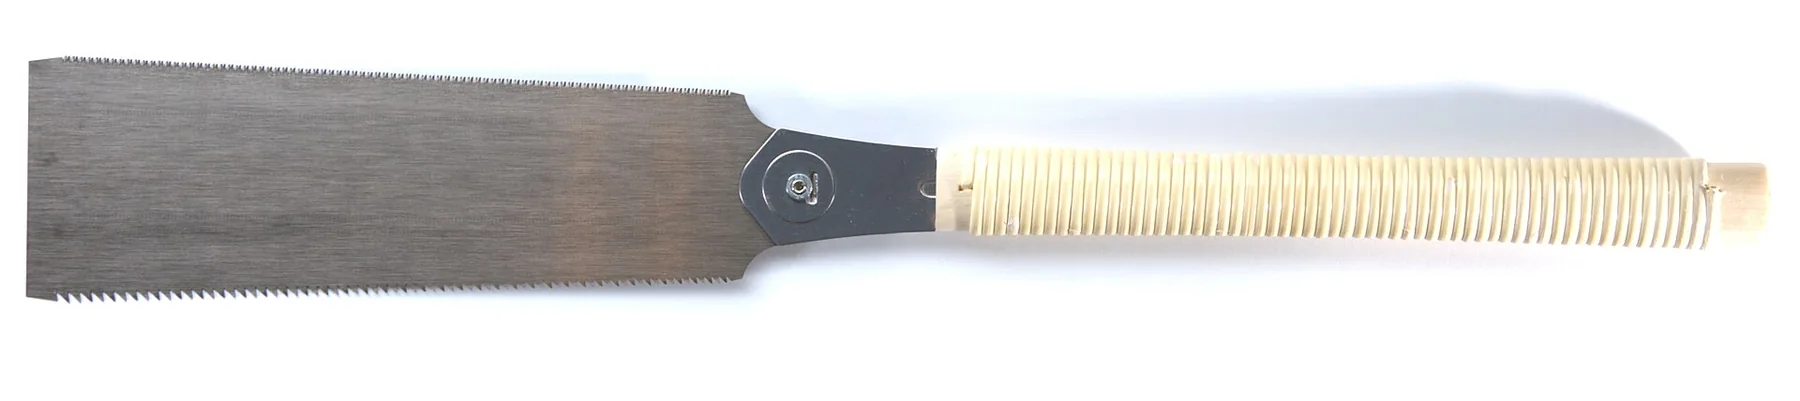
A Japanese saw, or nokogiri, cuts on the pull stroke. Pulling places the blade in tension, allowing it to be thinner than a blade that must resist buckling on a pushed cut. The practical result is a narrow kerf and low cutting force—but also a blade that dislikes twisting, levering, or being forced through a closing kerf.

The ryoba has teeth on both edges: generally one edge for ripping with the grain and the other for crosscutting. The dozuki has a stiffened back and fine teeth suited to accurate joinery cuts. A stiff back also limits depth, so confirm that it will clear a chair tenon’s shoulder or cheek before starting.
To saw well with one:
- Mark with a knife or sharp pencil and decide which side is waste.
- Start with almost no pressure and let a few teeth establish the kerf.
- Use relaxed, long strokes once the cut tracks.
Stand so the pull stroke follows your forearm instead of crossing your body. Watch both the layout line on the face and a second line on the edge. If the kerf wanders, reduce pressure and correct over several strokes. Do not bend the blade sharply back toward the line; a kinked replaceable blade is not a sharpening problem.
Chair-shop exercise
Prepare six identical scrap blocks. Knife a shoulder line around each. Saw three shoulders with your usual backsaw and three with a dozuki, leaving the line on the kept side. Pare only enough to remove saw marks, then compare the resulting shoulder position with a square and feeler paper. The winner is not the thinnest kerf; it is the system that gives the most repeatable shoulder with the least correction.
Stop gate: you can start on the waste side, track two faces, and withdraw the blade without twisting it before using the saw on a compound chair part.
Quick check
Tension lets the plate be thin for a narrow kerf and low effort, but it dislikes twisting or levering.
Nomi: laminated chisels and the hollow back
Many Japanese chisels, or nomi, laminate hard cutting steel to a softer iron body. The hard layer takes and keeps the edge; the softer support makes manufacture and sharpening practical. The back commonly has one or more hollows, ura, which reduce the area that must be flattened. The narrow land at the cutting edge must remain continuous. Grinding through it to enlarge or “fix” the hollow ruins the reference surface.
Flatten and polish only what needs to register: the land at the edge and enough of the surrounding back to support accurate work. Progress through stones without skipping the scratch removal that makes a later polish cosmetic. Keep the back flat on the stone; rocking rounds the reference. On the bevel, a honing guide is acceptable if it fits the blade, but hand sharpening works when the bevel stays consistently supported.
Chair mortises punish weak technique because their walls are often narrow and angled. Chop with the bevel facing the waste when you want the bevel to push chips away from the preserved wall. Work from both ends toward the middle when breakout is a risk. Never pry sideways with a fine chisel: remove waste, withdraw, and cut again.
Quick check
Grinding through the land to ‘fix’ the hollow ruins the reference surface.
Kanna: a plane that must be fitted
The Japanese plane, kanna, is pulled. Its blade and chipbreaker are fitted into a wooden body rather than adjusted by a mechanical frog. That simplicity transfers responsibility to setup: the bed, side clearance, mouth, sole, blade projection, and chipbreaker all have to agree.
For chair work, use a kanna where a controlled pull is comfortable—crest rails, arms, straight-grained facets—not because a glassy surface is promised regardless of grain. Plane with the fiber. When a curved or reversing-grain chair part begins tearing, change direction, take a finer cut, skew the plane, or switch to a spokeshave or scraper. The tool is not a test of loyalty.
Before touching the chair, tune on same-species scrap. Sight the blade projection against a bright background, tap laterally to even it, and take full-width test shavings. A useful shaving is evidence of setup; an ultrathin ribbon is not the project goal if the surface remains out of shape.
Marking culture: create one source of truth
Japanese practice includes ink lines, bamboo marking tools, squares, and knife layout. The chairmaking transfer is straightforward: use a zero-width reference and derive related cuts from it. Do not measure the same interval repeatedly with a tape.
For a set of rungs or tenons, make a story stick. For paired parts, stack them and mark stations together. Extend sightlines beyond the tool footprint. Put an arrow on every bevel setting showing which direction the part leans. “Measure twice” is weaker than reference once, transfer many.
Joinery: keep the boundary honest
The celebrated keyed scarfs and interlocking joints associated with Japanese carpentry are largely architectural solutions for timbers. A chair is smaller, repeatedly loaded, and full of slender members. Do not shrink an architectural puzzle until it fits a seat rail and assume the mechanics scale.
What transfers well is:
- exact layout from prepared reference faces;
- sharp tools used with controlled body mechanics;
- mechanical capture through wedges, keys, and shoulders where appropriate;
- rehearsal before a one-way assembly; and
- respect for wood movement and grain direction.
Some furniture joints have close relatives across traditions, but names and details vary. Use a controlling furniture plan instead of relying on an internet label such as “hell tenon.” The safest principle is to describe the geometry you will cut—blind mortise, preloaded wedges, flare direction, grain orientation—rather than trusting a translated nickname.
Quick check
What transfers is exact layout, sharp tools, mechanical capture, rehearsal, and respect for wood movement.
A modest starter kit and care routine
One dozuki, one medium ryoba, and one mid-size nomi are enough for the experiment. Add a kanna only when you want to learn its fitting and maintenance, not because a set looks complete.
At the end of a session:
- brush resin and chips from saw teeth; protect the blade;
- dry carbon-steel tools completely and apply a very light protective oil where appropriate;
- flatten waterstones as needed and let them dry according to their maker’s guidance;
- record the operation each tool improved or made harder.
For direct study, the Takenaka Carpentry Tools Museum in Kobe centers carpentry tools, handwork, wood, models, and demonstrations; check its official English site for current access 2. In Takayama, Hida Sangyo’s history connects local craft to a furniture industry that began producing bentwood furniture from beech in 1920 3. Those visits make the honest bridge: an older tool culture meeting modern chair forms.
The goal is not to become “a Japanese woodworker” by buying three tools. It is to become a more observant chairmaker by letting a different tool system expose your habits.
Lesson complete
Nice work.
Sources for this lesson
- 1Toshio Odate. Japanese Woodworking Tools: Their Tradition, Spirit and Use. Linden Publishing. 1998. verifiedPublisher description confirms coverage of pull saws, laminated hollow-backed chisels, planes, marking tools, waterstones, and tool care. Cited at: publisher description.
- 2Takenaka Carpentry Tools Museum. Takenaka Carpentry Tools Museum. verifiedOfficial English museum site for the Kobe collection, exhibitions, demonstrations, access, and visitor information. Cited at: visitor information.
- 3About Us. Hida Sangyo Co., Ltd.. verifiedOfficial company history describing Hida's 1920 start in bentwood furniture made from local beech. Cited at: company history.