Woven Seats and Finishes
Woven seats and chair finishes: checking the frame first, estimating material, tension as a gradient, Danish cord, rush and fiber rush, Shaker tape, hickory and elm inner bark, whether to finish before weaving, oil, milk paint, soap and shellac, and oily-rag safety.
- 8 min
- 10 steps
- 3 questions
- Lesson 132 of 160
In this lesson
- Inspect the frame before buying material
- Estimate before tensioning
- Tension is a gradient, not a contest
- Danish cord
- Rush and fiber rush
- Shaker tape
- Inner bark
- Finish before or after weaving?
- Final inspection and care card
Picking up where you left off.
A woven seat is not decoration stretched across a finished chair. It is a tensioned surface that loads four rails, changes comfort, and eventually wears out. Good chair design anticipates that replacement. The frame should remain repairable while the seat becomes a renewable skin.
This lesson covers four families—paper cord, rush, tape, and inner bark—then a finish workflow for chairs that will be touched, dragged, cleaned, and repaired. For exact weave paths, knot locations, rail preparation, and material handling, use a dedicated manual such as the current Caner’s Handbook 1.

Inspect the frame before buying material
Weaving magnifies a frame problem. Confirm:
- joints are cured and do not rack under moderate hand pressure;
- seat rails have the profile and edge treatment required by the weave;
- inside corners are accessible;
- nails, tacks, or grooves exist only where the controlling method specifies;
- finish is cured where wrapping will trap it; and
- the chair sits at the intended height before the seat adds thickness.
Measure the clear seat opening at front, back, left, and right. A trapezoidal opening changes course counts and corner buildup. Sketch the frame and number the rails. Photograph the underside of a reference chair; the underside often explains more than the attractive top.
Estimate before tensioning
Material estimates vary with weave, cord size, seat shape, rail wrap, packing, waste, and splice method. Do not rely on area alone. A useful planning model is:
where \(N_w\) and \(N_f\) are warp and filling course counts, and each course length includes its real route around rails—not just the open span. For a first chair, measure a short sample course around the actual frame, multiply by the estimated count, then add the manual’s recommended allowance. Record actual consumption. Your second estimate will be local and reliable.
Do not buy exactly the arithmetic result. Dye lots, cord twist, tape color, and bark preparation make mid-seat substitutions visible.
Tension is a gradient, not a contest
The common beginner error is pulling every early course as tight as possible. Rails can bow, corners can overload, and a seat can become hard or distorted before it is half filled. The opposite error—soft early courses—leaves no room to correct sag later.
Use SAME as the control loop:
- Square: does the pattern remain aligned with the frame?
- Across: does tension feel comparable across neighboring courses?
- Margin: is enough space left for the remaining courses and packing?
- Edges: are rails and material free of abrasion or crushing?
Pause every few courses. Sight across the seat, compare the center with the corners, and count both sides. Correct a small drift early; do not hide it under a final crowded course.
Quick check
Tension is a gradient: check squareness, evenness across courses, remaining margin, and edge wear every few courses.
Danish cord
Danish modern seats use tightly twisted paper cord in several construction idioms. Some are woven across a frame; others use repeated rail wraps and L-shaped nails on the inside faces to organize the courses. The National Museum’s Wishbone Chair record identifies beech and braided paper thread, a concise reminder that apparently modest material can belong to a museum-level, long-lived chair 2.
Do not add nail rows to a frame designed for another method. Nail position, rail thickness, corner geometry, and route belong together. When restoring, document the original underside before removing anything. Count wraps, record turns, and keep one intact corner until the new route is understood.
Paper cord should remain clean and dry. Pull in the direction that tightens its twist rather than untwisting it. Use a method-approved temporary clamp when you pause. A knot or splice placed at a high-wear top surface is a future failure; follow the manual’s hidden-splice strategy.
Stop gate: a sample corner establishes the exact wrap direction and nail route, course counts are planned, and the first full set lies square without rail distortion.
Quick check
Don’t add nail rows to a frame designed for another method; nail position, rail thickness, and route belong together.
Rush and fiber rush
Traditional rush seats use plant material prepared and twisted during weaving; fiber rush uses manufactured paper cord that imitates the working form. Both often produce a four-corner pattern that advances toward the center. Rectangular-looking frames may require fillers or adjusted courses when the front rail is wider than the back.
Natural rush handling depends on material and condition. Follow the supplier or manual for dampening; soaking indiscriminately can stain, weaken, or make later shrinkage unpredictable. Pack the underside as specified so the top remains supported. Keep corner ridges traveling toward the center rather than wandering.
A center that closes neatly is the result of course planning from the beginning. When the remaining opening can no longer accept the expected number of courses without crushing, stop and diagnose spacing instead of forcing a bulky knot into the top.
Shaker tape
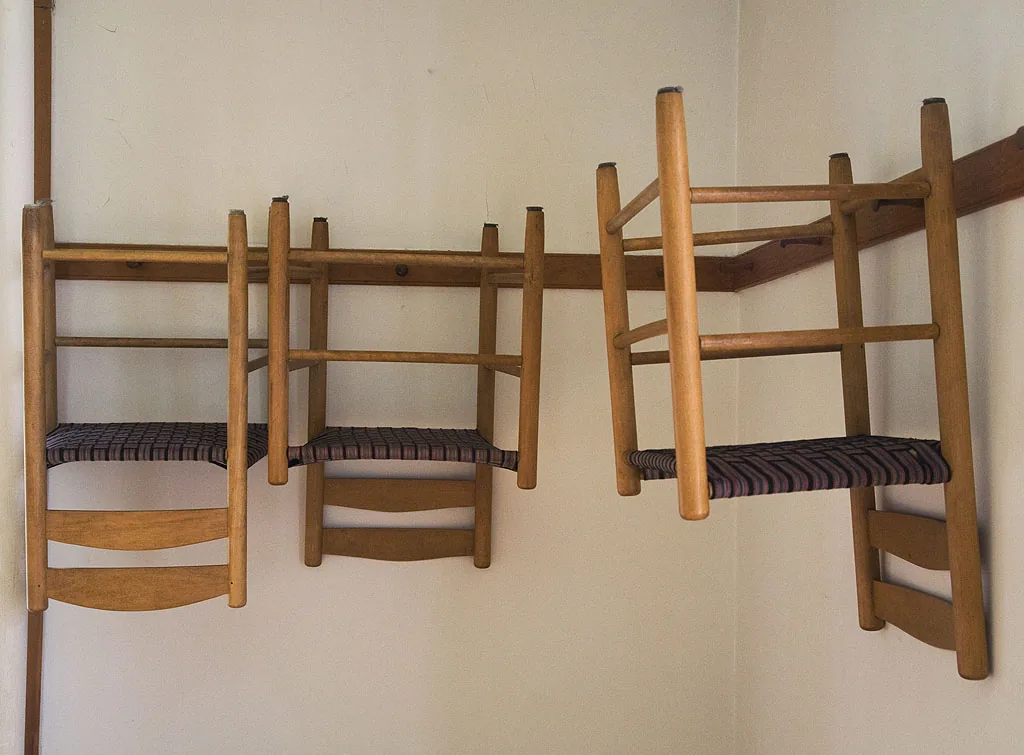
Shaker tape is an approachable first weave: warp courses run one direction, then weft passes over and under them. Two colors make mistakes easy to see and create the familiar checkerboard. The frame may include a thin cushion or other support layer when the chosen method specifies it.
Clamp the warp consistently and count it. An odd or even count changes how a plain weave terminates. In the weft, alternate the over-under sequence each row and check the far edge before pulling through. A single repeated row creates a long visual fault; unweave it immediately.
Tape twists silently under the seat. Run a hand underneath after each few courses. Keep splices and fastening on the prescribed underside zones, away from sharp rail corners.
Inner bark
Hickory or elm inner bark connects the seat to woodland season, species, and processing. It is not simply free tape. Harvest ethics, tree permission, correct season, strip preparation, storage, and moisture condition all matter. Jennie Alexander’s third edition places seating after the complete post-and-rung build and includes hickory-bark weaving 3. Use that process directly.
For a first ladderback, Shaker tape is a sensible way to learn tension while the frame is still new. Bark can become a later seat when material and field knowledge align. The chair is designed to permit that replacement.
Finish before or after weaving?
Decide from the weave and finish schedule. Finishing the frame first can protect inaccessible rail surfaces, but only if the finish fully cures and does not make the rails too slick for the intended seat. Finishing after weaving risks staining or hardening cord and tape. Make a wrapped rail sample with the exact finish and material.
Oil
Penetrating oils and oil/varnish blends can be renewed, but products differ. Follow the label for surface prep, coat thickness, ventilation, drying, and cure. Oil-soaked rags can self-heat and ignite. Lay them flat outdoors to cure where permitted, store in an approved closed metal safety container, or follow the product and local fire authority’s disposal instructions—never leave a crumpled pile in the shop.
Milk paint
Milk paint suits vernacular and Windsor chairs, builds color in layers, and can be rubbed to reveal edges. It does not excuse poor surface prep. Make a same-wood sample through the full schedule, including any topcoat. Buchanan and Bizzarri’s seventh Democratic chair class covers mixing, application, rubbing, crackle effects, and topcoat options 4. Use that demonstration with the product maker’s instructions.
Soap and shellac
A soap finish is pale, low-build, and renewable, but the exact soap, concentration, application, and maintenance define the result. Test for water spotting and feel. Shellac is a repairable film that dries quickly; fresh dewaxed shellac can also serve in layered schedules where compatible. Always test compatibility rather than assuming “traditional” materials automatically cooperate.
The USDA handbook’s finishing chapter is useful for the larger principle: wood condition, surface preparation, finish type, application, and exposure all affect performance 5.
Quick check
Never leave a crumpled pile of oily rags in the shop.
Final inspection and care card
After weaving, set the chair on a flat, non-slip surface and confirm the rail loads did not introduce rack or rock. Inspect every underside turn for twist, abrasion, loose fastening, and protruding hardware. Load it with weights before anyone sits, and stop if rails move, the weave slips, or the chair starts to rock.
Attach a small care record to the chair log:
- material and supplier;
- weave/manual used;
- date and actual quantity consumed;
- finish product, batch, coats, and cure date;
- cleaning restrictions; and
- one clear photo of top and underside.
That card is a gift to the future repairer—which may be you. A repairable chair is not merely made without permanent materials; it is made with enough information to renew them intelligently.
Lesson complete
Nice work.
Sources for this lesson
- 1Jim Widess, Bruce W. Miller III. The Caner's Handbook: Restoring Cane, Rush, Splint, Danish Cord, Rawhide, and Wicker Furniture. Schiffer Publishing. verifiedCurrent publisher page for the updated illustrated handbook covering rush, splint, Danish cord, rawhide, wicker, repair, and maintenance. Cited at: publisher scope.
- 2Hans J. Wegner. CH24 Wishbone Chair, 1950. National Museum of Art, Architecture and Design, Norway. verifiedMuseum record for the beech chair with braided paper-cord seat; accession OK-1978-0217A. Cited at: object record.
- 3Jennie Alexander. Make a Chair from a Tree: Third Edition. Lost Art Press. 2021. verifiedPublisher contents and excerpts for post-and-rung construction, moisture management, bending, assembly, and hickory-bark seating. Cited at: chapter 14 and publisher description.
- 4Curtis Buchanan, Elia Bizzarri. Democratic Chair Series with Curtis Buchanan. Hand Tool Woodworking. verifiedSeven recorded classes with episode-by-episode scope plus materials and minimalist-tool guidance. Cited at: episode 7.
- 5Forest Products Laboratory. Wood Handbook: Wood as an Engineering Material. Revised 2021 ed. U.S. Department of Agriculture, Forest Service. 2021. verifiedOfficial engineering reference; chapters 4, 10, 13, 16, and 19 cover moisture, adhesives, drying, finishing, and plasticizing/bending. Cited at: chapter 16.