Building an Icon (Choose Your Track)
When to buy a plan and when a derived study is honest: classifying sources, reverse-engineering from museum records and calibrated photos, a full-size skeleton, and three tracks: Charles Brock's sculpted chair, a Danish-modern study, or Frid's stool.
- 8 min
- 12 steps
- 3 questions
- Lesson 138 of 160
In this lesson
- Gate one: classify the source
- The reverse-engineering method
- Track A: Brock sculptured chair
- Track B: Danish-modern study
- Track C: Frid stool or another published classic
- Load-test before use
- Common failure modes across tracks
Open alongside this lesson
-
Build a Sculpted Rocker (opens in a new tab)
Use the maker's current full-size pattern set for the Brock track.
-
Project Companion Books & Free Patterns (opens in a new tab)
Older companion dimensions do not replace the current controlling patterns.
-
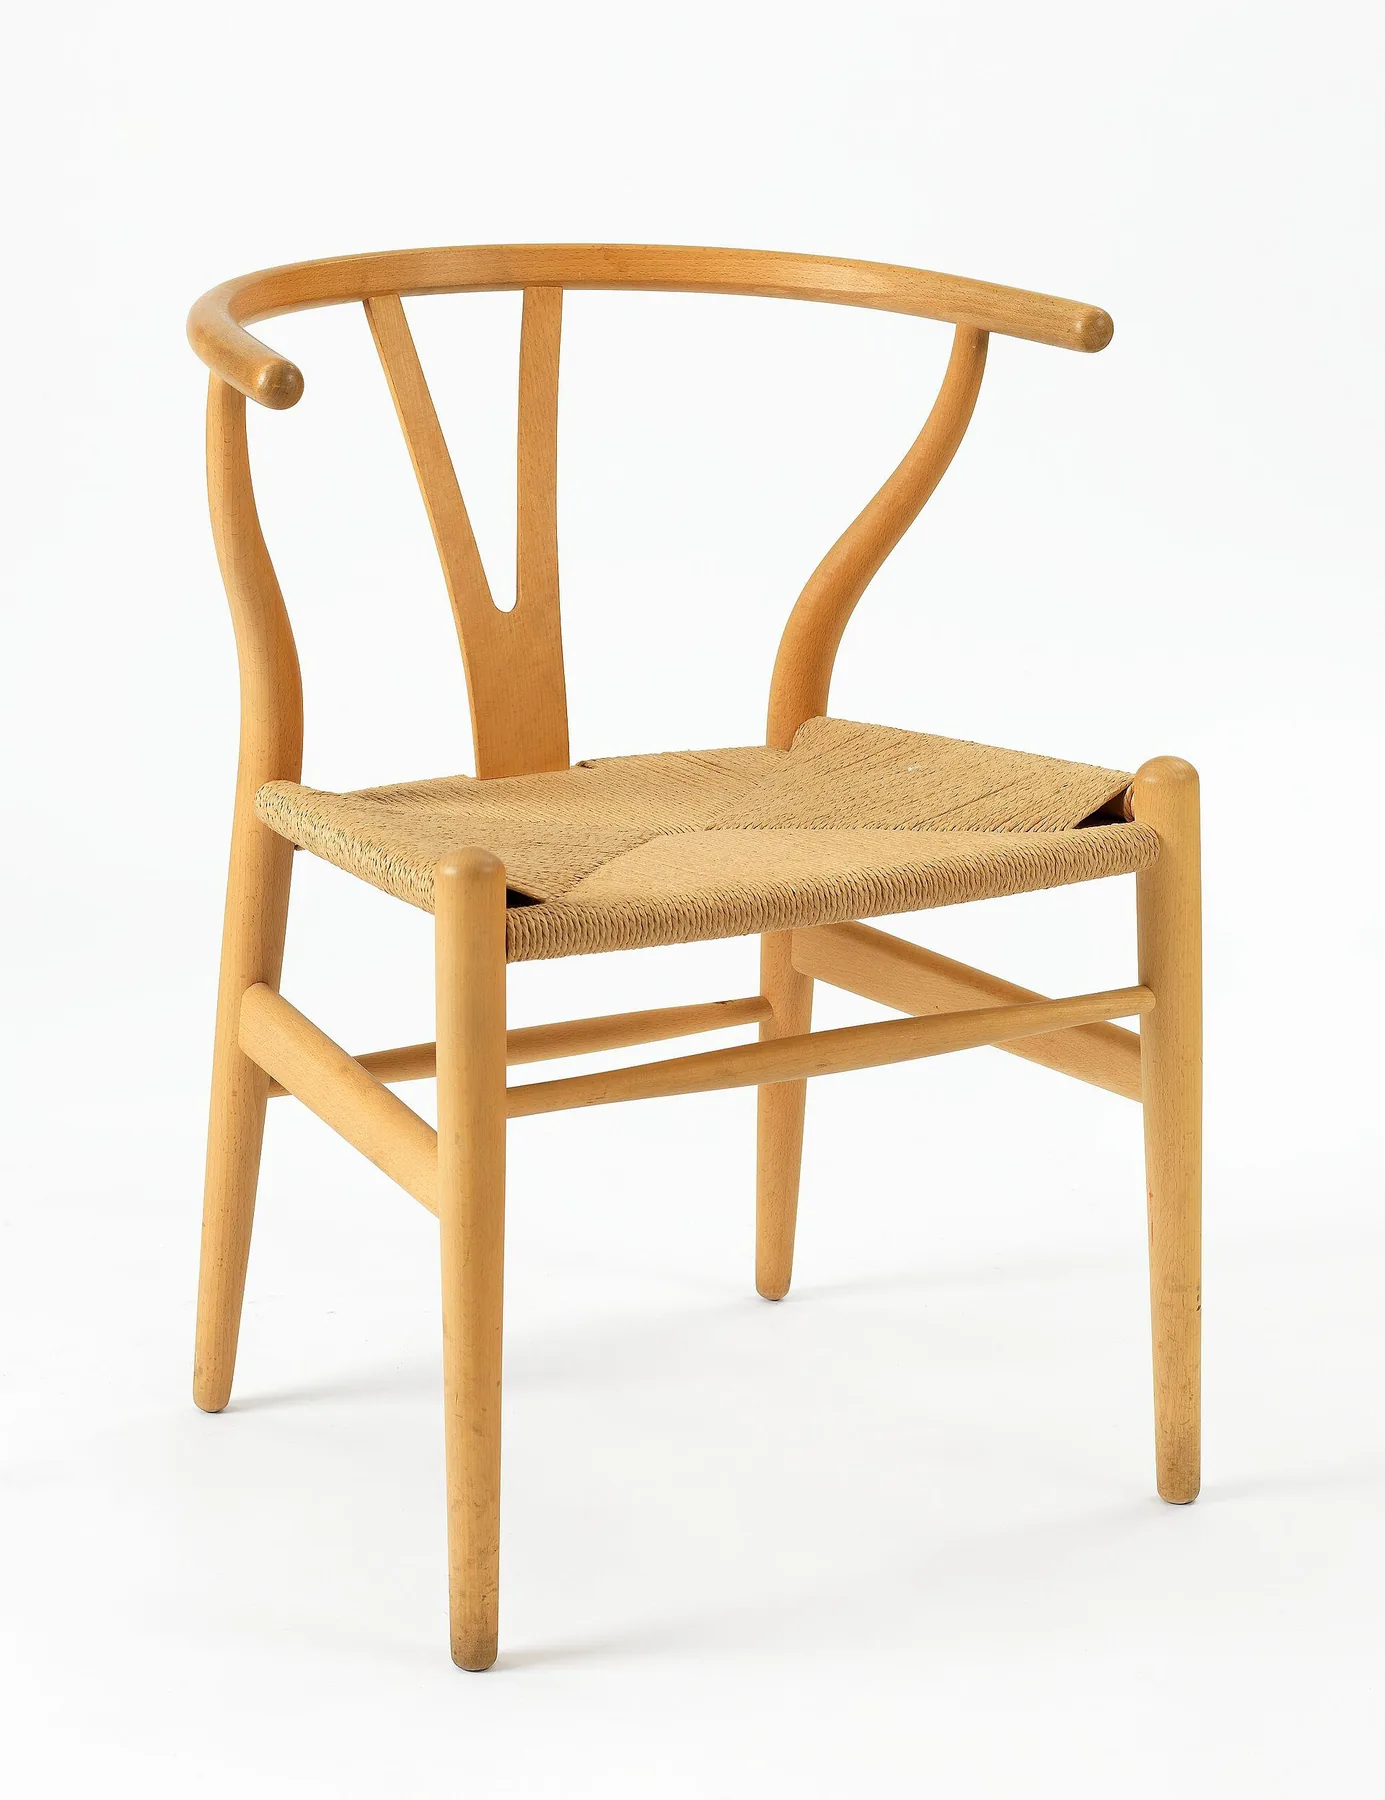
CH24 Wishbone Chair, 1950 (opens in a new tab)
Evidence for the Danish-modern study, not an authorized shop plan.
-
Chairmaker's Notebook (opens in a new tab)
Detailed support for sightlines, drilling, reaming, and compound geometry.
Picking up where you left off.
This build offers three tracks but teaches one decision: when should you buy the controlling plan, and when is a derived study honest?
- Track A: Brock sculptured chair or rocker—buy the maker’s current full-size patterns and follow them. The difficulty is sculpted joinery and shaping, not reverse-engineering.
- Track B: Danish-modern study—use a published plan for a comparable chair when one is legitimately available, or make a clearly labeled homage through the method below.
- Track C: a documented classic such as Tage Frid’s three-legged stool—use the published book drawings; the compact project tests angled joinery and sculptural transitions.
Do not derive dimensions merely to avoid paying a living maker. Reverse-engineering is for study, repair, unavailable historical documentation, and original variation—not plan piracy.

Gate one: classify the source
Before choosing, place the project in one tier:
- Controlling plan: current drawings/patterns from the designer, maker, publisher, or authorized source.
- Documented historical build: measured drawings from a credible book or institution.
- Derived study: your own drawing calibrated from lawful object information and images, labeled “after” the designer.
Write the tier on the project packet. A build can change tiers: if you later buy patterns, archive the derived file and make the controlling pattern primary.
Quick check
Buy the controlling plan when one is available; label a derived study ‘after’ the designer.
Quick check
Reverse-engineering from photos is for when no authorized plan exists, and it’s labeled as derived.
The reverse-engineering method
1. Establish object identity
Collect museum or manufacturer records that agree on designer, model, date, material, and overall size. The National Museum record for Wegner’s Wishbone Chair identifies a 1950 beech example with braided paper-thread seat 1. That is trustworthy object context. It still does not reveal joint dimensions, bend form, or hidden hardware.
2. Collect useful views
Prefer front, side, rear, top, and underside images made with a longer lens and little perspective. Record source URL, credit, rights, and access date. Reject wide-angle lifestyle images for measurement; they can remain inspiration.
Look for agreement. If the left and right legs visibly converge differently, the camera is not centered. If the near seat rail is much larger than the far rail, scale cannot be assumed uniform across depth.
3. Calibrate only a known plane
If a published width \(D\) lies in the same plane as the feature being measured and spans \(p\) pixels, use \(s=D/p\) for that plane. Do not apply it automatically to parts closer to or farther from the camera.
Trace centerlines first. Add member thickness later. A wobbly outside contour copied from reflections is less useful than a fair structural axis. In the drawing, keep separate layers for source image, calibration line, centerlines, derived outlines, and annotations.
4. Reconstruct orthographic views
Align front and side views around a common floor line, seat reference, and centerline. Project major stations between views: foot, seat rail, arm/top rail, crest, joint centers. Where views disagree, mark a range instead of inventing precision.
Use a known chairmaking constraint to test plausibility, not to overwrite evidence. Tenons need adequate material around them; bends need achievable radii; woven seats need rail access. If the pretty trace violates basic construction, either perspective misled you or the hidden construction is different.
5. Build a full-size skeleton
Use cheap straight stock, cardboard profiles, and temporary joints. Make the stance, seat plane, back angle, and principal curves before details. A prototype should be easy to change, not beautiful.
Evaluate posture only with the fitting rig from Lesson 1.2; clamps may position unloaded parts but may not secure a rig while someone sits. Use the temporary skeleton to evaluate geometry visually, not as seating. Then revise the drawing. Record each change as observed, inferred, or chosen. That vocabulary prevents a design choice from acquiring false authority later.
Mnemonic: identity, views, scale, skeleton.
Stop gate: the object is correctly identified, image rights are recorded, two views support every major axis, the temporary skeleton has tested stance visually, and the fitting rig has tested comfort.
Track A: Brock sculptured chair
Charles Brock currently provides full-size patterns and project video material through his official site 2. Buy the pattern set for the exact project and version you intend to build. Brock’s companion page explicitly warns that older book measurements should not replace current patterns 3.
Plan-reading setup
- Inventory every pattern and note revision/version.
- Find all centerlines, registration marks, joint boundaries, and “do not shape yet” zones.
- Make durable working templates rather than cutting the originals.
- Mark grain direction and show face on every blank.
- Pair left/right components immediately.
Sculpted chairs tempt the builder to shape early. Resist. Joinery uses square faces, flat reference zones, and full-thickness material. Complete dry-fitting and preserve witness surfaces until the plan’s shaping sequence releases them.
Use the mnemonic Join, prove, then sculpt. A rasp can erase evidence of misalignment as quickly as it creates a graceful transition.
Schedule by gates
Do not estimate this track as “a weekend.” Break it into completed systems:
- patterns and stock;
- seat blank and reference geometry;
- leg/seat joints;
- back and arm joints;
- full dry assembly;
- sculpting and fairing;
- rockers/bends if applicable;
- finish and cure.
At every gate, photograph references before they are shaped away.
Quick check
Join, prove, then sculpt.
Track B: Danish-modern study
The Wishbone is an advanced target because the top rail is both prominent and structurally connected to several members; the cord seat introduces a second craft. A straight-member chair with a woven seat can be a saner first Danish-modern homage.
Choose the process honestly:
- Steam-bend only with suitable stock, a tested form, compression support when required, and a plan-backed schedule.
- Bent-laminate when the form is achievable and visible glue lines are acceptable.
- Do not carve a thick curved rail until it looks bent if doing so exposes short grain in a loaded member.
Build the complete undercarriage as a dry skeleton before final shaping. Make a dedicated sample corner for the cord route. A weaving reference such as The Caner’s Handbook supplies actual seat technique; the museum photo supplies appearance 4.
Stop gate: the derived drawing identifies every inference, the chosen bend is proven at full scale, all joint walls are structurally plausible, and a seat-corner sample resolves cord fastening.
Track C: Frid stool or another published classic
Use the complete published drawing set—not an isolated screenshot. Three-legged seating does not rock on an uneven floor in the same way as four legs, but each joint carries more of the system. Angled legs, through-tenons, and the seat/back connection must be read together.
Make a full-size side and front story from the book, then a scrap joint for the hardest intersection. Preserve extra material around the sculpted seat/back region until the joint is proven. If a dovetail or wedged joint is one-way, rehearse the full assembly with substitute pins or loose wedges before glue.
Load-test before use
Before anyone sits on a new chair, inspect every joint, then load the seat with sandbags or weights in steps, standing clear. Unload and look after each step; stop and diagnose if anything moves, cracks, ticks, or stays bent. A first chair that passes is fine to use and watch; an experimental one-off deserves a second look after some months of use.
Common failure modes across tracks
- A photo becomes a “plan”: label what is inferred and prototype it.
- Versions are mixed: one controlling source, one revision line.
- A curve is traced but not buildable: choose steam, lamination, carving, or sawing based on grain and load before finalizing the profile.
- Sculpting removes reference faces: capture and complete joinery first.
- Symmetry is copied instead of mirrored: build left/right from a common centerline and template.
- Comfort is judged at finish: use the fitting rig while changes are cheap; do not sit on a temporary or unproven structural prototype.
Finish with a derivation sheet: source records, image rights, calibration anchors, uncertain ranges, prototype changes, and final measured drawing. The valuable product is not only the icon-inspired chair. It is a method you can defend, repeat, and adapt without pretending the designer published decisions that were actually yours.
Lesson complete
Nice work.
Sources for this lesson
- 1Hans J. Wegner. CH24 Wishbone Chair, 1950. National Museum of Art, Architecture and Design, Norway. verifiedMuseum record for the beech chair with braided paper-cord seat; accession OK-1978-0217A. Cited at: object record.
- 2Build a Sculpted Rocker. Charles Brock Chairmaker. verifiedMaker's official site for current full-size patterns, companion material, and complete project video series. Cited at: patterns and video series.
- 3Project Companion Books & Free Patterns. Charles Brock Chairmaker. verifiedMaker's warning that older companion-book dimensions should not substitute for the current controlling full-size patterns. Cited at: usage notes.
- 4Jim Widess, Bruce W. Miller III. The Caner's Handbook: Restoring Cane, Rush, Splint, Danish Cord, Rawhide, and Wicker Furniture. Schiffer Publishing. verifiedCurrent publisher page for the updated illustrated handbook covering rush, splint, Danish cord, rawhide, wicker, repair, and maintenance. Cited at: Danish-cord coverage.
Further reading
- Peter Galbert. Chairmaker's Notebook. Lost Art Press. 2015. verifiedDetailed chairmaking reference for drilling, reaming, sightlines, and compound geometry.