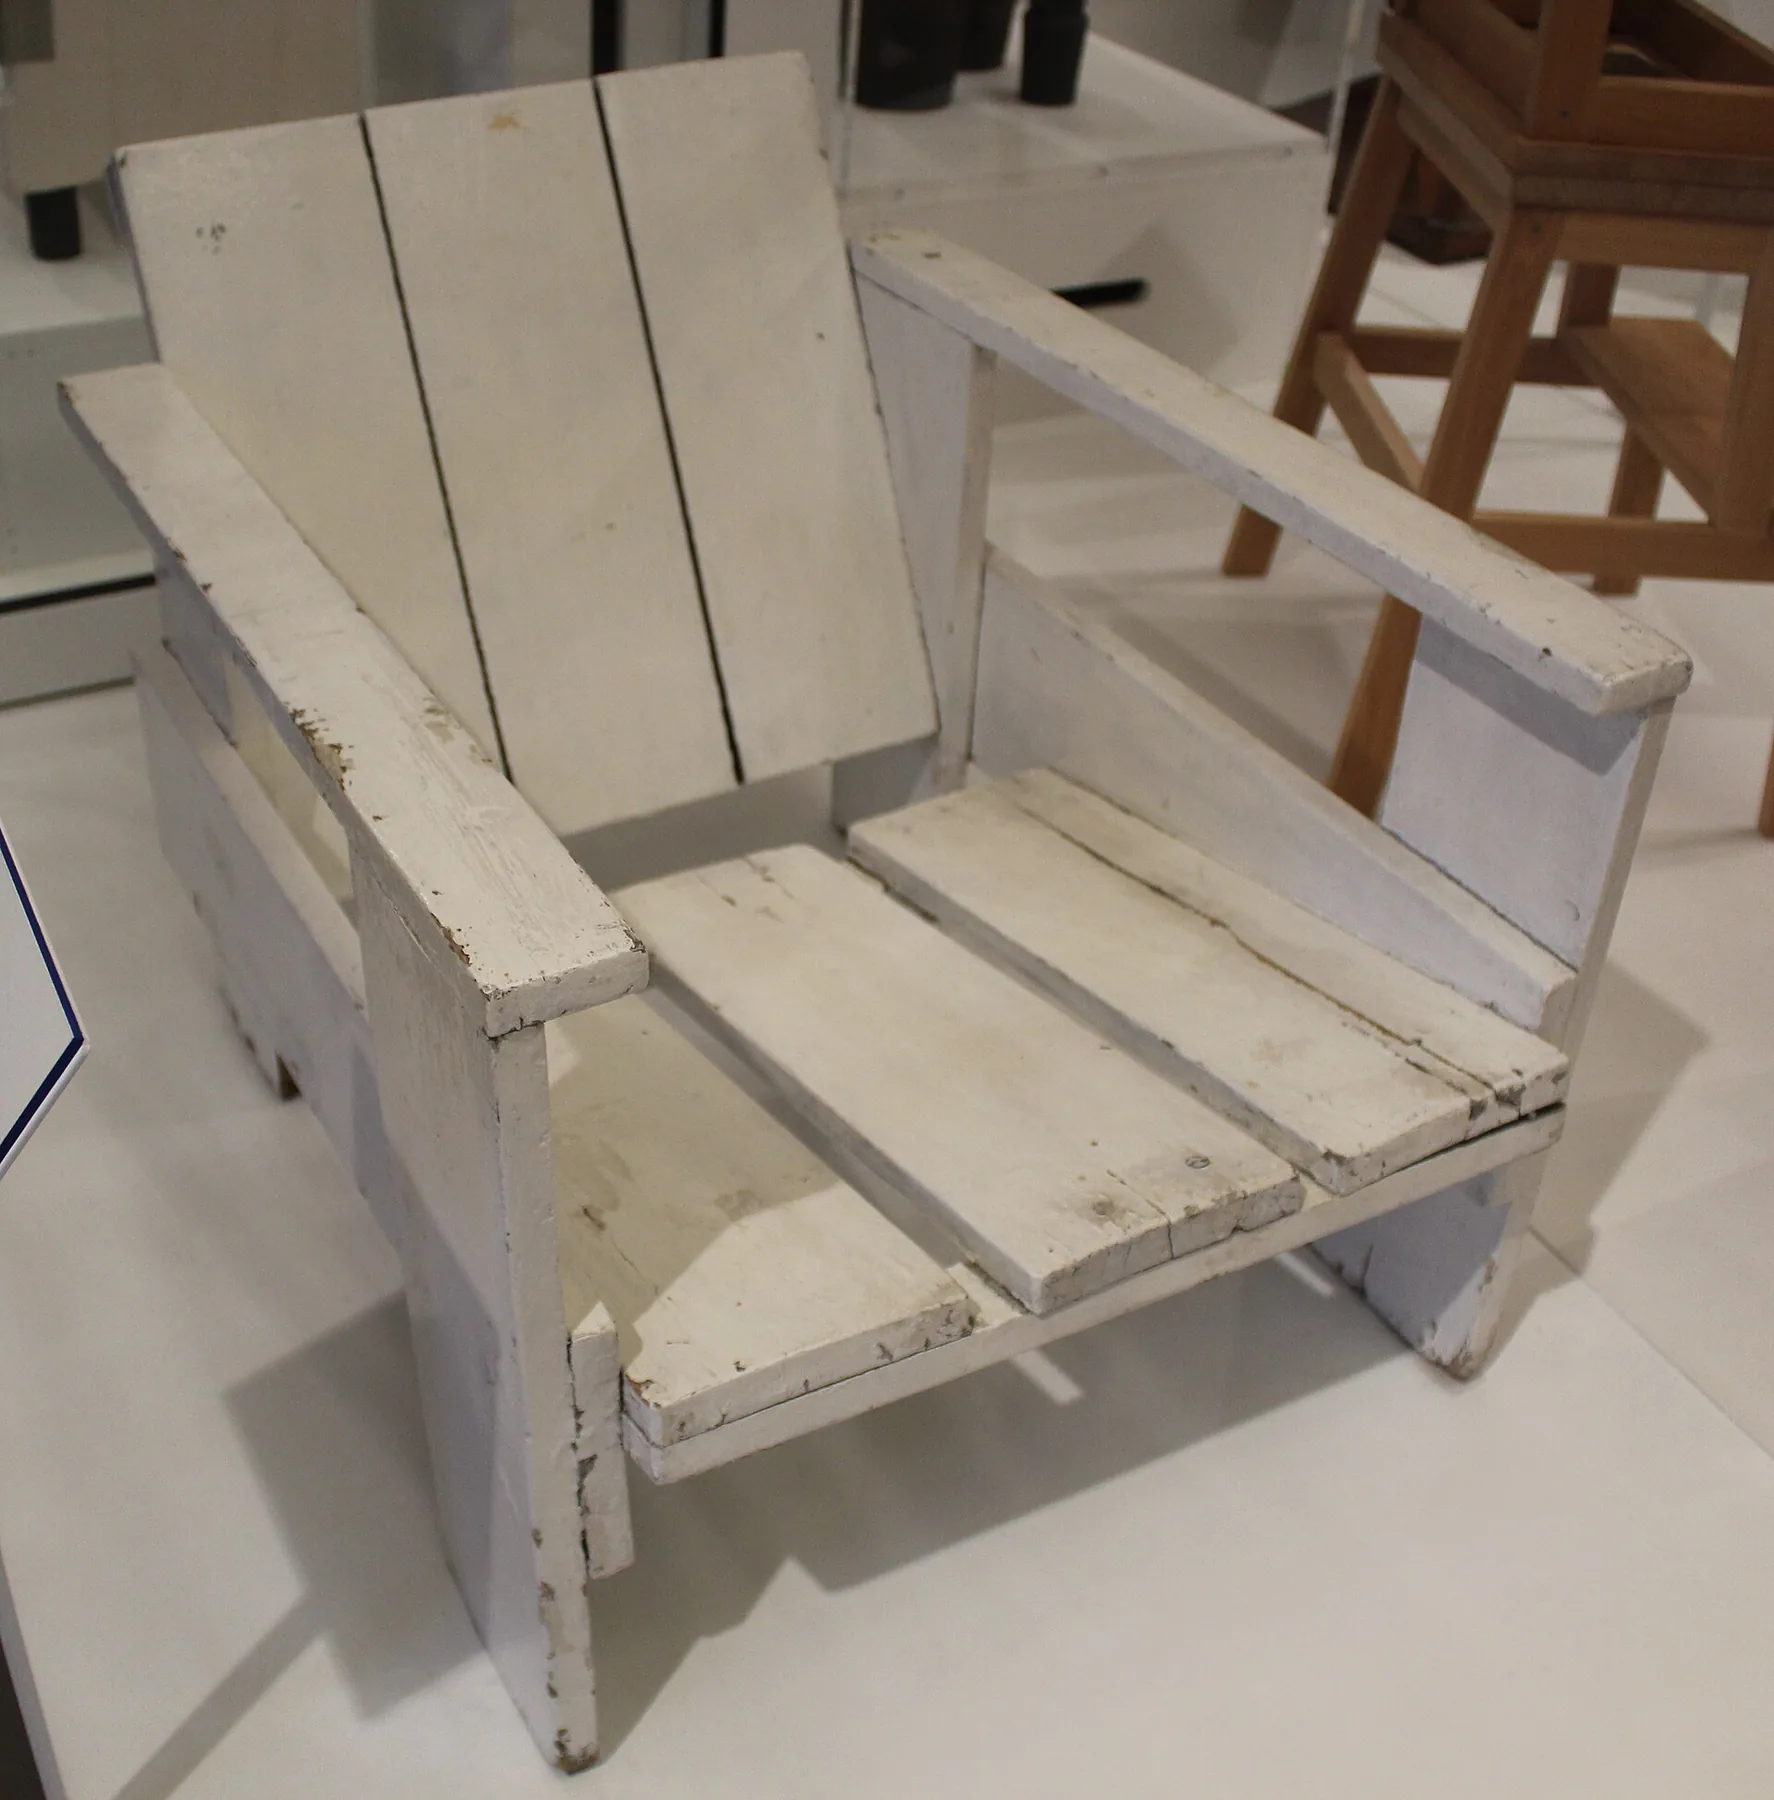
The Designer's Invitation (Mari's Sedia 1 or Rietveld's Crate Chair)
A first build from a famous designer: Enzo Mari's Sedia 1 or Rietveld's Crate chair in softwood, assembling a project packet, keeping source units intact, selecting boards, testing fasteners, dry sequencing, load-testing with weights, and finishing.
- 7 min
- 9 steps
- 3 questions
- Lesson 135 of 160
In this lesson
- Pick the learning question
- Make a project packet
- Select softwood like structural material
- Mill one vocabulary
- Test the fastening system
- Dry sequence before final assembly
- Load-test before use
- Finish the lesson, not just the chair
Open alongside this lesson
-
Autoprogettazione? (opens in a new tab)
Use the authorized book as the primary source for Mari's exercise and drawings.
-
Sedia 1 Chair (opens in a new tab)
Actionable supplement; reconcile it with the controlling publication before cutting.
-
Crate Chair, ca. 1935 (opens in a new tab)
Object identity and overall dimensions only - not a construction plan.
-
Mission Furniture: How to Make It, Part I (opens in a new tab)
A legal alternative for plan-reading practice; modernize materials, methods, and testing.
Picking up where you left off.
The first build is intentionally direct: a famous designer’s chair from ordinary softwood, completed with a short tool list. Choose one of two controlling sources. For Sedia 1, use the current Corraini edition of Enzo Mari’s Autoprogettazione?; the publisher describes it as a 1974 exercise in understanding design by following or changing Mari’s drawings 1. For Rietveld’s Crate chair, use a legitimate measured-drawing source such as How to Construct Rietveld Furniture. This lesson is a build brief, not a replacement cut list.
Pick the learning question
- Choose Sedia 1 if you want to study repeated boards, triangulation, nail placement, and Mari’s idea that making reveals structure.
- Choose Crate chair if you want to study broad planes, lap/overlap logic, screw placement, and how spacing creates a composition.
Both are visually simple enough to expose every mistake. Neither requires decorative joinery to hide poor stock, inconsistent parts, or an assembly that drifted out of square.

SFMOMA records its Crate chair as pine and publishes overall object dimensions, which are useful for recognizing the museum object but not sufficient to build it 2. Use the controlling drawings for parts and fasteners.
Make a project packet
Before the lumber run, assemble:
- the authorized plan or book pages;
- a stock list copied in your own table, with units shown in every column;
- one exploded sketch with part letters;
- an assembly-order list;
- a fastener test block; and
- a page for deviations.
Do not transcribe dimensions from a social-media photo. Do not combine one maker’s cut list with another edition’s drawing. If you use Self-assembly’s public Sedia 1 guide as a shop aid, keep it beside the controlling Corraini publication and identify any derivation or unit conversion 3.
Unit-conversion discipline
If the source uses millimeters and your stock is sold in nominal inches, preserve the design dimensions in millimeters on the master list. Add separate columns for actual available stock and your planned change. Never overwrite the source number with a rounded purchase size.
For a conversion check:
Carry enough decimals to choose material, then build repeated parts from one physical setup or story stick. Decimal precision does not make a home-center board the same thickness as the European stock in the plan.
Quick check
A 3/4-inch board isn’t a 20 mm board; small repeated differences shift the geometry, so record every deviation.
Select softwood like structural material
At the rack, sight each board along its face and edge. Reject severe twist, deep checks, loose knots, crushed edges, and grain runout through a narrow member. A small crown may be manageable; twist infects every intersection. Put the straightest, clearest material into long members and areas near fasteners.
Estimate yield by laying part lengths along a sketch of each board. Include saw kerf, end checking, and a trimming allowance. The quick calculation is:
but the sketch still controls because knots are not evenly distributed. Buy enough extra to reject one poor structural part without stopping the weekend.
Let material acclimate until repeated width or moisture readings are stable enough for the project. Stack flat with support. These chairs tolerate modest softwood movement; they do not benefit from assembling wet boards that shrink away from every intersection.
Mill one vocabulary
Crosscut one test end and confirm the saw produces square cuts in both directions. Mill or select all repeated widths and thicknesses before cutting the full set to length. Label each part immediately.
For Sedia 1, preserve the exact board relationships the plan uses. For the Crate chair, broad planes make inconsistent width obvious; use a fence, stop, or paired layout rather than measuring each board independently.
Mnemonic: same stock, same setup, same story. Repeated parts come from one stock decision, one machine/hand-tool setup, and one story stick.
Stop gate: all parts are labeled, repeated members agree when stacked, reference faces are marked, and the offcut reserved for fastener tests matches the real stock.
Test the fastening system
Softwood splits near ends. Build a test joint with the actual fastener, pilot bit, countersink, hammer/driver, and grain orientation. For nails, a blunted point or pilot hole may reduce splitting depending on nail and stock. For screws, test pilot and clearance holes separately; the upper part should be drawn to the lower without thread jacking the gap open.
Keep fasteners away from visible defects and respect the plan’s placement. More fasteners can create a perforation line and more opportunities to split. Set driver torque on the test block. A screw head buried by force has already crushed the fibers meant to hold it.
Safety is ordinary and nonnegotiable: clamp parts rather than holding them near a saw or drill, wear eye and hearing protection, keep the supporting hand outside the fastener path, and check for protruding points after every assembly stage.
Quick check
A screw head buried by force has already crushed the fibers meant to hold it.
Dry sequence before final assembly
Lay the chair on a flat surface or assembly board. Mark centerlines and offsets from one datum. Use spacer blocks for repeated gaps rather than a tape at every location.
For each major stage:
- place and clamp the parts without fasteners;
- compare diagonals where a rectangular assembly should be square;
- check the plan’s intended angle with a bevel or template;
- drill/pilot only after both references agree;
- install enough fasteners to hold, recheck, then complete the pattern.
If diagonals differ, half their difference is not automatically the amount to push one corner; it is simply evidence of skew. Ease the frame while watching both diagonals and the intended offsets. On an intentionally nonrectangular chair, use the plan’s centerline, full-size profile, or dedicated squaring points instead.
Stop gate: the subassembly lies flat, its reference spacing agrees with the drawing, and no fastener is being asked to pull a warped part into place.
Load-test before use
Before anyone sits on a new chair, inspect every joint, then load the seat with sandbags or weights in steps, standing clear. Unload and look after each step; stop and diagnose if anything moves, cracks, ticks, or stays bent. A first chair that passes is fine to use and watch; an experimental one-off deserves a second look after some months of use.
Quick check
Stop and diagnose if anything moves, cracks, ticks, or stays bent.
Finish the lesson, not just the chair
Choose a finish compatible with ordinary use and the source’s design character. Test it on offcuts, including end grain and fastener heads. Follow the maker’s ventilation and cure instructions.
Photograph the completed chair from front, side, three-quarter, and underside. Add three notes to the chair log:
- where the structure became clear only during assembly;
- which repeated setup saved the most time; and
- one change you would make without compromising the controlling design.
That last note is Mari’s invitation in practical form: making is not obedience to an image. It is a disciplined way to understand why the image stands up.
Lesson complete
Nice work.
Sources for this lesson
- 1Enzo Mari. Autoprogettazione?. Corraini Edizioni. verifiedPublisher page for Mari's 1974 self-construction exercise and its drawings, correspondence, and commentary. Cited at: publisher description.
- 2Gerrit Rietveld. Crate Chair, ca. 1935. San Francisco Museum of Modern Art. verifiedMuseum object record identifying the pine chair and its overall dimensions; not a construction plan. Cited at: object record.
- 3Sedia 1 Chair. Self-assembly. verifiedPublic project page indexing a derived Sedia 1 cut list and assembly guide; use alongside the controlling Corraini publication. Cited at: project page.
Further reading
- H. H. Windsor. Mission Furniture: How to Make It, Part I. Project Gutenberg. 1912. verifiedIllustrated public-domain-in-the-USA text with measured drawings, stock lists, and construction sequences for several chairs. Historical methods, finishes, and safety assumptions require modern review.