Dovetails
The joint that holds a box together mechanically: through and half-blind dovetails, tails-first layout at 1:6 or 1:8, sawing to the line, chopping waste, transferring to the pins, and fitting.
- 4 min
- 7 steps
- 3 questions
- Lesson 39 of 160
In this lesson
- Anatomy
- Lay out the tails
- Saw and chop the tails
- Transfer to the pins
- Saw, chop, and fit the pins
- Practice
- What to take from this
Picking up where you left off.
Anatomy
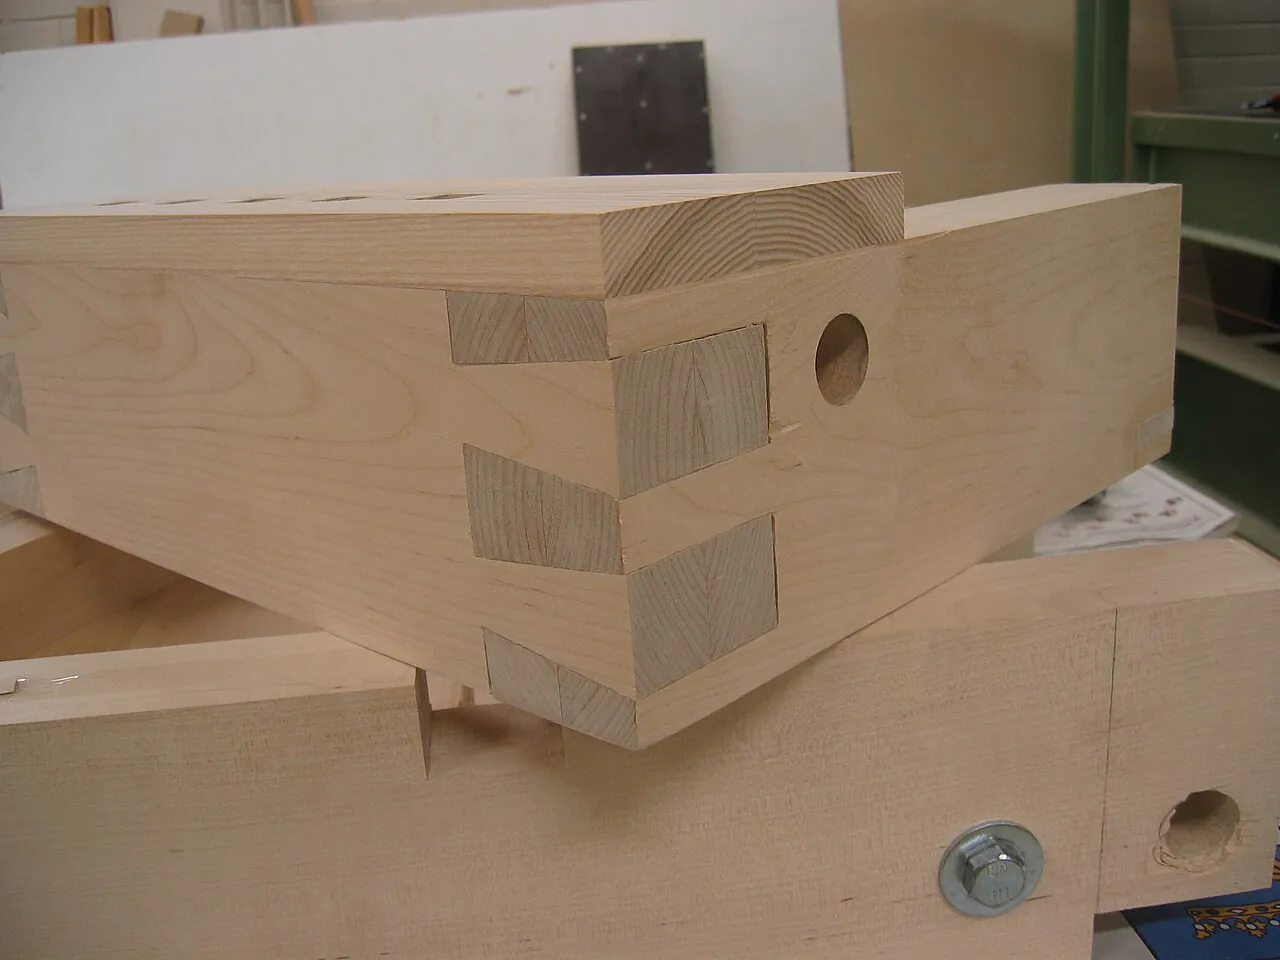
A dovetail joint interlocks two boards at a corner. Tails on one board flare outward like a dove’s tail; pins on the other fit between them. Because of the flare, the tail board can’t be pulled away from the pin board in one direction, even without glue. That’s why dovetails hold chests, drawers, and carcasses together for centuries.

- Through dovetails show on both faces: chests, boxes, carcass corners.
- Half-blind dovetails hide the joint on one face behind a lap: drawer fronts.
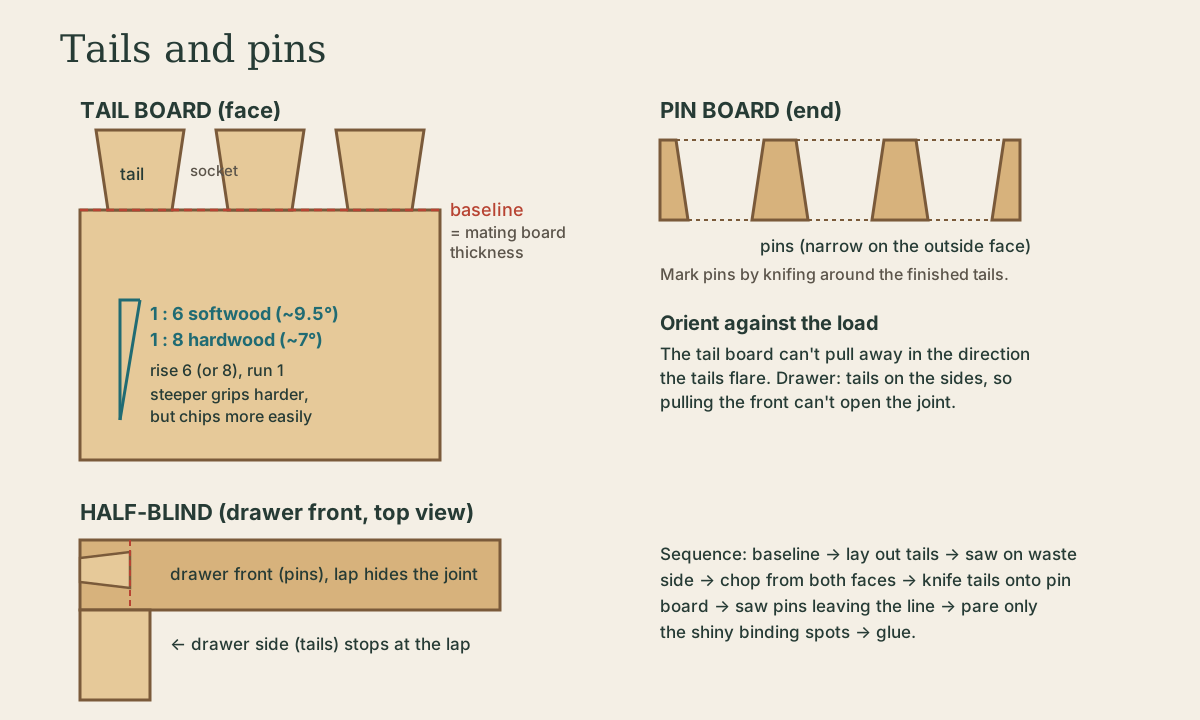
- Slope: the traditional rule of thumb is 1:6 (about 9.5°) for softwood and 1:8 (about 7°) for hardwood. Steeper grips harder but chips more easily; shallower looks finer.
- Orientation: put the tails on the part that would otherwise pull away. In a drawer, tails go on the sides, so pulling the front doesn’t separate it. In a chest, tails usually go on the front and back, pins on the ends (or the reverse for a carcass that hangs).
Quick check
The rule of thumb is 1:6 (about 9.5°) for softwood and 1:8 for hardwood. Steeper slopes grip harder but chip more easily; modern glues make the exact choice mostly visual.
Quick check
A dovetail resists separation in one direction. Orient it against the load: pulling the drawer front.
Lay out the tails
Most hand-tool workers cut tails first, then mark the pins from them:
- Square and mark both boards’ ends; the ends must be square and true.
- Baseline: set a marking gauge to the thickness of the mating board (plus a hair) and scribe around the end of each board, both faces.
- On the tail board, mark half-pins at each edge and space the tails between them with dividers. Narrow pins and wide tails are traditional for hand-cut work.
- Mark the slopes with a dovetail marker or sliding bevel, square them across the end, and mark the waste with an X.
Quick check
Set a marking gauge to the mating board’s thickness (or a hair more) and scribe the baseline on both faces.
Saw and chop the tails
- Clamp the tail board upright in the vise. Saw on the waste side of each line, straight down to the baseline with a dovetail saw, watching the line on the face and the end.
- Saw off the half-pin corners.
- Remove waste between tails with a coping saw, close to the baseline, or chop it out.
- Chop to the baseline with a chisel: put the edge in the knife-scribed baseline, chop halfway through, flip, and chop from the other side, so neither face breaks out.
Transfer to the pins
- Clamp the pin board upright in the vise, flush with a plane laid on its side at bench height.
- Lay the tail board on it, aligned at the baseline and edges.
- Knife around the tails onto the end of the pin board with a marking knife.
- Square the lines down to the baseline on both faces and mark the waste.
Saw, chop, and fit the pins
- Saw on the waste side of the knife lines, leaving the line - this is where accuracy matters most.
- Remove the waste with a coping saw and chop to the baseline from both faces.
- Test fit: tap the boards together partway with a mallet over a block. Look for shiny burnished spots where it binds; pare only those, lightly.
- Assemble fully with glue. A good joint goes together with a few firm taps and closes tight at the baseline.
Small gaps can be shimmed with glued slivers; bigger ones teach you to saw closer to the line next time. Pre-industrial dovetails often show overcut saw kerfs past the baseline, a sign of speed rather than carelessness 1.
Playback is optional. If the player is unavailable, open the video at its source.
Practice
Cut a practice joint in pine every day for a week, and look at each one closely. Dovetails are a matter of sawing straight to a line, which comes quickly with repetition.
What to take from this
Dovetails interlock tails and pins so the joint resists pulling apart in one direction; orient the tails against the load. Use about 1:6 in softwood and 1:8 in hardwood. Scribe baselines at the mating thickness, lay out and saw the tails on the waste side, chop from both faces, knife the tails onto the pin board, saw the pins leaving the line, and pare only the binding spots for a tight fit.
Lesson complete
Nice work.
Sources for this lesson
- 1Joshua A. Klein. The Foundations Course (Apprenticeship Series). Mortise & Tenon Magazine. verifiedHand-tool furniture making from pre-industrial originals - tool selection, sharpening, lumber processing, mortise and tenon, through and half-blind dovetails, nailed rabbets, dados, and shellac and milk paint finishes.
Further reading
- Christopher Schwarz. The Anarchist's Tool Chest. Lost Art Press. 2011. verifiedArgues a kit of fewer than 50 good hand tools can build almost anything; explains how to choose each tool, new or antique, and how to build a chest to hold them. Free PDF from the publisher.