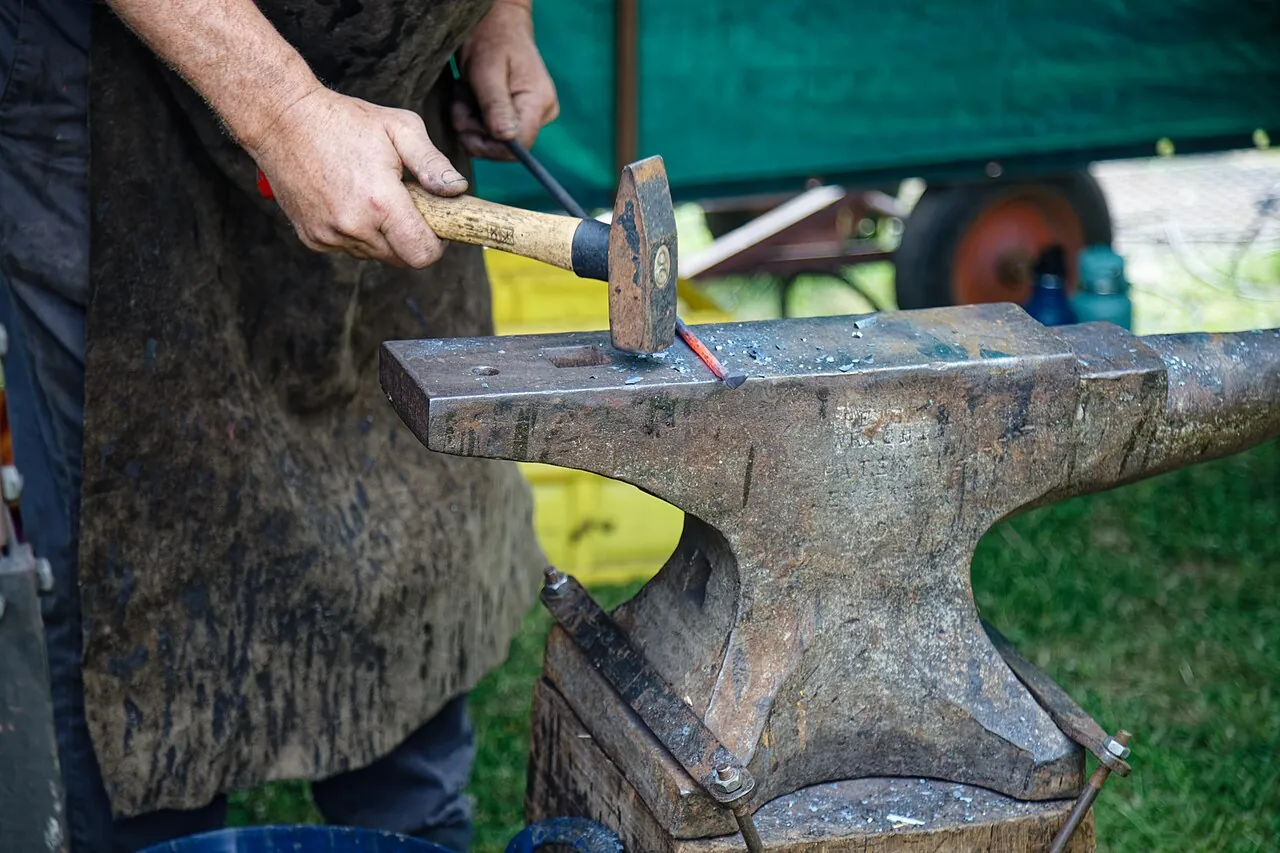
Anvils, Hammers, and Tongs
The smith's core kit: reading an anvil's parts and testing a used one, setting it at the right height on a stump, choosing a hammer and learning to swing it, tongs that actually hold the work, and the vise, hardy tools, and quench bucket.
- 4 min
- 6 steps
- 3 questions
- Lesson 84 of 204
In this lesson
- The anvil
- Setting up
- Hammers
- Tongs
- Everything else
- What to take from this
Picking up where you left off.
The anvil
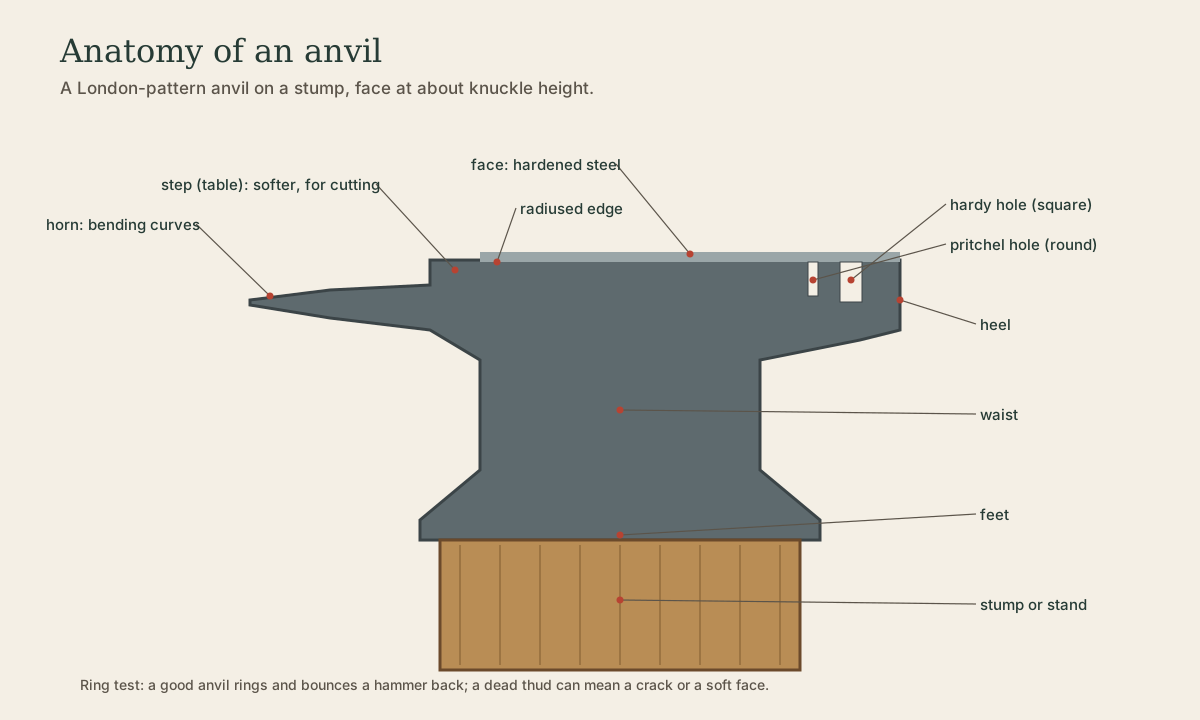

| Part | Use |
|---|---|
| Face | hardened steel working surface; most work happens here |
| Edges | one or two radiused sections for bending and drawing without cutting the stock; sharp edges for crisp shoulders |
| Horn | bending curves and rings, drawing out |
| Step (table) | softer area for cutting on, so chisels don’t hit the hardened face |
| Hardy hole | square hole for hardy tools: hot cut, bending fork, swage and fuller bottoms |
| Pritchel hole | round hole for punching through and bending small rod |
Buying used: tap the face with a hammer - a good anvil rings and bounces the hammer back (drop a ball bearing: it should rebound most of the height). A dull thud suggests a crack, delamination, or a soft face. Chipped edges and some sway are workable; avoid welding repairs by amateurs and cast-iron “ASOs” (anvil-shaped objects) that dent.
Weight: 100-200 lb is a good working anvil; a heavy block of solid steel works too.
Quick check
The round pritchel hole is for punching through and bending small stock.
Setting up
- Height: face at about knuckle height with your arm hanging at your side.
- Stump or stand: a solid section of hardwood log, a steel stand, or a box filled with sand. The anvil must not walk or ring loudly; chain it down or nail strap around the feet, and silicone or magnets reduce ring.
- Arrangement: forge, anvil, and quench bucket in a tight triangle so steel loses little heat between them.
Quick check
Too high and blows lose power; too low and your back suffers.
Hammers
- A cross-peen or rounding hammer of 2-2.5 lb (900-1,100 g) is the standard starting hammer. The peen spreads metal in one direction; the face draws and flattens.
- Hold it near the end of the handle with a relaxed grip; let the hammer drop and rebound, swinging from the elbow and shoulder rather than the wrist.
- Accuracy beats force. Hit flat; a tilted face leaves marks.
- Dress the face: slightly crowned with rounded edges, polished, so it doesn’t leave sharp dents.
Tongs
Tongs must fit the stock: jaws gripping along their length, not just at the tip 1.
| Tongs | For |
|---|---|
| Flat jaw | flat bar |
| V-bit (wolf jaw) | square, round, and octagonal stock |
| Bolt jaw | holding a bar by its end with an upset or a head |
| Pick-up | grabbing anything |
Heat the jaws and reshape them around the stock to fit. A ring or “rein clip” slid over the handles locks the grip. Many smiths forge their own tongs as an early project.
Short work is often held without tongs by forging on the end of a longer bar and cutting off later.
Quick check
Jaws should grip the stock along their length; adjust them hot to fit.
Everything else
- Leg vise (post vise) mounted solidly to a bench and the floor: takes hammering.
- Hardy tools: hot cut, bending fork, fullers and swages.
- Punches and drifts (next module).
- Quench bucket of water for cooling tongs and tools.
- Safety gear: safety glasses always, hearing protection, leather apron, and cotton or wool clothing - synthetics melt.
What to take from this
Learn the anvil’s face, edges, horn, step, hardy hole, and pritchel hole; test a used anvil for ring and rebound and set it at knuckle height on a solid stump. Start with a 2-2.5 lb cross-peen hammer swung from the shoulder, accurate rather than hard. Fit tongs to the stock so work never slips, and wear glasses, hearing protection, and natural fibers.
Lesson complete
Nice work.
Sources for this lesson
- 1John Lord Bacon. Forge-Practice: Elementary. John Wiley & Sons. 1908. verifiedPublic-domain trade-school text from the Lewis Institute; fire building with coking coal, welding heat and fluxes (sand, borax, sal ammoniac), upsetting, drawing out, bending, punching, and tool-steel hardening and tempering colors (430 F pale yellow to 570 F blue, temper gone near 650 F).
Further reading
- Robert H. Harcourt. Elementary Forge Practice. Stanford University Press. 1917. verifiedPublic-domain trade-school text with step-by-step exercises in drawing out, bending, twisting, and welding.