Edges: Beveling, Sanding, and Burnishing
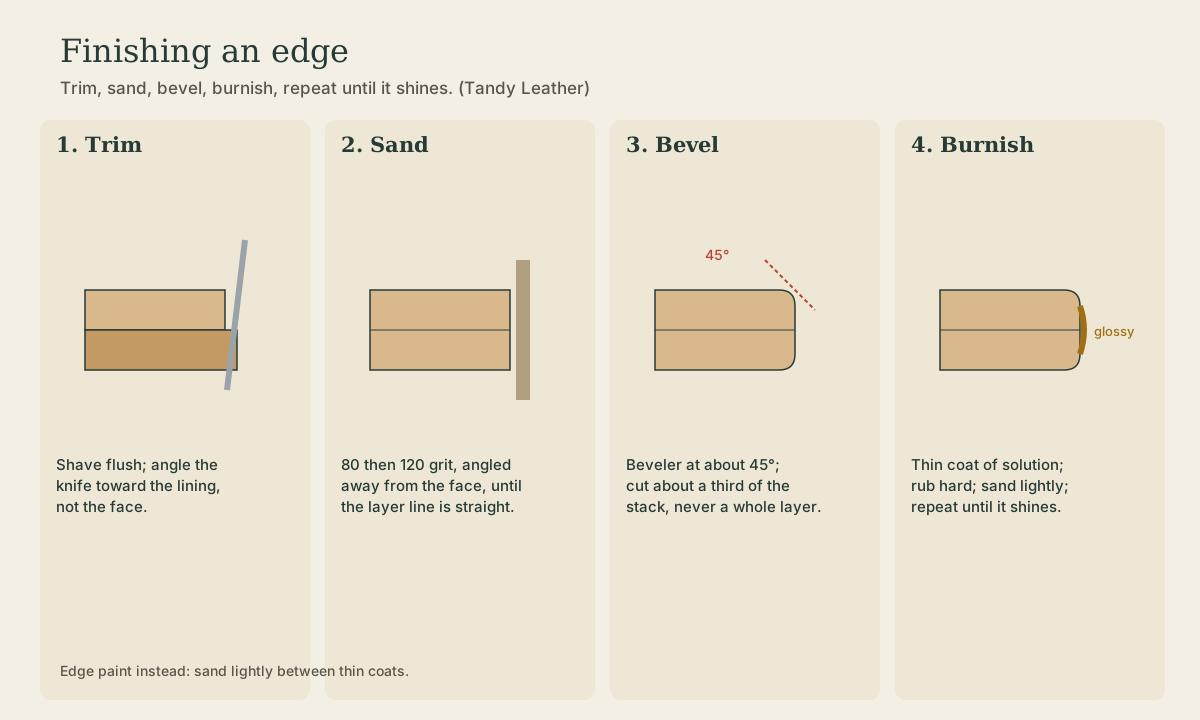
Nothing marks good leatherwork like a smooth, glossy edge. The four steps: trim the layers flush, sand them true, bevel the corners without cutting through a layer, and burnish with water or solution until the fibers compress to a shine. Plus the alternative of edge paint.
- 3 min
- 7 steps
- 2 questions
- Lesson 101 of 204
In this lesson
- Trim
- Sand
- Bevel
- Burnish
- Or paint it
- Try it
Picking up where you left off.
A cut leather edge is a raw cross-section of fibers: fuzzy, pale, and prone to fraying. Finishing it takes a few minutes and makes a project look professional. One commenter on Tandy’s tutorial put it well: a fine edge can save a project that is otherwise ordinary 1.
Trim
Start by trimming the edge, especially where two layers have been glued and stitched, as flush as you can get it, so there’s less sanding later. Angle the knife slightly so you’re cutting toward the lining, not into the face of the project, and keep the blade sharp by stropping 1.
Sand
Sand the edge with 80-grit, then 120-grit sandpaper or a sanding stick. Always angle the sandpaper slightly away from the face, so you don’t shrink the front of the piece. Sand until the line between the layers is visible and perfectly straight 1.
Bevel
Run an edge beveler along the corners of the edge, front and back, holding it at about 45 degrees. It should cut only about a third of the stacked thickness and never through an entire layer, or the layered edge will crush when you burnish it. The goal is a nicely rounded edge 1. Keep bevelers sharp by stropping too 1.
Quick check
Cut through a layer and it crushes when you burnish.
Burnish
Apply a thin coat of burnishing solution (or just water), then rub the edge briskly with a wood or canvas burnisher to compress the fibers. Then sand lightly, apply more solution, and burnish again. Repeat until the edge is smooth and reflective “like glass” 1. On a large piece, burnishing solution brushed onto the flesh side also locks down the fuzzy fibers there 1.
Quick check
Apply solution, rub, sand lightly, and repeat.
Or paint it
Edge paint is an alternative. Follow the same trimming and sanding steps but skip the burnishing solution; some people don’t bevel painted edges. Apply thin coats with a roller pen, an edge paddle, or a wool dauber, sanding lightly between coats until the edge is smooth 1.
Playback is optional. If the player is unavailable, open the video at its source.
Try it
On your saddle-stitched practice piece, finish one edge all the way: trim, sand, bevel both corners, and burnish three rounds. Leave another edge raw. Compare them after a week of handling.
Lesson complete
Nice work.
Sources for this lesson
- 1Tandy Skills: Edge Finishing Tutorial. Tandy Leather. verifiedTrim edges as close as possible, angling the knife slightly toward the liner, not the face; strop blades. Sand with 80-grit then 120-grit, angled away from the face, until the lamination line is straight. Bevel: cut only about one-third of the stacked leather, never through an entire layer, holding the beveler at about 45 degrees. Burnish: thin coat of burnishing solution, run the burnisher along the edge to compress fibers, sand lightly, repeat until smooth and reflective. For edge paint, skip burnishing solution and sand lightly between coats.