Kolrosing
Scandinavian line decoration: incising fine lines with the knife tip and rubbing in charcoal, coffee, or bark powder, then sealing with oil. Tools, the cutting grip, curves and lettering, and where kolrosing goes on spoons, cups, and handles.
- 4 min
- 6 steps
- 3 questions
- Lesson 10 of 204
In this lesson
- What it is
- Wood and tools
- Cutting the line
- Coloring and sealing
- Where it goes
- What to take from this
Picking up where you left off.
What it is
Kolrosing is Scandinavian line decoration: fine lines incised into wood and filled with dark powder - charcoal, coal dust, coffee grounds, graphite, or ground bark - or with colored wax 1. It goes back at least to the Viking Age 1. Wille and Jögge Sundqvist in Sweden and Judy Ritger in the United States have done much to keep it alive 1.

On spoons, kuksas, knife handles, and boxes, kolrosing adds initials, dates, borders, plants, and animals without weakening the piece the way deep carving can.
Quick check
The powder lodges in the cut; oil then seals it.
Wood and tools
- Wood: pale, fine-grained, smooth: birch, maple, basswood, holly. On coarse or dark wood the line gets lost or follows the grain.
- Surface: dry and smooth. Knife-finished or scraped surfaces take lines cleanly; avoid oiling first, since oil keeps the powder from sticking.
- Knife: a small, very sharp blade with a fine point. Dedicated kolrosing knives have a short blade that’s sharpened only near the tip; a sloyd knife or a craft knife works to start.
- Color: finely ground charcoal, used coffee grounds dried and powdered, or cinnamon for a warm brown.
- Finish: a drying oil such as raw linseed or walnut.
Quick check
On coarse or dark wood the line gets lost or follows the grain.
Cutting the line
Kolrosing is drawing with a blade:
- Draw the design lightly in pencil.
- Hold the knife like a pencil, the blade tilted slightly, with the hand resting on the work for control.
- Pull the tip along the line, cutting a shallow V a fraction of a millimeter deep. Some carvers cut each line twice at opposing angles to open the V a little.
- Rotate the work, not your hand, around curves. Short strokes join smoothly better than one long wobbly one.
- Cross-grain lines cut cleanly; lines with the grain can wander, so take extra care.
Playback is optional. If the player is unavailable, open the video at its source.
Quick check
Kolrosing is drawing with a blade; deep cuts look coarse and fill unevenly.
Coloring and sealing
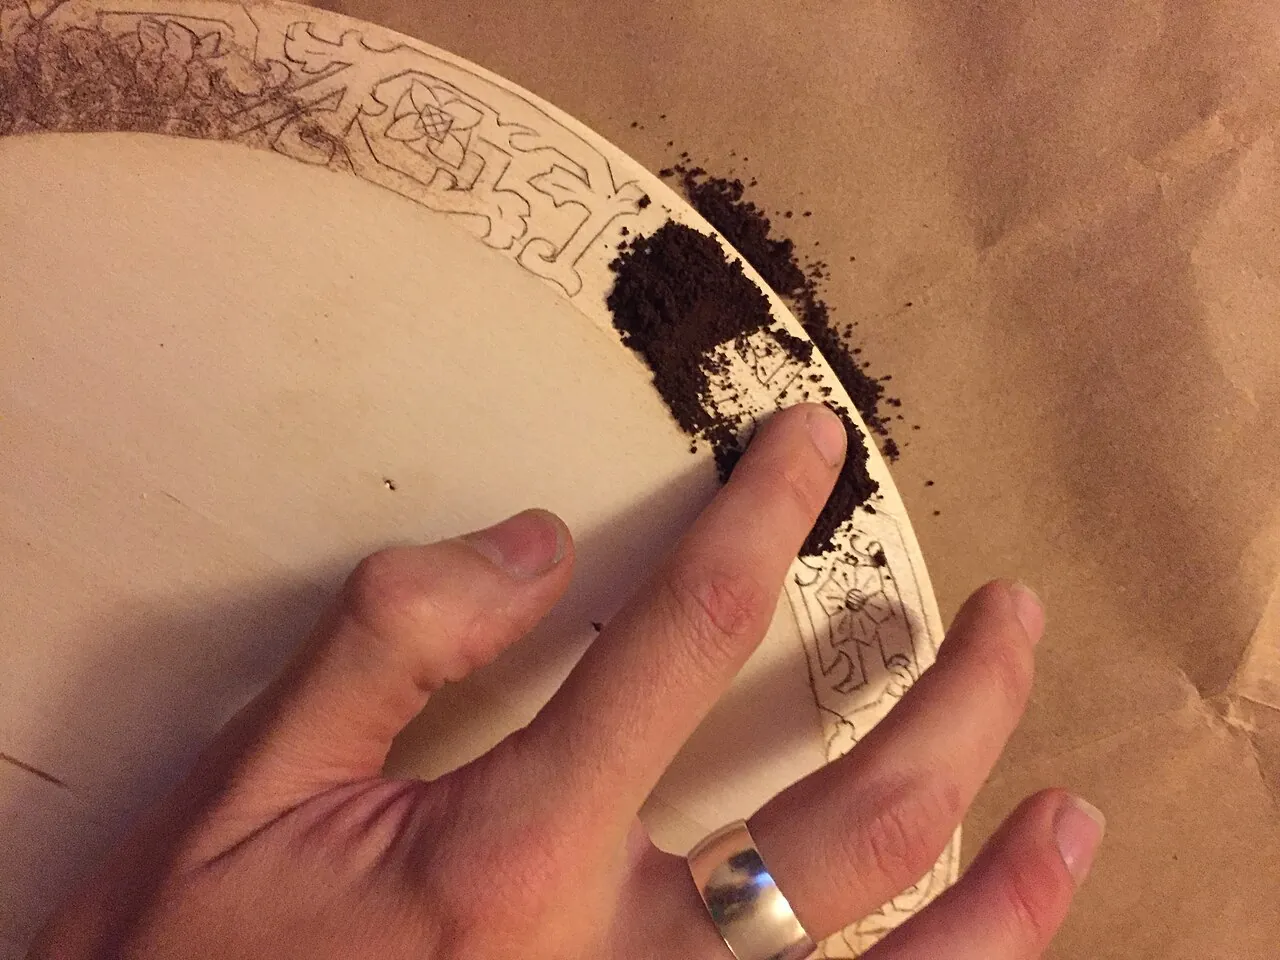
- Rub the powder into the lines with a fingertip or cloth.
- Wipe or lightly scrape the surface clean; the color stays only in the cuts.
- Oil the piece. The oil darkens the line, locks the powder in, and protects the wood. Wipe off excess and let cure.
Lines that look faint after oiling can be recut and recolored.
Where it goes
Initials and a date on the back of a spoon handle; a border around a kuksa rim; a running vine along a knife handle; a maker’s mark on a bowl foot. Sundqvist’s woodenware combines carving, kolrosing-style lines, and paint in the Västerbotten tradition 2.
Playback is optional. If the player is unavailable, open the video at its source.
What to take from this
Kolrosing cuts fine, shallow lines with a knife held like a pencil, rubs charcoal, coffee, or bark powder into them, wipes the surface clean, and seals everything with oil. Use pale, fine-grained, dry wood such as birch or maple, rotate the work around curves, and keep cuts shallow. It’s ideal for initials, dates, and borders on spoons, cups, and handles.
Lesson complete
Nice work.
Sources for this lesson
- 1Kolrosing. Wikipedia. 2026. verifiedScandinavian technique of incising fine lines and rubbing in dark powders (charcoal, coffee, bark) or colored wax, dating back at least to Viking times.
- 2Jögge Sundqvist. Slöjd in Wood. Lost Art Press. 2018. verifiedPublisher excerpt (PDF) of the English translation of the Swedish classic; butter knife, spoons, bowls, sheath, hooks, and painted decoration in the Västerbotten tradition.