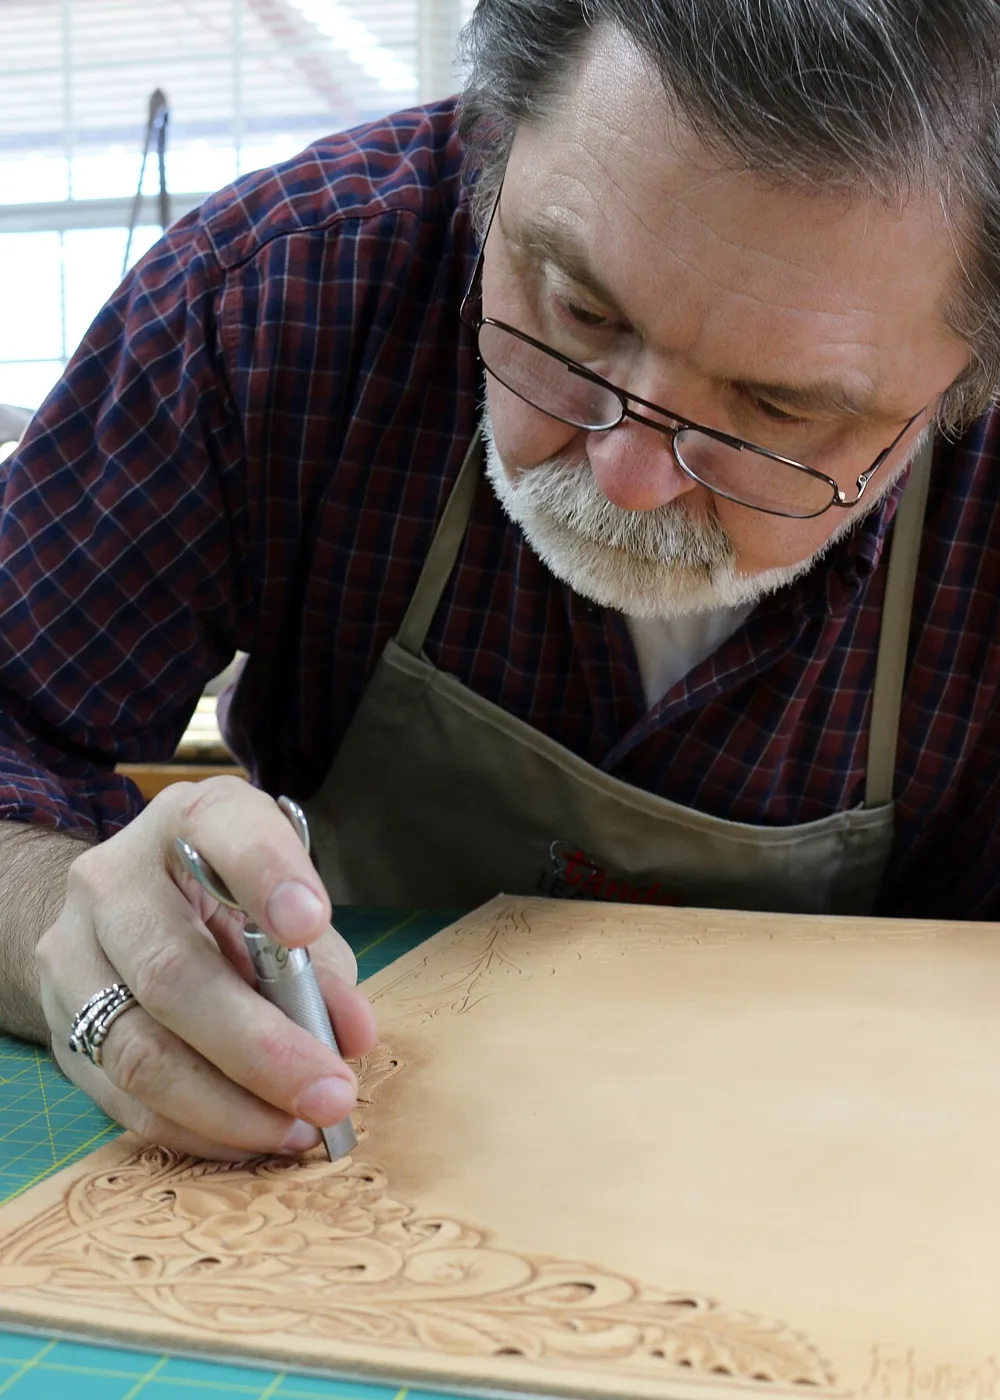
Stamping and Carving
Decorating vegetable-tanned leather: stamping, the easy start, where a single confident mallet strike presses a pattern into cased leather; and carving in the Western floral Sheridan style, where a swivel knife cuts the outlines and bevelers, pear shaders, backgrounders, and seeders build depth. The sequence as taught by master carver Jim Linnell.
- 3 min
- 5 steps
- 2 questions
- Lesson 104 of 204
In this lesson
- Stamping
- Carving, Sheridan style
- Practice
- Try it
Picking up where you left off.
Stamping
Stamping is the easiest way in: you set a shaped metal stamp on damp leather and strike it with a mallet, leaving a crisp, repeatable impression. It’s good for borders, backgrounds, and accents on belts, wallets, and covers 1. Work on a solid surface, ideally a slab of granite or marble, so the blow doesn’t bounce 1. Case the leather first; the stamped impression sets cleanly and lasts 1. Aim for one confident strike rather than several taps, and keep your force consistent so a pattern stays even 1.
Carving, Sheridan style
Carving goes further: you cut into the surface and then shape the leather around the cuts so the design stands up, almost three-dimensional. Carving is the foundation of traditional Western floral leatherwork, and it works best on vegetable-tanned leather because that holds detail 1. The best-known style is Sheridan style, with its dense, swirling flowers and leaves. Tandy’s video course with master carver Jim Linnell breaks it into steps 3:
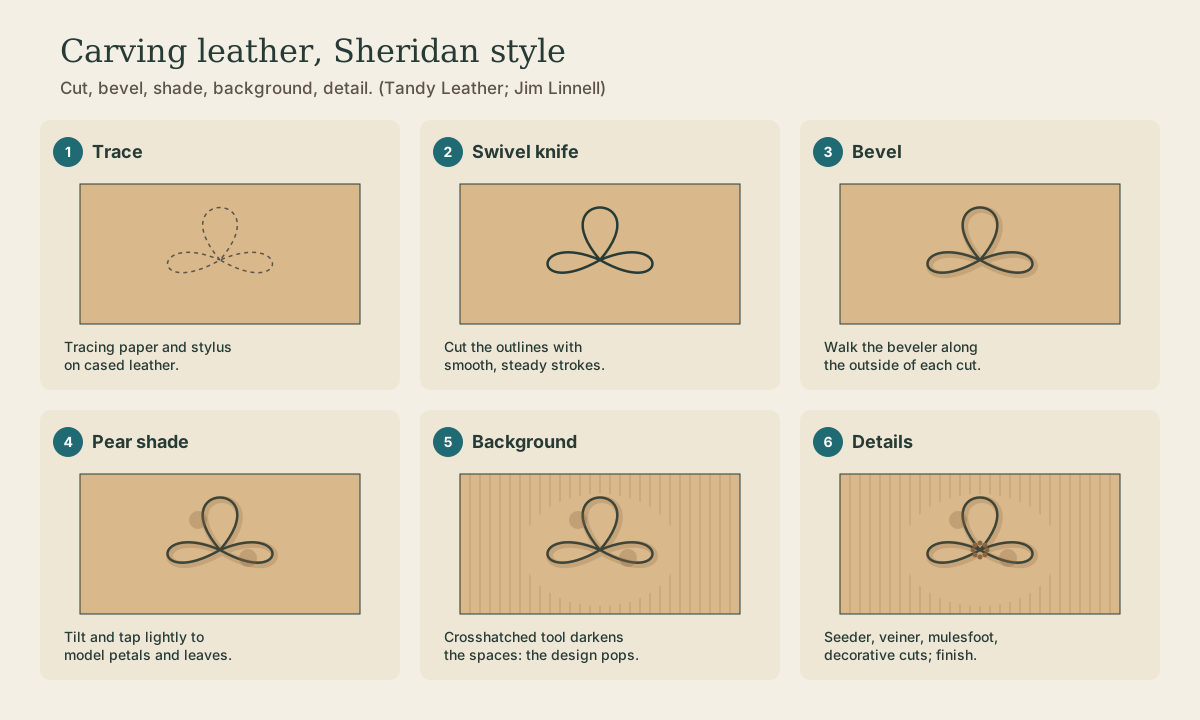
- Trace. Draw the design on tracing paper, lay it on the cased leather, and trace over the lines with a stylus to transfer them 3. (A 1929 manual gives the same advice: trace through paper rather than using carbon paper, and keep the original pattern for reuse 4.)
- Cut. Cut the outlines with a swivel knife, a knife whose blade turns in a barrel so it can follow curves, keeping it sharp 3 1.
- Stamp the centers and pear shade. Stamp flower centers, then use a pear shader, tilting it and tapping lightly, to give petals and leaves a rounded, shaded form 3.
- Bevel. Walk a beveler along the outside of each cut, striking it with the mallet, to press the leather down beside the line so the design stands up. Linnell also uses undercut bevelers 3.
- Background and details. Texture the spaces between with a backgrounder, which darkens and compresses them so the design pops; add seeder dots, veiner and mulesfoot marks on leaves, and decorative swivel-knife cuts 3.
- Finish. Dye and seal; Linnell’s final lesson covers the traditional Sheridan-style finish 3.

Quick check
Bevelers, shaders, and backgrounders then build depth around those cuts.
Quick check
The crosshatched face compresses and darkens the background.
Practice
Carving is a skill built over time 1. Start with straight lines and simple curves with the swivel knife on a scrap, then a single leaf, then a flower. Keep the leather cased as you go; when tools stop leaving clean impressions, it’s probably drying out 2.
Playback is optional. If the player is unavailable, open the video at its source.
Try it
Case a 4-inch square of 6–8 oz veg-tan and stamp a border around it with any stamp you have, one strike per impression. Then trace a single simple leaf in the middle, cut it with a swivel knife, and bevel around it. You’ve done the core of Sheridan-style carving.
Lesson complete
Nice work.
Sources for this lesson
- 1Decorative Leather Techniques: Stamping, Carving, and Embossing Explained. Tandy Leather. verifiedStamping: hammering shaped tools into cased leather on a solid surface such as granite; beginner friendly. Carving: cutting lines with a swivel knife, then bevelers, backgrounders, and modeling tools, best on vegetable-tanned leather; the foundation of Western floral work. Embossing raises designs with plates, presses, heat, or molds. Techniques combine.
- 2How to Case Leather for Tooling and Wet Forming. Tandy Leather. verifiedCasing adds and controls moisture in vegetable-tanned leather: too dry resists cutting and stamping; too wet is mushy and won't hold impressions. Dampen lightly with sponge or sprayer; let it absorb a few minutes as the surface returns to its natural color; ready when cool and firm but takes a slight impression; rewet as needed. For long sessions, wrap dampened leather in plastic for hours or overnight, then air slightly. For wet forming, submerge 30 seconds to a minute by thickness, let it sit until the surface color returns and it's flexible, shape it, and secure until dry.
- 3Jim Linnell. Sheridan Style Carving (Parts 1-4). Tandy Leather, Leathercraft Library. verifiedPart 1: tracing, swivel knife cutting, stamping flower centers, pear shading. Part 2: pear shading, undercut bevelers and regular bevelers. Part 3: fine details with the seeder, veiner, mulesfoot, background, hair blade, and decorative swivel-knife cuts. Part 4: the Sheridan-style finish.
- 4F. R. Smith. Practical Leatherwork: A Textbook for Students and Craft Workers. Sir Isaac Pitman & Sons, London. 1929. verifiedBritish art-leather manual: leathers (Persians, skivers, calf, modelling hide), tools, thonging, sewing, press fittings, modelled leather. Glossary: skiving is (a) splitting a skin horizontally into thicknesses or (b) beveling an edge by paring; skived joints are almost invisible. Never use a steel straight-edge on modelling leather: the stain cannot be removed. Damp the leather all over, since a small damped patch dries leaving a stain at its edge; transfer designs through tracing paper with a hard pencil rather than carbon paper. Beginners' modelling tools: broad modeller and double-ended Dresden.