Shrink Pots
A lidded container from a green branch that clamps its own bottom as it dries: choosing a knot-free birch round, boring and hollowing to even 3/8-inch walls, cutting the groove, fitting a dry bottom, the lid, and decoration.
- 4 min
- 7 steps
- 3 questions
- Lesson 11 of 204
In this lesson
- How it works
- Choosing the round
- Hollowing
- The groove
- The bottom
- Lid and finish
- What to take from this
Picking up where you left off.
How it works
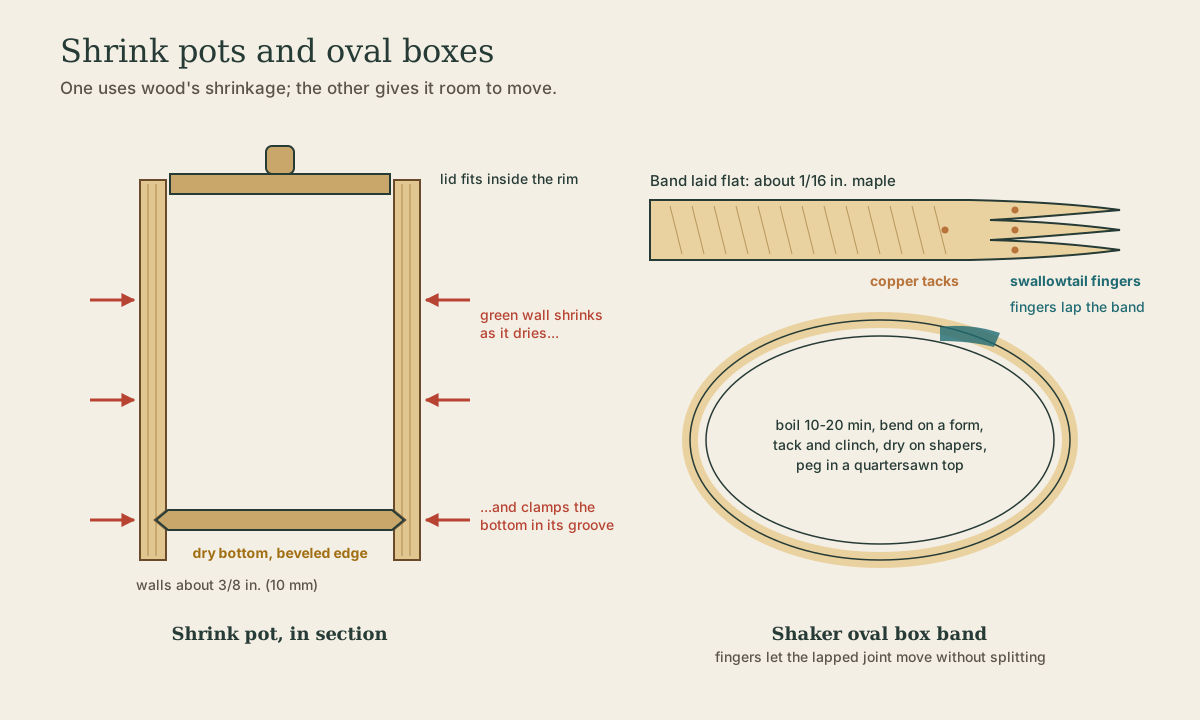
A shrink pot (shrink box) is a hollowed section of a green branch with a dry bottom set into a groove near its base. As the green wall dries, it shrinks around the circumference and clamps the bottom tight, no glue or nails 1. It’s wood movement - usually the enemy - put to work. Sundqvist’s sloyd decorates them with carving and paint 2.
Quick check
Wet-dry joinery: the green part shrinks, the dry part doesn’t.
Choosing the round
Hollowing
- Core the center with a T-auger, brace and bit, or a drill press and Forstner bits, removing the pith (which would crack) 1.
- Hollow to the layout line with a long-handled hook knife or gouges, leaving a little to smooth 1.
- Remove the bark and shape the outside with a drawknife or knife, staying just outside the outer line.
- Aim for even walls about 3/8 in. (10 mm) all the way around 1. Thick walls hold more water and shrink more; uneven walls crack.
Work in one session if you can, or keep the pot wrapped so it doesn’t start drying early.
Quick check
A thick spot shrinks more and stresses the thin spots around it.
The groove
Cut a groove inside the wall about 1/2 in. (12 mm) above the bottom edge, roughly 1/8 in. (3 mm) deep, with a V-shaped profile. A knife works; Byrd uses a scorp for the channel 1. Keep it level all the way around so the bottom sits flat.
The bottom
- Dry wood, ideally a thin board of the same or similar species, about 3/8 in. thick. A wet bottom would shrink along with the wall and loosen.
- Trace the inside of the pot at the groove and cut the bottom slightly oversize, so it must be sprung into the groove.
- Bevel its edge to match the V of the groove.
- Squeeze the green pot slightly oval and pop the bottom in. As the wall dries over the next days, it locks the bottom in.
Quick check
Only the wall should be moving.
Lid and finish
The lid is a dry disc that fits inside the rim, with a knob or a carved handle. Fit it after the pot has dried fully - fit it green and it’ll jam as the wall shrinks. Decorate the outside with chip carving, kolrosing, or paint while it’s still slightly damp or after it dries; oil inside and out with a drying oil.
Playback is optional. If the player is unavailable, open the video at its source.
What to take from this
A shrink pot uses wet-dry joinery: a hollowed green birch round with even 3/8-in. walls clamps a dry, beveled, slightly oversize bottom in a V-groove as it dries. Core out the pith, hollow with a hook knife, cut the groove level, spring the bottom in while the wall is wet, and fit the lid only once the pot is dry.
Lesson complete
Nice work.
Sources for this lesson
- 1Danielle Rose Byrd. How To Make Greenwood Shrink Pots. Fine Woodworking. 2018. verifiedFine Woodworking 273. Birch first choice (maple, alder, aspen also); knot-free rounds 5 in. or smaller; walls about 3/8 in.; a dry bottom in a groove in the wet wall.
- 2Jögge Sundqvist. Slöjd in Wood. Lost Art Press. 2018. verifiedPublisher excerpt (PDF) of the English translation of the Swedish classic; butter knife, spoons, bowls, sheath, hooks, and painted decoration in the Västerbotten tradition.