Shaping, Pine Tar, and Bindings
Days three and four: release the bent skis and check them, taper the thickness from the foot to tip and tail, true the sides, cut the groove, carve the tips, make the binding slot, then scrape, sand, and burn pine tar into the bases, and make leather strap bindings fitted to your boots.
- 6 min
- 9 steps
- 2 questions
- Lesson 141 of 204
In this lesson
- Release and check
- Taper the thickness
- True the sides
- The groove
- Tips and decoration
- The binding slot
- Pine tar
- Leather bindings
- Try it
Picking up where you left off.
Release and check
Unclamp the skis the next morning 1 and stand them base to base. They should touch at tip and heel with an even gap under the feet, no more than Richardson’s 3/4 inch of arch 2. Check that both tips rise about the same, and sight down each ski for twist.
Then check that each ski is true: drive a pin into the middle of the tip and the heel and stretch a thread between them; it should run down the center the whole way, or the ski will run in a curve 2.
Taper the thickness
Hansen’s students “cut, gouged, scraped and chiseled the bent ski blanks into something that resembled a pointed ski” 1. The aim is a ski about an inch thick under the foot, thinning smoothly toward tip and tail. Talbot tapered his to 5/16 inch at both ends 3:
- Mark the taper on both edges of the ski.
- Plane the two top corners down to the line first, then plane off the ridge left in the middle; finish with the grain 3.
- Behind a carved tip, saw down and chisel out the waste where the plane can’t reach 3.
Flex each ski by hand as you go. The whole front should be springy, helping the bend, not stiff up to a sharp kink 2. Thin both skis evenly so they flex alike.
True the sides
Plane the edges to the template line, square to the base. Richardson wanted edges sharp but not so sharp that they splinter, and warned against an exaggerated side curve, which makes it hard to grip with the edge on steep, hard snow 2.
The groove
The groove “steadies the ski for straight-running by preventing them from slipping sideways,” like a keel. Too deep and the ski won’t turn: Richardson once owned a pair with a groove about 3/8 inch deep that ran straight well and turned badly. His recommendation is about 1/12 inch deep and rounded 2.
Talbot routed a groove 3/8 inch wide and 1/16 inch deep, from 12 inches behind the tip to 12 inches from the tail, with a straight fence clamped along the ski, and tapered its ends with a chisel 3. By hand, a small round gouge or a round-soled plane cuts the rounded Telemark groove.
Quick check
Too deep a groove makes the ski hard to turn; Richardson’s ideal was about 1/12 inch.
The binding slot
Telemark skis have a narrow slit through the ski near the middle for the binding 2. A common way to place it: balance each ski on a finger and mark the balance point; put the slot there, with the boot toe just in front of it. Bore a row of holes through the ski from side to side, just below the top surface, and chisel them into one slot wide enough for the strap.
.jpg)
Pine tar
Pine tar “seals the bottom of the ski to prevent moisture from entering the wood,” and wax goes over it 1. Fangel’s method for regular pine tar 5:
- Prepare. Scrape the base clean and sand with 60 grit, then 100 or 120. Brush off the dust.
- Thin. Thin heavy tar with mineral spirits. Quick-drying ski tar is used as its can directs.
- Heat and brush. Warm the base with a heat gun or a torch with a flare tip, and brush on an even coat.
- Bubble. Heat the tar until it bubbles, working in 6- to 12-inch sections and taking care not to scorch the wood.
- Wipe. Reheat gently and wipe off the excess with a clean cloth. Wipe again until no tar comes off.
- Wax. Let the base cool, then wax.
Do this outdoors or with strong ventilation, with a fire extinguisher at hand. Richardson preferred plain varnish to black paint on the tops and sides, so the grain shows and the sun doesn’t melt snow onto the ski 2; tar or oil on the tops also works.
Quick check
Fangel works in 6-12 inch sections, then wipes until no tar comes off on the cloth.
Leather bindings
Hansen’s students sized bindings to their ski footwear. They soaked, cut, and punched a rawhide strap for the foot and cut and fitted tanned leather straps to hold the boot onto the ski 1:
- Toe strap. Thread a strap of soaked rawhide through the slot and shape it over the boot toe while it’s wet, so it dries to the shape of your boot. Punch holes and lace or buckle it.
- Heel strap. A tanned strap runs from the toe strap on one side, around the back of the boot above the heel, to the other side, with a buckle to adjust it.
- Fit. The boot should be held firmly at the toe and still lift freely at the heel.
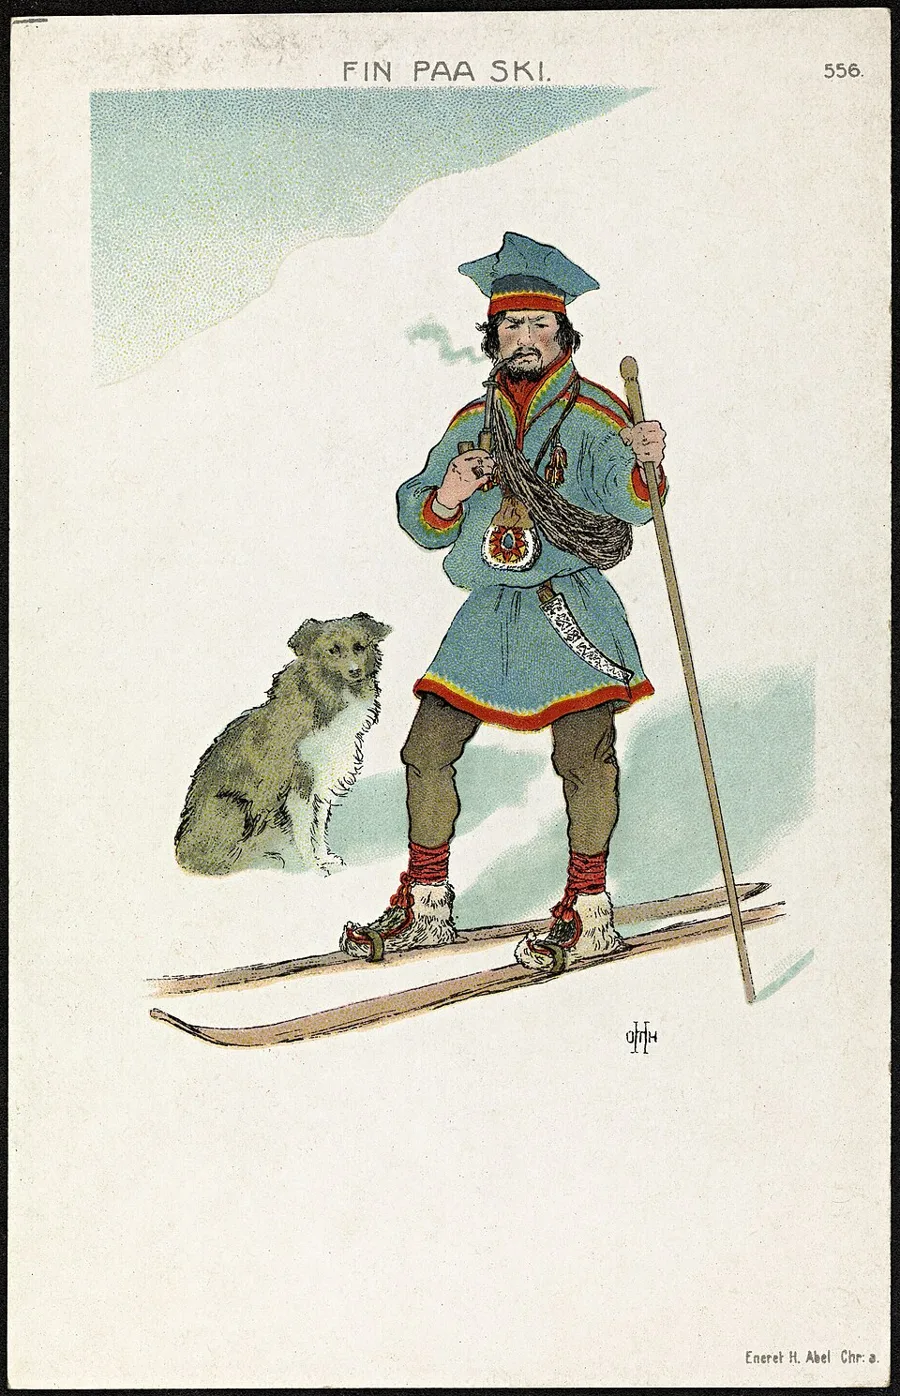
Older bindings were simpler still: Richardson pictures the skis of one of the first Telemark skiers to come to Christiania (Oslo), with a binding of twisted birch bark 2, and the postcard above shows a Sámi skier held by a single strap over each toe, with one long pole. North House lets students bring their own bindings instead 4.
Playback is optional. If the player is unavailable, open the video at its source.
Try it
Before tarring, ski the bare skis once on a few inches of snow, or just stand and flex on them on a carpet. Uneven flex or a ski that turns on its own shows up now, while you can still plane it.
Lesson complete
Nice work.
Sources for this lesson
- 1Greg Fangel. Traditional Birch Ski Making. Wooden Cross-Country Skis. verifiedAccount of Mark Hansen's 2 1/2-day North House class: pre-cut birch blanks soaked in a hot-water bath heated by a wood stove; molds adjusted, including camber under the foot; skis set overnight; then cut, gouged, scraped, and chiseled to a pointed ski, band saw allowed; decorative tips and lines; pine tar on the base, wax over it; Norwegian leather bindings: rawhide foot strap soaked, cut, and punched, tanned leather straps sized to the footwear.
- 2E. C. Richardson. The Ski-Runner. Published by the author, London. 1909. verifiedSkis about 7 1/2 ft long, 3 1/2 in wide, 1 in thick. Size: tip reaches the middle of the fingers with the hand held above the head. Arch no more than 3/4 in; bend rising 5-6 in, gentle like a bow; broader at the bend and heel; groove about 1/12 in deep and rounded (Swedish 1/8 in, rectangular); a narrow slit near the middle for the binding. Ash and hickory preferred; birch light but apt to be brittle; Norwegian birch skis impregnated with tar.
- 3Making Traditional Scandinavian Wooden Skis. The Argobuilder. verifiedA Wisconsin build: sized ground to wrist with the arm up; adjustable steam-bending form of 1x8 and 2x4 pine with removable cross braces, tip curve drawn steeper than wanted for springback; 1/4-in plywood template, side curve drawn with a batten; ash blanks 1 1/16 x 4 x 80 in, air-dried preferred; 3/8 x 1/16 in groove from 12 in behind the tip to 12 in from the tail; tapered to 5/16 in at tip and tail.
- 4Craft of Birch Ski Making: Making Your Own Set. North House Folk School. verifiedA custom pair of birch skis sized to height, weight, and use; wood grain, bending wood, bindings, use and handling. Materials $150-175 depending on leather bindings. 'Not a log to ski course': the instructor does preliminary steps. Optional tools: tape, pencils, spokeshave, low-angle block plane, carving knife, drawknife, V-tool. Instructor Ian Andrus; session Jan 14-17, 2027, day 1 4-8 pm, days 2-4 9-5.
- 5Greg Fangel. Wooden Ski Base Prep. Wooden Cross-Country Skis. 2011. verifiedScrape old wax and tar, sand 60 then 100-120 grit. Quick-drying pine tar follows its can; regular pine tar is thinned and heated in: heat the base, brush on, heat until it bubbles, reheat and wipe off the excess, in 6-12 in sections; wipe until no tar shows; glide wax after cooling. Sources: Finn Sisu, Akers Ski (Maine), any horse supply house.