Cutting, the Lined Yoke, and the Placket
Days one and two: lay out and cut every rectangle with the stripes running true, sew the doubled shoulder yoke so all its seams are enclosed, slash the center front and sew a placket with a box-stitched tab, and set a pocket. The order Folkwear's busserull instructions follow, with the seam allowances.
- 3 min
- 6 steps
- 2 questions
- Lesson 133 of 204
In this lesson
- Cut
- The lined yoke
- The placket
- A pocket
- Seam finishes
- Try it
Picking up where you left off.
A busserull goes together fast once it’s cut, because every piece is a rectangle. Take time over the cutting; the stripes will show any skew.
Cut
Prewash and press the fabric. Fold it with the stripes lined up, selvedges together, and square one end to a stripe. Then mark and cut:
- Body: one long piece folded at the shoulders (the Hadeland “poncho cut,” where the body is cut from one length of cloth) or separate front and back 1.
- Yoke: two, a shell and a lining, stripes running the same way as the body 1.
- Sleeves (2), gussets (2), collar band (2 halves or one folded strip), cuffs (2), placket and underplacket, a pocket, and the optional back belt.
Mark the center front and the bottom of the placket slash with chalk.
The lined yoke
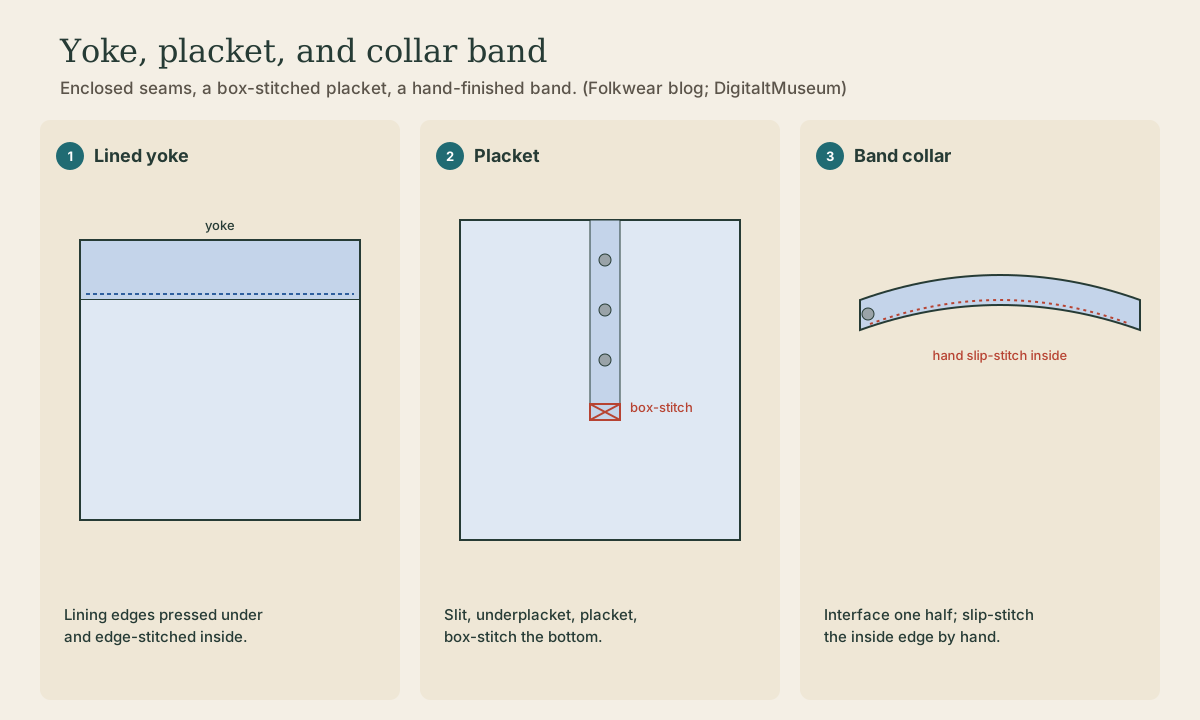
The Tromsø museum shirt has a doubled yoke 2. Folkwear’s construction encloses its seams 3:
- Sew the yoke shell to the back and front at the shoulders, right sides together.
- Press the lining’s long edges under 1/2 inch.
- Lay the lining inside, covering the seams, and edge-stitch it down from the outside, or slipstitch by hand.
- Stay-stitch the neck edge at 3/8 inch so it doesn’t stretch.
Quick check
Museum shirts have doubled yokes too.
The placket
The opening at the neck is a slash with a placket. Folkwear’s method 3:
- Cut the center-front slash to the marked depth.
- Sew the narrow underplacket to one side and the wider placket to the other at 3/4 inch.
- Fold each over the seam allowance to the inside and stitch down.
- Overlap them at the bottom and box-stitch a rectangle with an X through both, to lock the end of the slash.
Museum shirts close the placket with 3 buttons; buttons were plain metal, bone, or shell, and later pewter 2 4.
Quick check
The end of a slash takes all the strain when the shirt is pulled over the head.
A pocket
Cut a rectangle with a 1-inch hem allowance at the top and 1/2 inch elsewhere. Hem the top, press the other edges under, and topstitch it to the left chest, matching the stripes to the body so it nearly disappears.
Seam finishes
Folkwear gives zigzag, serged, or turned-and-stitched edges for the seams 3. For a work shirt, a flat-felled seam, where one allowance is trimmed and the other folded over it and stitched flat, is the strongest option, though no museum record here confirms it was used on busserulls.
Playback is optional. If the player is unavailable, open the video at its source.
Try it
Sew a practice placket in a scrap first. It’s the one fiddly step in the shirt, and a clean box-stitch at the bottom is the sign of a well-made busserull.
Lesson complete
Nice work.
Sources for this lesson
- 1Busserull (Hadeland Folkemuseum). Hadeland Folkemuseum, DigitaltMuseum. verifiedTwill-woven striped cotton; poncho cut with the body from one length of cloth; shoulder piece (akslaug) about 22 cm wide with stripes the same way as the body; straight-set sleeves with underarm gusset, pleated into a one-button cuff; neck placket; side slits; back strap.
- 2busserull (UMUIT-E N2646). UiT Norges arktiske universitetsmuseum, DigitaltMuseum. verifiedDoubled yoke, neckband, wide placket with 3 buttons; sleeves pleated 2 front and 2 back at the top and 6 at the wrist into a narrow one-button cuff; gusset cut in one with the sleeve front; short side slits; back length about 76 cm, back width 57 cm, sleeve about 54 cm.
- 3149 Norwegian Busserull (pattern) and Making the Norwegian Busserull, parts one and two. Folkwear. 2026. verifiedSizes XS-3XL; rectangles and squares, underarm gussets, buttoned placket, optional half belt. Yardage on 45-inch fabric: XS-S 2 1/8 yd, M 2 3/4, L 2 7/8, XL-3XL 3 1/2; on 60-inch: XS-M 1 3/4, L-XL 2 1/8, 2XL-3XL 2 1/4. Finished chest 48 3/4 to 72 in; back length 26 1/2 to 29 in. Six 1/2-inch buttons; optional two 1-inch D-rings. Blog (folkwear.com/blogs/news/making-the-149-norwegian-busserull and .../making-the-norwegian-busserull-part-two): lined yoke with lining edges pressed under 1/2 inch and edge-stitched; neck stay-stitched at 3/8 inch; slash center front, underplacket and placket at 3/4 inch with box-stitched tab; collar band interfaced on one half, inside slipstitched by hand; four pleats at each sleeve's cuff end; gussets to sleeves, sleeves to body; optional back belt; side seams through the gussets; narrow-hemmed sleeve slits; cuffs whipstitched inside; hem 1/4 inch turned twice; buttonholes and buttons.
- 4Carol Ann Colburn. The Busserull (Norwegian Work Shirt) Tradition. Norwegian Textile Letter. 2016. verifiedMarch 31, 2016. Worn in the late 1800s by railroad workers, loggers, builders, farm and harbor workers, and fishermen; near 1900 the red or blue with white stripes became a national symbol; Norwegian-Americans in rural Wisconsin wore it from the 1870s until overalls displaced it by the 1920s. Band collar; yoke extending over the upper arm; mid-chest placket or full-length opening; square underarm gussets; optional half back belt. Buttons plain metal, bone, or shell, later pewter.